The Allure of "Free" Solar EV Charging
The dream of every electric vehicle owner with rooftop panels is simple: park the car, plug it in, and fill the battery using nothing but free, clean sunshine. However, the reality of solar-integrated EV charging is fraught with technical misunderstandings, incompatible hardware, and installation blunders. As a senior reviewer for AutoEdgeView, I have tested dozens of smart chargers, and the "solar charging" category is where consumers make the most expensive mistakes.
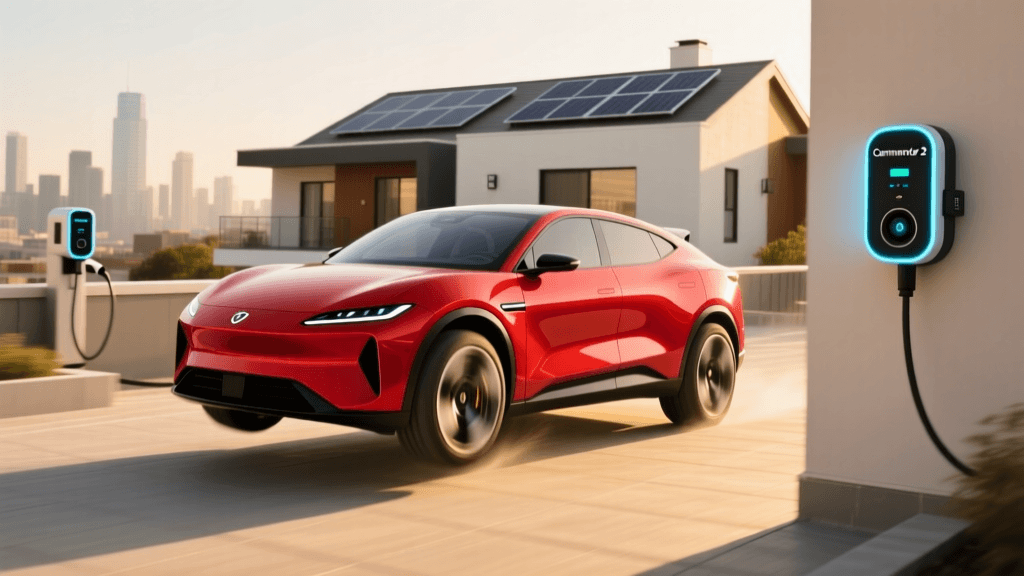
In this guide, we are busting the most pervasive myths about solar EV chargers, specifically focusing on the market leaders: the myenergi Zappi V2, the Wallbox Pulsar Plus (with Power Meter), and the Emporia EV Charger. If you want to avoid wasting money on hardware that won't talk to your inverter, read on.
Myth 1: "Any Wi-Fi Smart Charger Can Use My Excess Solar"
The Mistake: Buying a premium Wi-Fi-enabled charger (like a standard ChargePoint Home Flex or JuiceBox) and assuming the app will magically detect your solar panels and divert excess energy to your car.
The Reality: A smart charger cannot guess how much power your home is consuming or generating. To divert solar energy, the charger must have physical hardware—specifically, Current Transformer (CT) clamps—installed on your main electrical panel to measure real-time grid import and export.
According to the U.S. Department of Energy's Home EV Charging guide, advanced energy management systems require direct monitoring of the home's electrical load. The Zappi V2 includes these CT clamps in the box. The Wallbox Pulsar Plus, however, does not; you must purchase and install the separate Wallbox Power Meter accessory (often costing an additional $300+) to unlock the "Solar Charging" feature in the app. If you buy a Wallbox without the Power Meter, you are just buying a standard grid-tied charger.
Myth 2: "I Can Charge at Full 40-Amp Speeds on Solar Alone"
The Mistake: Expecting your 40-amp or 48-amp Level 2 charger to run at maximum capacity using only your rooftop array.
The Reality: Let us do the math. A 40-amp charger operating on a 240-volt circuit requires 9,600 watts (9.6 kW) of continuous power. The Department of Energy's Homeowner's Guide to Going Solar notes that the average residential solar system size is typically between 5 kW and 8 kW. Furthermore, your home's baseline load (refrigerator, HVAC, routers) will consume 1 kW to 3 kW of that generation during the day.
Therefore, "pure solar" charging is rarely a high-speed Level 2 experience. It is often a slow trickle charge (Level 1.5 speeds). Smart solar chargers use "Eco" modes to dynamically throttle the amperage down to match your exact excess solar production, which usually hovers between 6A (1.4 kW) and 16A (3.8 kW).
Hardware Reality Check: Solar Integration Comparison
Not all solar integrations are created equal. Here is how the top contenders handle the complex math of solar diversion.
| Feature | myenergi Zappi V2 | Wallbox Pulsar Plus + Power Meter | Emporia EV Charger |
|---|---|---|---|
| Solar Hardware Required | Built-in CT Clamps (Included) | External Power Meter (Sold Separately) | Emporia Vue Panel Monitor (Sold Separately) |
| Minimum Solar Threshold | 1.4 kW (Grid can supplement) | 1.4 kW (User adjustable) | 1.4 kW (App controlled) |
| Diversion Modes | ECO, ECO+, FAST | Solar Charging (Full / Manual %) | EV Solar / Grid Tracking |
| Installation Complexity | High (Requires panel space for CTs) | High (DIN-rail Power Meter install) | Medium (If Vue is already installed) |
| Estimated Hardware Cost | ~$950 (All-in-one) | ~$650 + $300 Power Meter | ~$400 + $150 Vue Monitor |
Myth 3: "If a Cloud Passes, My Charger Will Drain My Home Battery"
The Mistake: Assuming that when solar production drops, the charger will aggressively pull from your expensive home battery storage (like a Tesla Powerwall) or cause massive grid spikes.
The Reality: This is where the Zappi V2's ECO+ mode shines and where users often misconfigure their settings. In ECO+ mode, the Zappi constantly monitors the CT clamps. If a cloud rolls in and solar production drops, the Zappi will instantly throttle the charging amperage down to maintain a zero-export/zero-import balance.
However, there is a hard physical limit you must understand: The 1.4 kW Minimum Rule. The SAE J1772 standard dictates that an EV will not accept a charge of less than 6 Amps (roughly 1.4 kW). If your excess solar drops below 1.4 kW, the charger faces a choice: pause charging entirely, or pull the deficit from the grid/home battery to maintain the 1.4 kW minimum. A common mistake is leaving the Zappi's "Grid Limit" setting at 0%, which forces it to pull from the grid to keep the charge alive. Setting a slight negative grid allowance or enabling the "Pause" feature in the app is crucial for true 100% solar charging.
Common Installation Mistakes to Avoid
Even the best hardware will fail if the electrician makes one of these common errors:
- Clamping the Wrong Wire: The CT clamps must be placed on the main incoming grid feed, not on the solar inverter's dedicated breaker. If placed on the inverter feed, the charger will only see solar generation and will be blind to your home's actual consumption, leading to massive grid import errors.
- Ignoring Phase Balancing: If you have a split-phase 240V system (standard in North America) or a 3-phase system (common in Europe/Australia), the CT clamps must be oriented correctly regarding the polarity arrows. A backward CT clamp will tell the charger you are exporting power when you are actually importing it, causing the charger to max out its amperage and spike your electric bill.
- Forgetting the Inverter Delay: Solar inverters take a few seconds to ramp up production when the sun comes out. If your charger reacts too quickly to a sudden load, it may pull from the grid before the inverter catches up. The Wallbox app allows you to set a "response delay" to mitigate this.
"The biggest shock for new solar EV owners is realizing their car won't charge on a heavily overcast day. Without understanding the 1.4 kW minimum threshold, many users think their charger is broken when it simply refuses to pull a 400-watt trickle from the panels."
Myth 4: "Emporia's Software-Only Integration is Less Reliable"
The Mistake: Dismissing the Emporia EV Charger because it relies on software integration with the Emporia Vue home energy monitor rather than dedicated CT clamps built into the charger itself.
The Reality: If you already use the Emporia Vue system to track your home's energy, the Emporia EV charger is arguably the most seamless and cost-effective solar integration on the market. Because the Vue monitor already has CT clamps on every individual circuit in your panel, the app's "EV Solar" feature uses highly accurate, circuit-level data to divert only true excess solar. It eliminates the need for redundant hardware and complex secondary wiring at the charger location, making it a favorite for retrofits where running new data cables to the EV charger is difficult.
Final Verdict: How to Actually Charge for Free
Solar EV charging is not a magical plug-and-play experience; it is a dynamic energy management system. To succeed, you must match the hardware to your specific electrical panel and understand the physical limitations of your solar array.
If you want the most robust, built-in hardware with granular control over grid thresholds, the Zappi V2 remains the gold standard for solar purists. If you are already in the Wallbox ecosystem and do not mind the extra cost and DIN-rail installation of the Power Meter, the Pulsar Plus offers a cleaner aesthetic and excellent app interface. Finally, if you are a data nerd who wants whole-home circuit tracking alongside your EV charging, the Emporia ecosystem is unmatched in value.
For more data on how electric vehicles interact with the broader power grid and renewable infrastructure, consult the Alternative Fuels Data Center (AFDC) Electric Vehicle resources. Stop guessing, install the right CT clamps, configure your minimum thresholds, and finally start driving on sunshine.