How to Get an EV Charger Installed at Home: Complete Step-by-Step Guide
Switching to an electric vehicle is one of the most impactful decisions you can make for reducing your carbon footprint & saving money on fuel. But owning an EV without a reliable home charging setup is like owning a smartphone without a charger — you will constantly be searching for the next outlet. Installing a dedicated EV charger at home transforms your daily routine, letting you wake up every morning with a full battery & eliminating range anxiety for good.
Whether you drive a Tesla, Ford Mustang Mach-E, Hyundai Ioniq, or any other electric vehicle, this comprehensive guide walks you through everything you need to know about getting an EV charger installed at home. We cover electrical requirements, permitting, costs, safety considerations, & whether you should tackle the project yourself or hire a licensed electrician.
Difficulty Level: Moderate to Advanced (electrical work required)
Estimated Cost: $500 – $2,500+ (charger unit + professional installation)
Time Required: 2 – 8 hours for professional installation
Permits Required: Yes, in most jurisdictions
Understanding Home EV Charger Requirements: Level 1 vs. Level 2
Before you schedule an installation or purchase any equipment, you need to understand the two primary types of home EV chargers available & determine which one suits your driving habits, electrical panel capacity, & budget.
Level 1 Charging (120V)
Level 1 charging uses a standard 120-volt household outlet — the same type of outlet that powers your lamp or phone charger. Every EV comes with a Level 1 charging cable included from the manufacturer. While convenient, Level 1 charging is slow, typically adding only 3 to 5 miles of range per hour of charging. For a vehicle with a 250-mile battery, a full charge from empty could take 50 hours or more.
Level 1 charging works adequately for plug-in hybrids with smaller batteries or for EV drivers who travel fewer than 30 miles per day & can leave their vehicle plugged in overnight. However, most EV owners quickly find that Level 1 charging cannot keep up with their daily driving needs.
Level 2 Charging (240V)
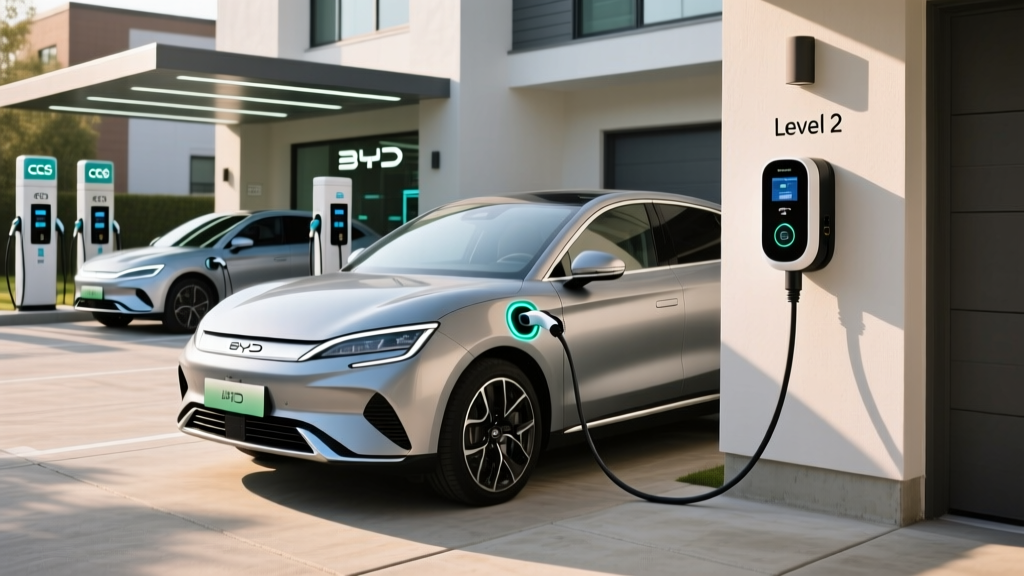
Level 2 charging requires a dedicated 240-volt circuit — similar to what powers your electric dryer, oven, or central air conditioning system. Level 2 chargers deliver between 16 & 80 amps of current, adding anywhere from 12 to 60+ miles of range per hour. A full charge overnight is easily achievable for virtually any EV on the market.
According to the U.S. Department of Energy's Alternative Fuels Data Center, Level 2 home charging is the most practical & cost-effective solution for the majority of EV owners. Most drivers choose to install a Level 2 charger in their garage or on an exterior wall near their parking spot.
If you are exploring your options, check out our best home EV chargers roundup for detailed reviews of top-rated Level 2 units that balance performance, smart features, & value.
Key Electrical Specifications to Know
- Voltage: Level 2 chargers require a 240V circuit (split-phase in North America)
- Amperage: Common circuit sizes are 30A, 40A, 50A, 60A, or 100A
- Charger Output: Most home units deliver between 3.3 kW & 19.2 kW
- Circuit Capacity Rule: The National Electrical Code (NEC) requires that continuous loads — including EV chargers — must not exceed 80% of the circuit breaker's rated capacity. This means a 40-amp charger needs a 50-amp circuit
- Connector Type: Most EVs use the J1772 connector standard, while Tesla vehicles use the North American Charging Standard (NACS). Adapters are widely available
Step-by-Step: How to Get Your EV Charger Installed
Installing a home EV charger involves several critical steps, from assessing your electrical panel to scheduling the final inspection. Here is the complete process laid out in order so you know exactly what to expect.
Step 1: Assess Your Electrical Panel Capacity
The first & most important step is determining whether your home's electrical service panel has enough spare capacity to support a new 240V circuit for EV charging. Most modern homes have a 100-amp or 200-amp main service panel. You need to calculate your existing electrical load & verify that adding a 30-amp to 60-amp EV charging circuit will not overload the system.
A licensed electrician will perform a formal load calculation following NEC Article 220 standards. This calculation accounts for your home's square footage, major appliances (HVAC, water heater, dryer, oven), & existing circuits to determine available headroom. If your panel is already near capacity, you may need a panel upgrade or a service upgrade before proceeding.
Homes with older 100-amp panels frequently require an upgrade to 200 amps, which can add $1,500 to $3,000 to the total project cost. Some jurisdictions now allow smart panel technology or load management devices that let you add EV charging without a full panel upgrade — ask your electrician about these options.
Step 2: Choose Your Charger & Installation Location
Select a charger that matches your vehicle's onboard charging capability & your home's available circuit capacity. For example, if your EV's onboard charger accepts a maximum of 48 amps (11.5 kW), there is no benefit to installing a 80-amp circuit. Browse our EV charger reviews to compare popular models side by side.
For location, consider these factors:
- Proximity to your parking spot: The charger should be within cable reach of your vehicle's charge port (typically 18–25 feet of cable is standard)
- Proximity to the electrical panel: Shorter wire runs mean lower installation costs. Every additional foot of conduit & copper wire adds to the price
- Indoor vs. outdoor: Garage installations are generally cheaper because they avoid the need for weatherproof enclosures & exterior-rated conduit. If mounting outdoors, ensure the charger has a NEMA 4 or higher weather-resistance rating
- Wi-Fi signal strength: If you choose a smart charger with app-based scheduling, energy monitoring, or utility integration, verify that your Wi-Fi network reaches the installation location
Step 3: Obtain Required Permits
In the vast majority of municipalities, installing a new 240V circuit for an EV charger requires an electrical permit. This is not optional — it is a legal requirement designed to protect you, your family, & your home from electrical hazards. The permitting process varies by location but generally follows this pattern:
- Application: Your electrician (or you, if DIY) submits a permit application to your local building or electrical inspection department. Many jurisdictions now offer online permit applications
- Plan review: Some areas require a brief plan review showing the circuit specifications, wire sizing, conduit route, & panel details
- Fee payment: Permit fees typically range from $50 to $300 depending on your municipality
- Permit issuance: Once approved, the permit is issued & work can begin
- Rough-in inspection: In some jurisdictions, an inspector visits after wiring is run but before walls are closed up
- Final inspection: After installation is complete, the inspector verifies that everything meets NEC code & local amendments
Skipping the permit process can result in fines, problems when selling your home, & potential denial of insurance claims if an electrical fire occurs. Always pull a permit for EV charger installations.
Step 4: Professional Installation
On installation day, your electrician will typically complete the following tasks:
- Install a new double-pole circuit breaker in your main electrical panel
- Run appropriately sized copper wire (typically 6 AWG for 50-amp circuits or 4 AWG for 60-amp circuits) through conduit from the panel to the charger location
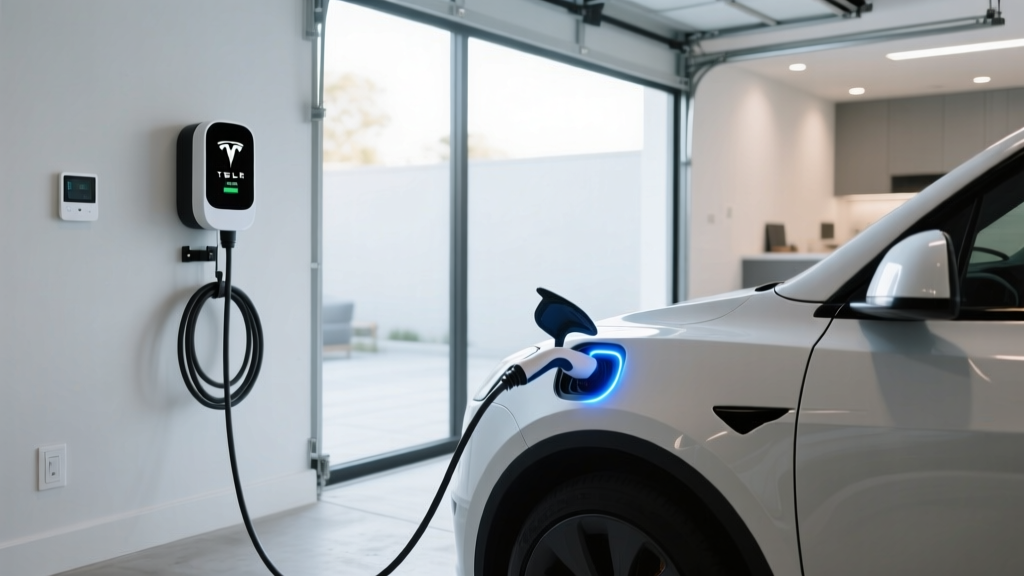
- Mount the EV charger to the wall using the manufacturer's bracket & hardware
- Make all electrical connections, including proper grounding
- Test the circuit for correct voltage, polarity, & ground fault protection
- Configure any smart features, Wi-Fi connectivity, or app integration
- Demonstrate proper operation with your vehicle
A straightforward installation with a short wire run & easy panel access can be completed in 2 to 4 hours. More complex installations involving long conduit runs, attic or crawlspace routing, or panel upgrades may take a full day or longer.
Step 5: Final Inspection & Approval
After installation, your local electrical inspector will visit to verify code compliance. The inspector checks wire sizing, breaker rating, grounding, GFCI protection (now required by NEC for most residential EV circuits), conduit fill, & proper mounting. Once the inspection passes, your installation is officially approved & you can begin charging with confidence.
Permits, Inspections & Local Code Compliance
Understanding the regulatory landscape helps you avoid costly mistakes & ensures your installation is safe, legal, & insurable. Here is a deeper dive into the permit & inspection process.
Why Permits Matter
EV chargers draw significant electrical current for extended periods — often 8 to 12 hours continuously. This sustained load creates heat in wires, connections, & breakers. The NEC classifies EV charging as a continuous load under Article 511 & Article 625, which imposes stricter requirements than typical household circuits. Permits ensure that a qualified inspector verifies your installation meets these safety standards.
NEC Requirements for Home EV Chargers
The National Electrical Code includes several provisions specifically addressing electric vehicle charging:
- NEC Article 625: Covers all aspects of EV charging equipment installation, including wiring methods, disconnecting means, & ventilation requirements
- 80% Continuous Load Rule (NEC 210.20): Circuit breakers must be rated at 125% of the continuous load. A 32-amp charger requires a 40-amp breaker; a 48-amp charger requires a 60-amp breaker
- GFCI Protection (NEC 625.54): Ground-fault circuit interrupter protection is required for outlets used for EV charging in most residential installations
- Disconnecting Means (NEC 625.43): A readily accessible disconnect switch may be required for hardwired chargers rated above a certain amperage
- Wire Sizing (NEC Table 310.16): Conductors must be properly sized for the circuit amperage & installation conditions, including temperature derating factors
Always verify your local jurisdiction's amendments to the NEC, as some cities & counties adopt additional requirements beyond the national code.
Rebates & Incentives
Many utility companies, state governments, & local municipalities offer rebates or tax incentives for installing home EV charging equipment. These incentives can offset $250 to $1,000 or more of your installation costs. Check with your local utility provider & visit the Alternative Fuels Data Center's state laws & incentives database to find programs available in your area. Some utility companies even offer special time-of-use electricity rates that make overnight EV charging significantly cheaper.
DIY Installation vs. Hiring a Professional Electrician
One of the most common questions EV owners ask is whether they can install a home charger themselves. The answer depends on your electrical knowledge, local regulations, & risk tolerance.
When DIY Might Make Sense
If you are replacing an existing 240V outlet (like a NEMA 14-50 that was previously used for a dryer or welder) with a plug-in EV charger, the physical installation may be as simple as mounting the unit to the wall & plugging it in. Similarly, if your panel already has a properly sized 240V circuit with the correct breaker & wiring in place, connecting a hardwired charger may be within the capabilities of an experienced DIYer with electrical knowledge.
However, even experienced DIYers should consider the following:
- Most jurisdictions require a permit & inspection for any new circuit installation
- Working inside an electrical panel exposes you to lethal voltages — the main bus bars remain energized even when the main breaker is off (unless the utility disconnects service)
- Improper wire sizing, loose connections, or missing GFCI protection can create fire hazards that may not manifest for months or years
- Insurance companies may deny claims related to unpermitted electrical work
- Many charger manufacturers void the warranty if the unit is not installed by a licensed electrician
Why Hiring a Professional Is Usually the Right Choice
For the vast majority of homeowners, hiring a licensed, insured electrician is the safest & most cost-effective approach. Professional electricians bring several advantages:
- Code expertise: They understand NEC requirements, local amendments, & best practices specific to EV charger installations
- Load calculations: They can accurately assess your panel capacity & recommend upgrades if needed
- Permit handling: Most electricians handle the entire permitting process on your behalf
- Warranty protection: Professional installation preserves your charger's manufacturer warranty
- Liability coverage: Licensed electricians carry insurance that protects you if something goes wrong
- Efficiency: An experienced electrician can often complete the job in a fraction of the time it would take a DIYer
When selecting an electrician, look for contractors who specifically advertise EV charger installation experience. Ask for references, verify their license & insurance, & get at least three written quotes. Many EV manufacturers maintain lists of recommended or certified installers on their websites.
EV Charger Installation Cost Breakdown
Understanding the full cost picture helps you budget accurately & avoid surprises. Here is a detailed breakdown of what you can expect to pay.
Charger Unit Cost
| Charger Type | Amperage | Typical Price Range |
|---|---|---|
| Basic Level 2 (non-smart) | 16–32A | $200 – $400 |
| Smart Level 2 (Wi-Fi enabled) | 32–48A | $350 – $700 |
| Premium Level 2 (high power) | 48–80A | $500 – $1,000+ |
For a detailed comparison of features, charging speeds, & value, see our guide to the best Level 2 EV chargers for home use.
Installation Labor & Materials
- Simple installation (panel adjacent to charger location, short wire run): $300 – $600
- Moderate installation (50–100 foot wire run, conduit through walls or attic): $600 – $1,200
- Complex installation (long runs, trenching, panel sub-feed, or difficult access): $1,200 – $2,500+
- Electrical panel upgrade (100A to 200A service): $1,500 – $3,000+
- Permit fees: $50 – $300
Total Estimated Costs
Most homeowners spend between $800 & $2,000 total for a Level 2 charger unit plus professional installation. The national average falls around $1,200 for a straightforward garage installation with a 50-amp circuit. Costs increase significantly when panel upgrades, long wire runs, or trenching are required.
Factors That Increase Cost
- Distance between the electrical panel & charger location (more wire, conduit, & labor)
- Need for a service panel upgrade or sub-panel installation
- Trenching for underground conduit to a detached garage or carport
- Local labor rates (urban areas & high-cost-of-living regions charge more)
- Wall material (concrete or brick walls require more labor to mount & route conduit)
- Additional features like load management systems or smart panel integration
Safety Tips & Best Practices for Home EV Charging
Electric vehicle chargers handle substantial electrical power for extended periods. Following these safety guidelines protects your home, your vehicle, & your family.
Electrical Safety
- Never use extension cords with your EV charger. Extension cords introduce resistance, heat buildup, & potential failure points not designed for continuous high-amperage loads
- Ensure proper grounding. Your charger circuit must have a verified equipment grounding conductor. Never use a cheater plug or remove the ground pin
- Install GFCI protection as required by NEC. Ground fault protection can prevent electrocution, especially for outdoor installations exposed to moisture
- Use the correct wire gauge for your circuit amperage. Undersized wires overheat & create fire hazards. Always follow NEC Table 310.16 or consult your electrician
- Do not daisy-chain adapters or modify charging cables in any way. Use only manufacturer-approved adapters & accessories
Physical Installation Safety
- Mount the charger at the manufacturer's recommended height (typically 48 inches from the floor to the center of the unit for ADA compliance)
- Ensure the charging cable does not create a tripping hazard across walkways or driveways
- For outdoor installations, verify that all connections are weatherproof & that the charger is rated for outdoor use (NEMA 4 or higher)
- Keep the area around the charger clear of flammable materials, including gasoline containers, paint, & solvents
- Install a surge protector on your EV charging circuit to protect sensitive electronics from voltage spikes
Ongoing Maintenance
- Periodically inspect the charging cable for cracks, fraying, or damage to the connector pins
- Check that the wall mount remains secure & that no wires have become loose
- Keep the connector clean & free of debris — wipe it with a dry cloth as needed
- Monitor your charger's app or display for error codes or unusual behavior
- Have your electrician inspect the circuit connections at the panel every few years, especially in areas with high humidity or temperature swings
Troubleshooting Common EV Charger Installation Issues
Even professionally installed EV chargers can occasionally experience issues. Here are the most common problems & how to address them.
Charger Will Not Power On
First, check the circuit breaker in your electrical panel. If it has tripped, reset it by switching it fully off & then back on. If the breaker trips again immediately, do not keep resetting it — this indicates a fault in the wiring or charger that requires professional diagnosis. Also verify that the charger's disconnect switch (if equipped) is in the ON position.
Charging Speed Is Slower Than Expected
Several factors can cause slower-than-expected charging speeds. Verify that your charger's amperage setting matches the circuit breaker rating (remember the 80% rule). Check whether your vehicle's onboard charger is the bottleneck — some EVs limit AC charging to 32 or 48 amps regardless of the charger's capability. Temperature extremes can also reduce charging speed, as the vehicle's battery management system may throttle charging to protect the battery. If you suspect a wiring issue, have your electrician measure the actual voltage at the charger under load — significant voltage drop indicates undersized wiring or loose connections.
Wi-Fi Connectivity Problems
Smart chargers rely on Wi-Fi for scheduling, energy monitoring, & firmware updates. If your charger cannot maintain a connection, try relocating your router, adding a Wi-Fi extender, or using a powerline adapter to bring network connectivity to your garage. Some chargers also support Ethernet connections for more reliable networking.
GFCI Breaker Nuisance Tripping
Some EV chargers — particularly older models or certain vehicle onboard chargers — can cause GFCI breakers to trip intermittently due to small leakage currents that are normal for the equipment but exceed the GFCI threshold. If this occurs, consult both your charger manufacturer & your electrician. In some cases, a different GFCI breaker brand or model resolves the issue. Never replace a GFCI breaker with a standard breaker to solve this problem — you would be removing a critical safety feature.
Charger Displays an Error Code
Most modern EV chargers display error codes or LED patterns to indicate specific faults. Consult your charger's user manual for the specific code meaning. Common error conditions include ground faults, over-temperature conditions, over/under-voltage, & communication failures with the vehicle. If a simple power cycle (turning the breaker off for 30 seconds & back on) does not resolve the issue, contact the manufacturer's technical support or your installing electrician.
Frequently Asked Questions
Do I need a permit to install an EV charger at home?
Yes, in most jurisdictions, installing a new 240V circuit for an EV charger requires an electrical permit. The permit ensures that a qualified inspector reviews the installation for compliance with the National Electrical Code & local amendments. Failing to obtain a permit can result in fines, complications when selling your home, & potential issues with insurance claims. Your electrician typically handles the permit application process as part of the installation service.
Can I install an EV charger myself, or do I need an electrician?
While technically skilled homeowners with electrical experience may be capable of installing an EV charger, hiring a licensed electrician is strongly recommended for most people. EV charging circuits involve high-amperage, continuous-load electrical work inside your service panel — mistakes can cause fires, electrocution, or equipment damage. Professional installation also preserves your charger's warranty, ensures code compliance, & satisfies insurance requirements. If you are simply plugging a charger into an existing, properly rated 240V outlet, the physical mounting may be DIY-friendly, but the circuit should still be verified by a professional.
How much does it cost to install a Level 2 EV charger at home?
The total cost for a Level 2 home EV charger installation typically ranges from $800 to $2,000, including the charger unit & professional labor. Simple installations with short wire runs cost less, while complex installations requiring panel upgrades, long conduit runs, or trenching can exceed $3,000. Many utility companies & state programs offer rebates of $250 to $1,000 or more, which can significantly reduce your out-of-pocket expense. The charger unit itself typically costs between $300 & $700 for a quality smart Level 2 model.
What size circuit breaker do I need for a home EV charger?
The circuit breaker size depends on your charger's maximum amperage draw. Under the NEC's 80% continuous load rule, the breaker must be rated at 125% of the charger's output. A 32-amp charger requires a 40-amp breaker, a 40-amp charger requires a 50-amp breaker, & a 48-amp charger requires a 60-amp breaker. Your electrician will determine the correct breaker size based on your specific charger model & your home's electrical capacity. Always use the breaker size specified by the charger manufacturer — oversizing or undersizing the breaker creates safety risks.
Will installing an EV charger increase my electric bill?
Yes, charging your EV at home will increase your electricity consumption, but the cost is typically far less than what you would spend on gasoline for equivalent miles. The average U.S. electricity rate makes the cost of home EV charging roughly equivalent to paying $1.00 to $1.50 per gallon of gasoline. You can further reduce costs by enrolling in your utility's time-of-use rate plan & scheduling charging during off-peak hours (typically overnight), when electricity rates are lowest. Many smart chargers include built-in scheduling features that automate off-peak charging. For more tips on maximizing efficiency, read our EV charging best practices guide.
Final Thoughts
Getting an EV charger installed at home is one of the best investments you can make as an electric vehicle owner. The convenience of waking up to a fully charged car every morning, combined with the cost savings of home electricity versus public charging or gasoline, makes the upfront investment well worth it.
The key to a successful installation is planning: assess your electrical panel capacity, choose the right charger for your vehicle & budget, hire a qualified electrician, obtain proper permits, & follow all safety guidelines. By following the steps outlined in this guide, you will have a safe, code-compliant, & reliable home charging setup that serves you well for years to come.
Ready to choose the right charger for your home? Start with our top-rated home EV charger recommendations & explore our complete library of EV guides & resources to make the most of your electric vehicle ownership experience.