EV Charger Installation Cost: The Complete Home Setup & Pricing Guide
Switching to an electric vehicle is one of the smartest moves you can make for your wallet and the environment, but one question looms large for nearly every new EV owner: how much does it actually cost to install a home EV charger? The answer depends on a variety of factors, from the electrical capacity of your home to the type of charger you choose. In this comprehensive guide, we break down every cost, requirement, and consideration so you can plan your installation with confidence.
⚡ Quick Overview
- Difficulty Level: Moderate to Advanced (electrical work involved)
- Estimated Cost: $200–$2,500+ depending on charger type & electrical upgrades
- Time Required: 2–8 hours for professional installation
- Permit Required: Yes, in most jurisdictions
Whether you are looking to install a simple Level 1 charger using an existing outlet or investing in a high-powered Level 2 home charging station, understanding the full cost picture is essential before you begin. Let us walk through everything you need to know.
Understanding EV Charger Types & Electrical Requirements
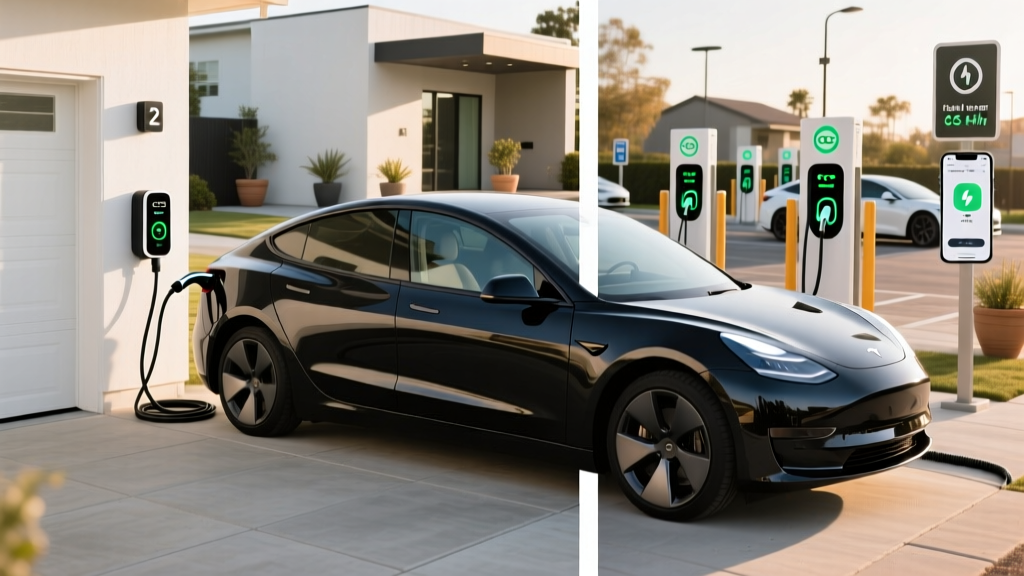
Before calculating installation costs, you need to understand the different levels of home EV charging and the electrical infrastructure each one demands. The charger level you choose will be the single biggest driver of your total installation cost.
Level 1 Charging (120V)
Level 1 chargers plug into a standard household 120-volt outlet — the same kind you use for a lamp or phone charger. They typically deliver between 1.4 kW and 1.9 kW of power, adding roughly 3 to 5 miles of range per hour of charging.
- Electrical requirement: Standard 120V, 15-amp or 20-amp dedicated circuit
- Installation cost: $0 if a suitable outlet exists; $150–$500 if a new dedicated circuit is needed
- Best for: Plug-in hybrids, overnight charging, low daily mileage drivers
The beauty of Level 1 charging is that many EV owners can start using it immediately with zero installation cost. However, the slow charging speed means it is not ideal for battery-electric vehicles with large packs or drivers who cover significant daily distances.
Level 2 Charging (240V)
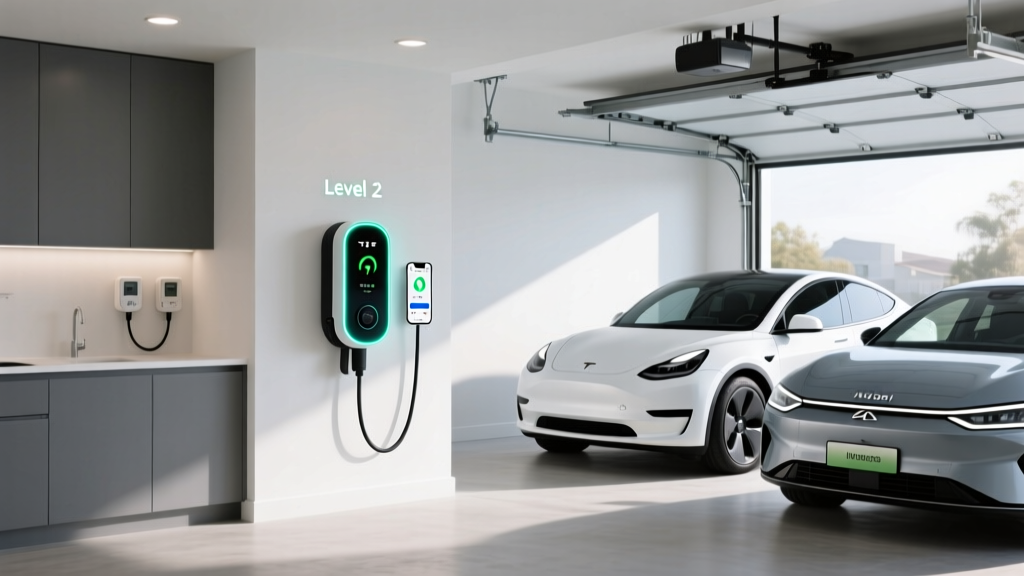
Level 2 chargers operate on 240 volts — the same voltage as your electric dryer or oven — and deliver between 3.3 kW and 19.2 kW of power. This translates to roughly 12 to 75 miles of range per hour, making Level 2 the gold standard for home EV charging.
- Electrical requirement: 240V circuit, typically 30-amp to 80-amp
- Installation cost: $500–$2,500+ depending on panel capacity & wiring distance
- Best for: Battery-electric vehicles, daily drivers, fast home charging
Most EV owners who invest in a dedicated home charging solution opt for a Level 2 unit. Our top-rated home EV charger reviews cover the best options across every budget and power level.
DC Fast Charging (Level 3)
DC fast chargers deliver 50 kW to 350+ kW of power and can charge an EV from 10% to 80% in 15 to 45 minutes. However, these are almost exclusively commercial installations due to their extreme power requirements and costs ranging from $15,000 to $100,000+. They require three-phase power, utility upgrades, and specialized permits. For the purposes of this guide, we will focus on Level 1 and Level 2 home installations.
Step-by-Step EV Charger Installation Process
Whether you are hiring a professional or considering a DIY approach, understanding the full installation process helps you prepare properly and avoid costly surprises. Here is what a typical Level 2 home charger installation involves.
Step 1: Evaluate Your Electrical Panel
The first and most critical step is assessing your home's electrical panel (breaker box). You need to determine:
- Total panel capacity: Most modern homes have 100-amp or 200-amp service. Older homes may have only 60-amp service.
- Available capacity: An electrician will perform a load calculation to determine how much unused capacity remains. A Level 2 charger on a 40-amp circuit needs roughly 8 kW of available headroom.
- Physical space: Your panel must have open slots for a new double-pole breaker.
If your panel is already near capacity, you may need a panel upgrade (from 100A to 200A), which can add $1,500 to $3,000 to your total cost. In some cases, a sub-panel installation ($500–$1,500) can provide a more cost-effective solution.
Step 2: Choose Your Charger Location
Your charger location affects both convenience and cost. Consider these factors:
- Proximity to the electrical panel: The farther the charger is from your panel, the more wiring is needed — and wiring is one of the largest cost variables. Every additional foot of conduit and wire adds to the total.
- Where you park: Install the charger near your primary parking spot. Most EV charging cables are 18 to 25 feet long, so plan accordingly.
- Indoor vs. outdoor: Outdoor installations require weather-rated (NEMA 4) enclosures and may need additional conduit protection.
- WiFi signal: Many smart chargers require a WiFi connection for scheduling, monitoring, and firmware updates. Check your signal strength at the planned installation point.
Step 3: Run Wiring & Install the Circuit
For a Level 2 charger, a licensed electrician will run appropriately gauged copper wire from your electrical panel to the charger location. This involves:
- Installing a new double-pole breaker in your panel (e.g., 40A, 50A, or 60A)
- Running wire through conduit (typically EMT or PVC) along walls, through attics, or underground
- Mounting a junction box or directly wiring to the charger unit
- For plug-in installations: mounting a NEMA 14-50 or NEMA 6-50 receptacle
- For hardwired installations: connecting wires directly to the charger's internal terminal block
The NEMA 14-50 outlet is the most common plug type for residential Level 2 charging, compatible with the majority of EV chargers on the market and capable of delivering up to 50 amps (40 amps continuous on a 50-amp circuit).
Step 4: Mount the Charger & Test
Once the circuit is live, the charger unit is mounted to the wall using the included bracket. The electrician will then test the installation by:
- Verifying correct voltage at the outlet or connection point
- Testing ground fault protection (GFCI), which is required by the National Electrical Code (NEC) for EV charging circuits
- Running a test charge session with the vehicle
- Confirming smart features (WiFi, app connectivity) are functioning
Permits, Inspections & Code Compliance
Electrical permits are not optional — they protect you, your home, and your insurance coverage. Skipping permits can lead to fines, voided warranties, and denied insurance claims in the event of an electrical fire.
When Is a Permit Required?
In virtually all U.S. jurisdictions, any new 240V circuit installation requires an electrical permit. This includes:
- Installing a new NEMA 14-50 outlet for EV charging
- Hardwiring a Level 2 charging station
- Upgrading your electrical panel
- Running new conduit or wiring
Even a Level 1 installation may require a permit if you are adding a new dedicated circuit. Check with your local building department for specific requirements.
The Permit & Inspection Process
- Application: Your electrician (or you, if DIY) submits a permit application to the local building department. Fees typically range from $50 to $250.
- Rough-in inspection: If walls were opened or conduit was run before being enclosed, an inspector may visit before walls are closed.
- Final inspection: After installation is complete, a municipal or county inspector verifies the work meets NEC standards and local amendments.
- Approval: Once the inspector signs off, your installation is officially code-compliant.
NEC Requirements for EV Charging
The National Electrical Code addresses EV charging installations primarily in Article 625. Key requirements include:
- Circuit sizing: EV chargers are considered continuous loads, meaning the circuit must be rated at 125% of the charger's maximum draw. A 32-amp charger requires a 40-amp circuit; a 48-amp charger requires a 60-amp circuit.
- GFCI protection: Ground-fault circuit-interrupter protection is required for all EV charging outlets in residential garages and outdoor locations.
- Ventilation: If charging in an enclosed space, adequate ventilation may be required (primarily relevant for older battery technologies).
- Cable management: Charging cables must be installed so they do not create a tripping hazard or risk physical damage.
The U.S. Department of Energy recommends always working with a licensed electrician who is familiar with local codes and NEC Article 625 requirements.
DIY Installation vs. Hiring a Professional Electrician
One of the most common questions EV owners ask is whether they can install a charger themselves. The honest answer depends on your skill level, local regulations, and risk tolerance.
When DIY Might Make Sense
A DIY installation may be reasonable if:
- You are simply plugging a Level 1 charger into an existing dedicated 120V outlet
- You have prior experience with electrical work (running circuits, installing breakers)
- Your local jurisdiction allows homeowner electrical permits
- The run from the panel to the charger location is short and straightforward
- You are comfortable working inside a live electrical panel
For a simple plug-in Level 2 charger using an existing NEMA 14-50 outlet (like those already installed for electric ranges or dryers), the "installation" may be as simple as plugging in the unit and mounting it to the wall. Total DIY cost: $0 for installation (just the price of the charger itself).
When You Should Absolutely Hire a Professional
Hiring a licensed electrician is strongly recommended — and often legally required — when:
- A new 240V circuit must be run from the panel
- Your electrical panel needs an upgrade or sub-panel
- Wiring must go through walls, attics, crawl spaces, or underground
- Your jurisdiction does not allow homeowner electrical permits
- You are hardwiring the charger (no plug)
- You are unfamiliar with NEC requirements or load calculations
Cost Comparison: DIY vs. Professional
| Factor | DIY | Professional |
|---|---|---|
| Labor cost | $0 | $300–$1,500+ |
| Materials (wire, conduit, breaker) | $100–$500 | Included in quote or $100–$500 |
| Permit fees | $50–$250 | $50–$250 (often included) |
| Risk of errors | Higher | Low (licensed & insured) |
| Warranty protection | May void charger warranty | Full warranty intact |
| Insurance coverage | May be voided | Fully covered |
Our recommendation: unless you are an experienced home electrician, hire a licensed professional. The potential savings of a DIY install are not worth the risk of electrical fire, equipment damage, or voided insurance. Many charger manufacturers, including those featured in our charger comparison reviews, explicitly require professional installation to maintain warranty coverage.
Complete Cost Breakdown: What You Will Actually Pay
Let us break down the total cost of EV charger installation into its component parts. Prices vary by region, home configuration, and charger model, but the following ranges reflect national averages.
The Charger Unit Itself
- Level 1 charger (120V): $150–$400 (many come included with the vehicle)
- Level 2 charger (240V), basic: $300–$500 (32A, non-smart units)
- Level 2 charger (240V), mid-range: $500–$700 (40–48A, WiFi-enabled, smart features)
- Level 2 charger (240V), premium: $700–$1,200 (48–80A, load sharing, premium build)
Check our guide to choosing the right EV charger for help selecting the best unit for your vehicle and budget.
Electrical Work & Materials
| Item | Estimated Cost |
|---|---|
| New 240V circuit (short run, <25 ft) | $300–$600 |
| New 240V circuit (long run, 25–75 ft) | $600–$1,200 |
| New 240V circuit (complex run, 75+ ft or underground) | $1,200–$2,500+ |
| NEMA 14-50 outlet installation | $150–$400 |
| Electrical panel upgrade (100A to 200A) | $1,500–$3,000 |
| Sub-panel installation | $500–$1,500 |
| Permit fees | $50–$250 |
| Drywall repair / patching | $100–$400 |
| Trenching (for detached garages) | $500–$2,000+ |
Total Estimated Cost Ranges
- Best-case scenario (existing outlet, plug-in charger): $300–$700 (just the charger)
- Typical Level 2 installation: $800–$1,800 (charger + new circuit + labor)
- Complex installation (panel upgrade, long run): $2,500–$5,000+
- Detached garage with trenching: $3,000–$6,000+
Rebates, Tax Credits & Incentives
The sticker price is not always what you will actually pay. Numerous incentives can significantly reduce your out-of-pocket costs:
- Federal tax credit: The Alternative Fuel Infrastructure Tax Credit offers up to 30% of the cost of EV charging equipment and installation, capped at $1,000 for residential installations. Check current eligibility requirements with your tax professional.
- Utility rebates: Many electric utility companies offer rebates of $250–$1,000 for installing a qualified Level 2 charger. Some utilities also offer reduced electricity rates for EV charging during off-peak hours.
- State & local incentives: Various states, counties, and municipalities offer additional rebates, grants, or tax credits. Some programs cover the full cost of installation for income-qualified residents.
- Manufacturer incentives: Some automakers include complimentary home charger units or installation credits with the purchase of a new EV.
Always check the Department of Energy's EV charging resources and your local utility's website for current incentive programs before starting your project.
Safety Tips & Best Practices
EV charger installation involves high-voltage electrical work that can be dangerous — even lethal — if performed incorrectly. Whether you are overseeing a professional installation or tackling a simpler project yourself, keep these safety principles in mind.
Electrical Safety Fundamentals
- Never work on a live panel. Always shut off the main breaker before opening your electrical panel. If you are unsure how to do this safely, stop and call an electrician.
- Use the correct wire gauge. Undersized wire causes overheating and fire risk. A 40-amp circuit requires at minimum 8 AWG copper wire; a 50-amp circuit requires 6 AWG; a 60-amp circuit requires 6 AWG or 4 AWG depending on insulation type and run length.
- Torque all connections properly. Loose connections create arcing and heat. Use a calibrated torque screwdriver to tighten all terminal connections to the manufacturer's specifications.
- Install GFCI protection. Ground-fault protection is required by NEC Article 625 for EV charging circuits and protects against potentially fatal shock hazards.
Charger-Specific Safety
- Follow manufacturer instructions exactly. Every charger has specific installation requirements detailed in its manual. Deviating from these instructions can void warranties and create safety hazards. Consult NEC guidelines alongside manufacturer documentation.
- Verify WiFi security. Smart chargers connected to your home network should use strong passwords and updated firmware to prevent unauthorized access.
- Use load management features. If your home's electrical capacity is tight, use your charger's built-in load management or an external energy management system to prevent overloading your panel.
- Inspect cables regularly. Check your charging cable and connector for signs of wear, cracking, or damage. Replace damaged cables immediately — do not attempt to repair them with tape or splices.
Outdoor Installation Considerations
- Use only chargers rated for outdoor use (NEMA 4 or higher rating)
- Install conduit and weatherproof junction boxes rated for wet locations
- Ensure the charging connector has a holster or holder to keep it off the ground
- Consider a retractable cable management system to prevent tripping hazards
- Verify that the charger's operating temperature range is appropriate for your climate
Troubleshooting Common Installation Issues
Even professionally installed EV chargers can encounter issues. Here are the most common problems and their solutions.
Charger Will Not Power On
- Check the breaker: Ensure the breaker in your electrical panel has not tripped. Reset it by switching it fully off, then back on.
- Verify the outlet: For plug-in installations, use a multimeter to confirm 240V is present at the outlet. A reading of only 120V may indicate a loose or disconnected hot leg.
- Inspect wiring connections: Loose wire connections at the breaker, outlet, or charger terminal can interrupt power. Have an electrician check all connections.
Charging Speeds Are Slower Than Expected
- Confirm circuit amperage: Your charger may be configured to draw less current than the circuit supports. Check the charger's settings or DIP switches.
- Check for voltage drop: Long wire runs with undersized wire can cause significant voltage drop, reducing effective charging speed. An electrician can measure voltage at the charger under load.
- Vehicle-side limits: Your EV's onboard charger has a maximum acceptance rate. If your vehicle can only accept 32A but your charger delivers 48A, the vehicle will limit the draw. Review your EV's charging specifications to understand its limits.
Breaker Trips Repeatedly
- Overloaded panel: Your home's total electrical load may exceed panel capacity when the charger runs simultaneously with other large appliances. A load calculation can confirm this.
- Incorrect breaker size: The breaker must match the circuit wire gauge and charger amperage. A breaker that is too small will trip; one that is too large creates a fire risk.
- Ground fault: A GFCI breaker that trips repeatedly may indicate a ground fault in the wiring or charger. This requires professional diagnosis.
WiFi Connectivity Problems
- Ensure your router's 2.4 GHz network is active (most smart chargers do not support 5 GHz)
- Consider a WiFi range extender or mesh node near the charger location
- Check for firmware updates on the charger unit through its companion app
- Some chargers offer ethernet or cellular connectivity as alternatives to WiFi
Charger Gets Hot During Use
Some warmth is normal during charging, but excessive heat is a warning sign:
- Warm outlet or plug: This often indicates a loose connection or worn outlet. Replace the NEMA 14-50 receptacle with a high-quality, industrial-grade unit rated for continuous duty.
- Warm breaker: A breaker that is warm to the touch may be overloaded or nearing end of life. Have it inspected.
- Warm charger body: Most chargers have thermal management systems. If the unit is reducing charging speed (thermal throttling), it may need better ventilation or a shaded mounting location.
Frequently Asked Questions
Is it worth installing a Level 2 charger at home?
For most EV owners, absolutely. A Level 2 charger adds 15 to 50+ miles of range per hour of charging, compared to just 3 to 5 miles with Level 1. This means you can fully recharge overnight, even after long driving days. The convenience of waking up to a full battery every morning, combined with the ability to take advantage of off-peak electricity rates, makes the investment worthwhile for nearly all battery-electric vehicle owners. The installation cost typically pays for itself within one to two years through fuel savings alone, especially when compared to the cost of relying on public DC fast charging stations.
Can I install an EV charger myself to save money?
You can handle a Level 1 setup yourself by simply plugging into a dedicated 120V outlet. However, for any new 240V circuit installation, we strongly recommend hiring a licensed electrician. Electrical work carries serious risks including fire, shock, and code violations that can void your home insurance. Many jurisdictions legally require a licensed professional for 240V work, and most charger manufacturers require professional installation to honor their warranties. The potential savings from DIY are typically $300 to $1,000 — not worth the risk when dealing with high-voltage electricity in your home.
Do I need to upgrade my electrical panel for an EV charger?
Not necessarily. It depends on your panel's existing capacity and your home's total electrical load. A licensed electrician will perform a load calculation per NEC Article 220 to determine if your panel can support the additional draw of an EV charger. Homes with 200-amp service and moderate electrical usage typically have enough headroom for a Level 2 charger without an upgrade. Homes with 100-amp service, or those already running multiple high-draw appliances (electric heat, electric water heater, electric range), may need a panel upgrade or a smart load management system. Some modern EV chargers offer built-in load management that automatically reduces charging speed when other appliances are in use, potentially avoiding the need for a costly panel upgrade.
How long does EV charger installation take?
A straightforward Level 2 installation — where the charger is mounted on a wall adjacent to or near the electrical panel — typically takes 2 to 4 hours. More complex installations involving long wire runs through walls, attics, or crawl spaces may take 4 to 8 hours. Installations requiring panel upgrades, sub-panels, or underground trenching to a detached garage can take one to two full days. The permitting and inspection process adds additional time but usually does not delay the physical installation. Most homeowners can schedule and complete the entire process, from initial electrician consultation to final inspection, within one to three weeks.
Will installing an EV charger increase my home's value?
Yes, in most markets. As EV adoption continues to grow, homebuyers increasingly view EV charging infrastructure as a desirable feature — similar to how solar panels or updated kitchens add value. A professionally installed Level 2 charging station signals that the home is modern, well-maintained, and ready for the future of transportation. Real estate studies have shown that homes with EV charging capabilities can command a premium, particularly in areas with high EV adoption rates. Additionally, the electrical panel upgrade that sometimes accompanies a charger installation adds independent value by increasing the home's overall electrical capacity. Keep all permits, inspection records, and warranty documentation to present to future buyers as proof of a code-compliant, professional installation.
Ready to find the perfect charger for your home? Browse our best home EV charger reviews and our complete EV charger buying guide to make an informed decision before you schedule your installation.