EV Charger Installation Cost in California: Your Complete Guide
California leads the nation in electric vehicle adoption, and for good reason. With robust incentives, an expanding charging network, and some of the highest gas prices in the country, going electric makes more sense here than almost anywhere else. But once you bring your new EV home, one critical question remains: how much will it cost to install a proper charger?
The answer depends on a wide range of factors — from the electrical capacity of your home to the type of charger you choose and the permitting requirements in your local jurisdiction. In this comprehensive guide, we break down every cost component so you can budget confidently and avoid surprises.
- Difficulty Level: Moderate to Advanced (professional installation strongly recommended)
- Estimated Cost Range: $500 – $4,500+ depending on electrical upgrades needed
- Typical Installation Time: 2 – 8 hours for standard installs; longer if panel upgrades are required
- Permit Required: Yes, in virtually all California jurisdictions
Whether you drive a Tesla, a Chevrolet Bolt, a Hyundai Ioniq, or any other electric vehicle, understanding the installation process and its associated costs is essential. For a closer look at the best home chargers currently available, check out our best home EV chargers roundup to find the right unit for your needs.
California EV Charger Installation Requirements
Before you can plug in and charge, your home needs to meet several electrical and regulatory requirements. California has some of the most stringent building and electrical codes in the country, which protects homeowners but also adds steps (and sometimes cost) to the installation process.
Electrical Panel Capacity
The first thing any licensed electrician will evaluate is your home's electrical panel. Most modern homes in California have a 200-amp service panel, which is typically sufficient for adding a Level 2 EV charger on a dedicated 40-amp or 50-amp circuit. However, older homes — particularly those built before the 1980s — may only have 100-amp or even 60-amp panels. In these cases, a panel upgrade is necessary before installation can proceed.
A Level 2 charger operating at 240 volts draws significant continuous current. The National Electrical Code (NEC) requires that continuous loads (those operating for three hours or more) must not exceed 80% of a circuit's rated capacity. This means a 50-amp circuit can safely deliver up to 40 amps of continuous power to your charger — a rule your electrician will follow when sizing your wiring and breaker.
Wiring & Circuit Requirements
Level 2 chargers require a dedicated 240-volt circuit, similar to what powers your electric dryer or oven. The wiring gauge depends on the amperage:
- 30-amp circuit: 10 AWG copper wire (for chargers up to 24 amps continuous)
- 40-amp circuit: 8 AWG copper wire (for chargers up to 32 amps continuous)
- 50-amp circuit: 6 AWG copper wire (for chargers up to 40 amps continuous)
- 60-amp circuit: 4 AWG copper wire (for chargers up to 48 amps continuous)
The distance from your electrical panel to the charging location also matters. Longer wire runs increase material costs and may require a larger wire gauge to prevent voltage drop. If your panel is on the opposite side of your house from your garage or driveway, expect higher costs.
California Building Code & CALgreen Standards
California's CALgreen building code includes specific requirements for EV-ready infrastructure in new construction. While these rules primarily apply to new builds and major renovations, they set the standard for what inspectors expect to see in any EV charger installation. Key provisions include proper conduit sizing, GFCI protection for outdoor installations, and adequate clearance around electrical equipment. You can learn more about California's EV-ready building standards through the California Energy Commission's ZEV infrastructure resources.
Step-by-Step EV Charger Installation Process
Understanding the installation workflow helps you prepare your home and budget effectively. Here is the typical process from start to finish.
Step 1: Site Assessment & Charger Selection
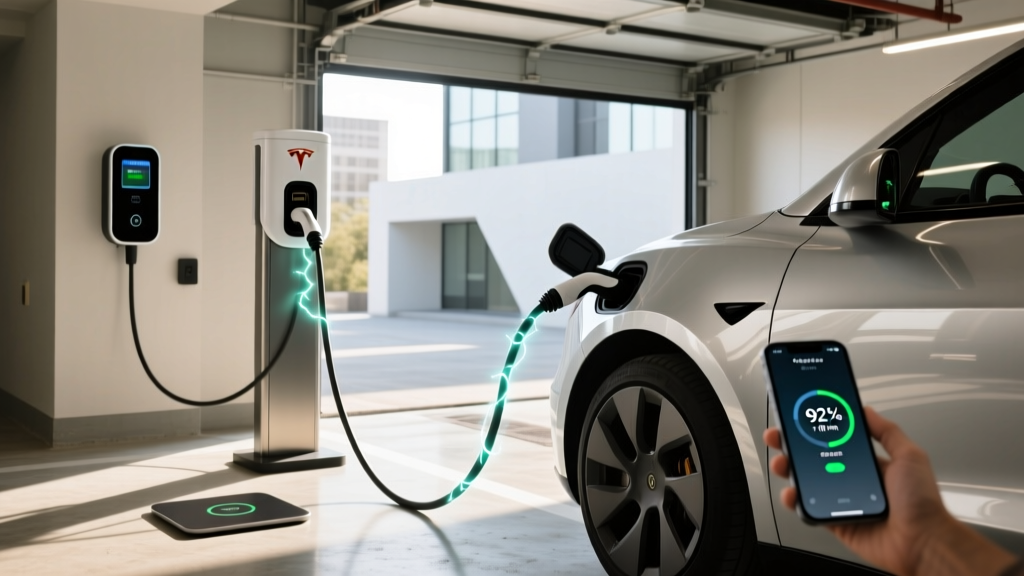
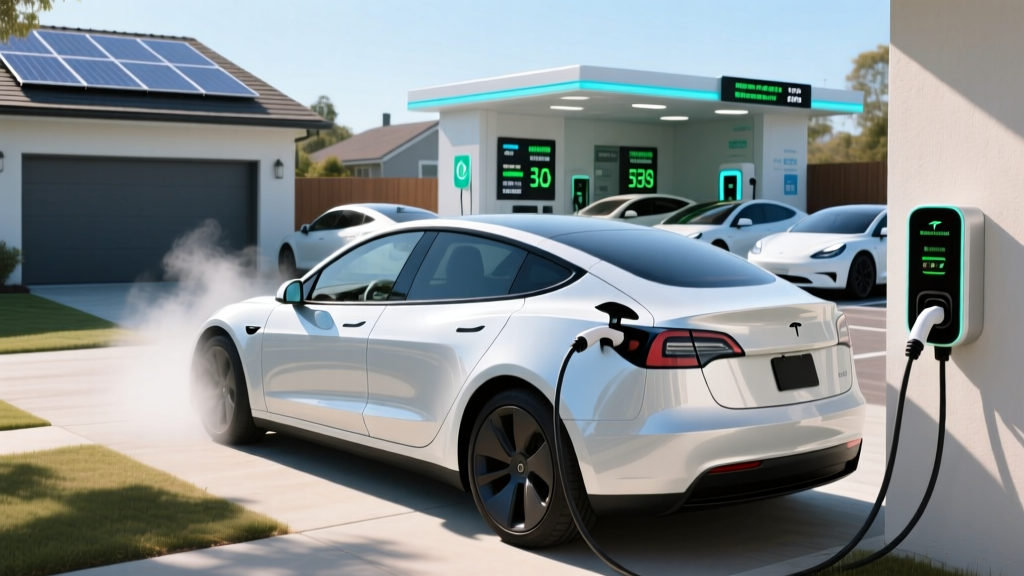
Begin by deciding where you want to charge. Most California homeowners install their charger in the garage, but outdoor installations on an exterior wall or a dedicated pedestal are also common — especially for homes without garages or for those who park in driveways. Consider the following:
- Proximity to your electrical panel (shorter runs = lower cost)
- Whether the charger cord can comfortably reach your vehicle's charge port
- Protection from weather (outdoor-rated chargers or enclosures may be needed)
- Wi-Fi signal strength if your charger has smart features
For help choosing the right charger, explore our Level 2 EV charger buying guide, which covers connector types, cable lengths, and smart features across popular models.
Step 2: Electrical Evaluation
Hire a licensed electrician to perform a load calculation on your electrical panel. This assessment determines whether your existing panel can handle the additional load of an EV charger or if an upgrade is necessary. Many electricians offer this evaluation for free or as part of a consultation fee that gets credited toward the installation.
Step 3: Permit Application
Before any physical work begins, your installer (or you, if DIY) must pull an electrical permit from your local building department. In California, permit fees for EV charger installations typically range from $50 to $300 depending on the jurisdiction. Some cities have streamlined permitting processes specifically for EV chargers, while others treat them as standard electrical work.
Step 4: Installation
The actual installation involves running conduit and wiring from your electrical panel to the charger location, installing a dedicated breaker, mounting the charger unit, and making all electrical connections. For a straightforward garage installation with the panel nearby, this can take as little as two to three hours. More complex runs — through attics, crawl spaces, or underground — can take a full day or more.
Step 5: Inspection & Approval
After installation, your local building department will send an inspector to verify that the work meets code. The inspector will check wiring gauge, breaker sizing, grounding, GFCI protection (where required), conduit installation, and overall workmanship. Once the installation passes inspection, you are cleared to charge.
Permits, Inspections & California Regulations
California takes electrical safety seriously, and EV charger installations are no exception. Skipping the permit process is not only illegal — it can void your homeowner's insurance, create fire hazards, and cause problems when you sell your home.
Why Permits Matter
An electrical permit ensures that a qualified professional reviews your installation plans and that an independent inspector verifies the completed work. This process catches dangerous mistakes like undersized wiring, improper grounding, or overloaded panels that could lead to electrical fires. According to the U.S. Department of Energy, professional installation with proper permitting is the safest approach for all Level 2 home charging setups.
Permit Costs Across California
Permit fees vary significantly by city and county:
- Los Angeles: $100 – $250 for standard EV charger permits
- San Francisco: $150 – $300 depending on scope of work
- San Diego: $75 – $200 for residential electrical permits
- Sacramento: $100 – $175 for EV-specific permits
- Smaller jurisdictions: $50 – $150 on average
Some California municipalities have adopted expedited or online permitting processes for EV chargers to encourage adoption. Check with your local building department to see if your city offers a streamlined process.
Utility Interconnection Requirements
If you plan to take advantage of time-of-use (TOU) rate plans offered by utilities like PG&E, SCE, or SDG&E, you may need to notify your utility of the installation. Some utilities require a separate interconnection agreement or may need to install a dedicated meter for EV charging to qualify for special EV rate plans. Contact your utility provider early in the process to understand any requirements and to learn about available rebates.
DIY vs. Professional Installation: What You Need to Know
The question of whether to install your EV charger yourself or hire a professional comes up frequently in EV communities. Let's break down the realities of each approach.
When DIY Might Make Sense
If you have significant electrical experience — for example, if you are a licensed electrician or have completed similar 240-volt projects — a DIY installation can save on labor costs. You will still need to pull a permit and pass inspection, but you eliminate the electrician's markup. Some homeowners with newer construction and accessible garages find the wiring run straightforward enough to handle themselves.
Why Professional Installation Is Recommended
For the vast majority of homeowners, professional installation is the right choice for several compelling reasons:
- Safety: Working inside a live electrical panel carries serious shock and arc flash risks. Licensed electricians have the training, tools, and personal protective equipment to work safely.
- Code compliance: California's electrical codes are complex and frequently updated. A professional installer knows current requirements for wire sizing, conduit fill, GFCI protection, bonding, and more.
- Warranty protection: Many charger manufacturers void the warranty if the unit is not installed by a licensed electrician. Always check your manufacturer's installation requirements before attempting DIY.
- Insurance coverage: If an electrical fire occurs and the work was done without a licensed professional, your homeowner's insurance may deny the claim.
- Permit & inspection navigation: Professional installers handle the permitting process, schedule inspections, and address any corrections the inspector may require.
Finding a Qualified Installer
Look for electricians who specialize in EV charger installations or have specific training from programs like the Electric Vehicle Infrastructure Training Program (EVITP). Many charger manufacturers also maintain lists of certified installers. Always verify that the electrician holds a current California C-10 electrical license, carries general liability insurance, and has positive reviews from previous EV charger clients. For more on choosing the right equipment for your installation, see our EV charging cable and connector guide.
Complete Cost Breakdown: EV Charger Installation in California
Now for the numbers that matter most. Below is a detailed breakdown of every cost component you can expect when installing a Level 2 EV charger in California.
The Charger Unit
Level 2 home chargers range widely in price depending on features, brand, and amperage:
- Basic 32-amp chargers: $250 – $450
- Mid-range 40-amp smart chargers: $400 – $650
- Premium 48-amp smart chargers: $550 – $800
- Tesla Wall Connector: $400 – $500
- Ultra-premium & commercial-grade units: $800 – $1,500+
Smart chargers with Wi-Fi connectivity, scheduling features, and energy monitoring typically cost $100 – $200 more than their non-smart counterparts but can help you save money by optimizing charge times to coincide with off-peak electricity rates.
Electrical Panel Upgrade (If Needed)
This is the single biggest variable in your installation cost:
- No upgrade needed (200-amp panel with available capacity): $0
- Panel upgrade from 100A to 200A: $1,500 – $3,000
- Panel upgrade from 60A to 200A: $2,500 – $4,500+
- Adding a sub-panel: $500 – $1,500
Not every older home needs a full panel upgrade. In some cases, an electrician can perform a load calculation that demonstrates sufficient capacity even on a 100-amp panel, particularly if you use a lower-amperage charger or install a smart load-management device that throttles charging when other appliances are running.
Labor Costs
Electrician labor rates in California typically range from $75 to $150 per hour, with higher rates in major metropolitan areas like San Francisco and Los Angeles. Total labor costs depend on the complexity of the installation:
- Simple garage install (panel adjacent): $300 – $600 (2 – 4 hours)
- Moderate complexity (wire run through walls/attic): $600 – $1,200 (4 – 8 hours)
- Complex install (long run, underground conduit, outdoor): $1,200 – $2,500+ (8+ hours)
Materials & Supplies
Beyond the charger itself, you will need wiring, conduit, a breaker, junction boxes, and various fittings:
- Wire (per foot): $3 – $8 depending on gauge
- Conduit & fittings: $50 – $200
- Breaker: $15 – $60
- Miscellaneous supplies: $50 – $150
- Total materials (excluding charger): $150 – $500+ for typical installs
Permits & Inspection Fees
As discussed above, expect to pay $50 – $300 for permits depending on your local jurisdiction. Inspection fees are usually included in the permit cost.
Total Estimated Costs
| Scenario | Estimated Total Cost |
|---|---|
| Simple install, no panel upgrade, basic charger | $500 – $1,200 |
| Standard install, no panel upgrade, smart charger | $900 – $2,000 |
| Complex install, no panel upgrade, premium charger | $1,500 – $3,000 |
| Any install with panel upgrade | $2,500 – $5,500+ |
California Rebates, Tax Credits & Incentives
One of the advantages of installing an EV charger in California is the robust incentive landscape that can significantly reduce your out-of-pocket costs.
Federal Tax Credit
The federal Alternative Fuel Infrastructure Tax Credit provides a credit of up to 30% of the cost of purchasing and installing EV charging equipment, with a maximum credit of $1,000 for residential installations. This credit applies to both the charger hardware and the installation labor. Consult a tax professional to confirm your eligibility and to claim the credit on your federal tax return.
Utility Rebates
Many California utilities offer generous rebates for home EV charger installations:
- PG&E: Rebates up to $1,000 for residential charger installation in eligible areas, plus additional incentives for panel upgrades in some programs
- Southern California Edison (SCE): Charge Ready program offering rebates and infrastructure support
- San Diego Gas & Electric (SDG&E): EV charger rebates and special TOU rate plans
- Sacramento Municipal Utility District (SMUD): Rebates up to $500 for qualifying Level 2 chargers
- LADWP: Various rebate programs for residential and multi-unit dwelling installations
These programs change frequently, so check with your specific utility for current offerings. Many utilities also provide free or discounted electrical assessments to help you understand your installation requirements before committing to a project.
Clean Vehicle Rebate Project (CVRP) & Local Programs
California's CVRP and various air quality management district programs sometimes include charging infrastructure incentives alongside vehicle purchase rebates. Additionally, some cities and counties offer their own incentive programs. The Alternative Fuels Data Center maintains a comprehensive database of current California incentives that you can search by location and type.
Safety Tips for EV Charger Installation & Use
Safety should be your top priority throughout the installation process and during daily charging operations. Follow these guidelines to protect your home, your vehicle, and your family.
Installation Safety
- Never work on a live panel. Always shut off the main breaker before any work inside the electrical panel. Even then, verify with a voltage tester that all conductors are de-energized.
- Use GFCI protection. The NEC requires GFCI protection for EV chargers installed in garages and all outdoor locations. This critical safety device protects against ground faults that could cause shock or electrocution.
- Ensure proper grounding. Your EV charger circuit must have an effective ground path. Do not rely on conduit alone for grounding — install a dedicated equipment grounding conductor.
- Follow torque specifications. All terminal connections must be tightened to the manufacturer's specified torque values. Loose connections create resistance, heat, and fire risk.
- Maintain clearance. The NEC requires at least 30 inches of working space width and 36 inches of depth in front of electrical panels. Do not install your charger in a way that obstructs panel access.
Ongoing Charging Safety
- Inspect the cable regularly. Look for cracks, fraying, or exposed conductors. Replace damaged cables immediately.
- Keep the area dry. Even outdoor-rated chargers should be installed in locations that minimize water exposure. Ensure proper drainage around outdoor installations.
- Do not use extension cords. EV chargers should be plugged directly into their dedicated outlet or hardwired. Extension cords introduce resistance, voltage drop, and overheating risk.
- Monitor for heat. It is normal for the plug and outlet to feel slightly warm during charging. If any component feels hot to the touch, stop charging immediately and have an electrician inspect the installation.
- Update firmware. If your charger has smart features and receives firmware updates, keep it current. Updates often include safety improvements and bug fixes.
For more tips on maintaining your home charging setup and maximizing efficiency, read our EV charging best practices guide.
Troubleshooting Common EV Charger Installation Issues
Even with professional installation, you may encounter issues during or after setup. Here are the most common problems and how to address them.
Charger Will Not Power On
If your charger shows no signs of life after installation, check the following: verify the breaker is in the ON position, confirm the charger is properly connected to the circuit (for hardwired units), and ensure the outlet is receiving 240 volts with a multimeter (for plug-in units). If the breaker trips immediately, there may be a wiring error or a ground fault — contact your installer.
Charging Speed Is Slower Than Expected
Several factors can cause slower-than-expected charging speeds. First, confirm that your charger's amperage setting matches the circuit capacity and that the circuit breaker is properly sized. Some chargers allow you to adjust the output amperage through a dip switch or app setting — ensure it is configured correctly. Also check your vehicle's onboard charger capacity; if your car's onboard charger maxes out at 32 amps, a 48-amp charger will not charge it any faster. Voltage drop from long wire runs can also reduce charging speed; an electrician can measure voltage at the charger under load to diagnose this issue.
Breaker Trips Repeatedly
A breaker that trips during charging usually indicates one of three problems: the circuit is undersized for the charger's amperage, there is a loose or damaged connection creating excess heat, or the total load on the panel exceeds its capacity. Repeated tripping is a serious safety concern — stop using the charger and have an electrician investigate immediately.
Wi-Fi Connectivity Issues (Smart Chargers)
Smart chargers rely on Wi-Fi for scheduling, energy monitoring, and remote control. If your charger cannot maintain a connection, try moving your router closer, installing a Wi-Fi extender in the garage, or connecting an ethernet cable if your charger supports wired networking. Some chargers also support Bluetooth as a backup connection method.
Error Codes on the Charger Display
Most modern chargers display error codes when something goes wrong. Consult your charger's user manual for specific code meanings. Common errors include ground fault warnings (check GFCI device and wiring), over-temperature alerts (ensure adequate ventilation around the unit), and communication errors (check vehicle-to-charger connection and cable seating).
Frequently Asked Questions
Do I need a permit to install an EV charger at home in California?
Yes. Virtually every city and county in California requires an electrical permit for EV charger installations. The permit ensures your installation meets safety codes and is inspected by a qualified official. Failing to obtain a permit can result in fines, insurance complications, and difficulties when selling your home. The permitting process is straightforward, and your electrician will typically handle it on your behalf.
Can I install a Level 2 EV charger on a 100-amp electrical panel?
It depends on your home's existing electrical load. A licensed electrician can perform a load calculation to determine if your 100-amp panel has enough spare capacity to support an EV charger. In some cases, using a lower-amperage charger (such as a 16-amp or 24-amp unit) or installing a smart load-management device allows you to add EV charging without upgrading your panel. However, many homes with 100-amp service will need an upgrade to 200 amps for safe, full-speed Level 2 charging.
How much does it cost to upgrade my electrical panel for an EV charger?
A panel upgrade from 100 amps to 200 amps typically costs between $1,500 and $3,000 in California, depending on the complexity of the work, your location, and whether any additional wiring or service entrance upgrades are needed. Upgrades from older 60-amp panels can cost $2,500 to $4,500 or more. While this is a significant expense, it increases your home's electrical capacity for future needs — such as solar panels, battery storage, heat pumps, or additional EVs — and can increase your home's resale value.
Is a hardwired EV charger better than a plug-in model?
Both options have advantages. Hardwired chargers eliminate the need for a 240-volt outlet, can be installed in more locations (including outdoors in some jurisdictions where outlets are restricted), and may support higher amperages. Plug-in chargers offer portability — you can take the charger with you if you move, and replacement is simpler if the unit fails. Many California homeowners choose plug-in models using a NEMA 14-50 outlet, which provides flexibility and is a familiar configuration for electricians. Your choice may also be influenced by local code requirements and your electrician's recommendation.
Are there rebates available for EV charger installation in California?
Yes, California offers some of the most generous EV charging incentives in the country. The federal Alternative Fuel Infrastructure Tax Credit covers up to 30% of installation costs (maximum $1,000 for residential). Additionally, most major California utilities — including PG&E, SCE, SDG&E, SMUD, and LADWP — offer rebate programs that can cover several hundred dollars of your charger and installation costs. Some programs also provide incentives for electrical panel upgrades when performed in conjunction with EV charger installation. Always check current program availability and eligibility requirements before starting your project, as funding can be limited and programs update regularly.
Installing an EV charger at home is one of the best investments you can make as a California EV owner. Not only does it provide the convenience of waking up to a full charge every morning, but it also dramatically reduces your fueling costs compared to gasoline or public charging. By understanding the costs, requirements, and incentives outlined in this guide, you are well-equipped to plan a successful installation that serves you reliably for years to come. For more EV ownership guidance, explore our complete library of EV guides and resources at Auto Edge View.