The transition to electric mobility in India is accelerating, with more drivers bringing home electric vehicles (EVs) from manufacturers like Tata, Mahindra, MG, and BYD. However, owning an EV is only half the journey; setting up a reliable and safe home charging infrastructure is equally critical. If you have recently consulted our comprehensive EV buying guide and made your purchase, your next logical step is understanding the setup process. This guide provides a detailed breakdown of the EV charger installation cost in India, covering everything from electrical requirements and local regulations to step-by-step installation and essential safety protocols.
Difficulty Level: Moderate to Advanced (Professional electrical work required for hardwired units).
Estimated Cost Range: ₹15,000 to ₹1,50,000+ (depending on charger type, cable routing distance, and electrical panel upgrades).
Understanding EV Charger Requirements in India
Before calculating costs, it is essential to understand the technical requirements for home EV charging in India. The Indian grid primarily supplies 230V single-phase or 415V three-phase alternating current (AC). Your home’s existing electrical infrastructure will dictate the type of charger you can install.
For most Indian households, the standard 15-ampere (15A) power socket can support a portable AC charger delivering up to 3.3 kW. While this is sufficient for plug-in hybrids or overnight charging of smaller battery packs, it is incredibly slow for modern EVs with 40 kWh to 60 kWh batteries. To achieve faster charging speeds, you will need a dedicated wall-mounted AC charger. These typically operate at 7.2 kW (requiring a 32A single-phase connection) or 11 kW to 22 kW (requiring a three-phase connection). Understanding the various EV connector types is also vital, as the Type 2 connector is the mandated standard for AC home charging in India.
Furthermore, your home’s sanctioned load from the local electricity distribution company (DISCOM) must be sufficient to handle the additional draw. Running a 7.2 kW charger simultaneously with heavy household appliances like air conditioners and geysers can easily exceed a standard 3 kW to 5 kW residential sanctioned load, necessitating a formal load enhancement application.
Step-by-Step EV Charger Installation Process
Installing a dedicated home EV charger is not a simple plug-and-play task. It requires careful planning, precise electrical work, and adherence to safety standards. Here is the standard step-by-step process followed by certified professionals:
1. Site Survey & Load Assessment: An electrician or OEM-certified technician will inspect your parking space, measure the distance from the main distribution board (DB) to the charging point, and assess your current sanctioned load. This step determines the cable length, conduit requirements, and whether a DISCOM upgrade is necessary.
2. DISCOM Load Enhancement (If Required): If your current sanctioned load is insufficient, you must apply for a load upgrade through your local DISCOM. This involves submitting an application, paying a security deposit or enhancement fee, and waiting for approval before the physical installation can proceed.
3. Mounting & Conduit Routing: The charger unit is securely mounted on the wall using heavy-duty rawlplugs and screws. Simultaneously, PVC or metallic conduits are routed from the main DB to the charging location to protect the wiring from physical damage and environmental wear & tear.
4. Wiring & Protection Installation: High-quality, multi-strand copper cables (typically 4 sq mm for 16A or 6 sq mm for 32A) are pulled through the conduits. A dedicated protection box is installed near the charger or at the main DB, housing the necessary Miniature Circuit Breaker (MCB), Residual Current Circuit Breaker (RCCB), and Surge Protection Device (SPD).
5. Earthing: Proper earthing is non-negotiable. If your home’s existing earth pit is inadequate or shares a neutral, a dedicated chemical earthing pit may need to be dug to ensure the earth resistance is below 1 ohm, protecting both the vehicle and the user.
6. Testing & Commissioning: Once wired, the technician will test the voltage, earth continuity, and RCCB trip functionality. Finally, the charger is paired with your EV to verify the communication handshake and ensure optimal charging speeds.
Permits, Inspections, and Local Regulations
Navigating the regulatory landscape is a crucial part of the installation cost and timeline. The Ministry of Power has declared EV charging a delicensed activity, meaning you do not need a special license to set up a private charger for personal use. However, local regulations and safety codes still apply.
The Central Electricity Authority (CEA) outlines strict technical standards for electrical safety, particularly regarding earthing and overcurrent protection. While a private homeowner installing a single charger rarely faces a direct CEA inspection, the work must comply with these standards to ensure your home insurance remains valid in the event of an electrical fire.
For apartment dwellers, the process involves additional layers of permission. You must obtain a No Objection Certificate (NOC) from your Resident Welfare Association (RWA) or building management. RWAs often have specific guidelines regarding cable routing in common shafts, designated EV parking zones, and the use of common area electricity versus private meters. Ensuring compliance with your RWA’s terms & conditions early in the process can prevent costly rework or disputes later.
DIY vs. Professional Installation
When evaluating the EV charger installation cost in India, many homeowners consider a Do-It-Yourself (DIY) approach to save on labor charges. While plugging a portable 10A charger into an existing, high-quality 15A socket is safe for occasional use, hardwiring a 7.2 kW or higher wallbox is strictly a job for certified professionals.
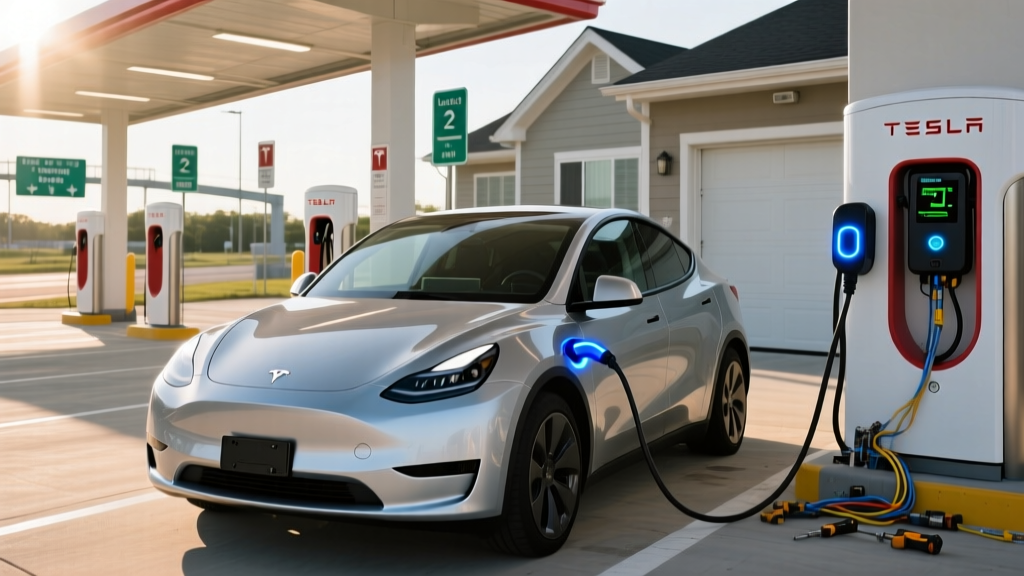
A 7.2 kW charger draws a continuous 32 amperes of current for several hours. Standard household wiring, loose connections, or undersized breakers will overheat rapidly under this sustained load, posing a severe fire hazard. Professional installers bring specialized tools like thermal cameras to inspect DB connections, crimping tools for secure wire terminations, and earth resistance testers to verify safety.
Moreover, attempting a DIY installation on a smart wallbox will almost certainly void the manufacturer’s warranty. If a power surge damages the unit or your vehicle’s onboard charger due to improper grounding or lack of surge protection, neither the charger OEM nor your car manufacturer will honor the warranty. Always rely on OEM-authorized partners or licensed electrical contractors to protect your investment and your home.
Detailed Cost Breakdown
The total EV charger installation cost in India varies wildly based on the charger’s power output, the distance from your main electrical panel, and the condition of your existing earthing. Below is a comprehensive breakdown of the potential expenses you should budget for:
- Charger Unit: A basic portable 16A charger costs between ₹5,000 and ₹15,000. A smart, wall-mounted 7.2 kW single-phase charger typically ranges from ₹30,000 to ₹60,000. For three-phase 11 kW or 22 kW units, expect to pay ₹50,000 to ₹1,00,000+. Check out our curated list of the best home EV chargers for top-rated options.
- Wiring & Conduits: High-grade copper cable (4 sq mm or 6 sq mm) and heavy-duty PVC conduits cost approximately ₹150 to ₹300 per meter. For a 30-meter run, this adds ₹4,500 to ₹9,000 to your bill.
- Protection Devices (MCB, RCCB, SPD): A dedicated protection box with a 30mA RCCB (for human safety), a Type C or D MCB (for overload protection), and an SPD (for voltage spikes) will cost between ₹3,000 and ₹7,000.
- Earthing Setup: If your home lacks a dedicated, low-resistance earth pit, installing a new chemical earthing system will cost between ₹4,000 and ₹8,000, including labor and materials.
- Labor & Installation Charges: Professional electricians or OEM-certified installation teams charge between ₹3,000 and ₹12,000 depending on the complexity of the cable routing, wall drilling, and DB modifications.
- DISCOM Load Enhancement Fees: If you need to upgrade your sanctioned load from 3 kW to 8 kW, DISCOM fees and security deposits can range from ₹0 (in some subsidized states) to ₹25,000 or more.
In total, a straightforward installation of a 7.2 kW smart charger with a short cable run and existing adequate earthing will cost around ₹45,000 to ₹65,000. Complex installations requiring long trenching, three-phase upgrades, and new earthing can easily exceed ₹1,20,000.
Essential Safety Tips for Indian Homes
India’ diverse climate and grid conditions present unique challenges for electrical equipment. To ensure longevity and safety, incorporate the following measures into your installation:
Surge Protection is Mandatory: The Indian power grid is prone to voltage fluctuations and sudden spikes, especially during monsoons and storms. An SPD (Surge Protection Device) diverts excess voltage to the ground, saving your charger’s sensitive internal PCBs and your car’s expensive onboard charging module from catastrophic damage.
IP Ratings for Outdoor Installations: If your parking spot is exposed to the elements, ensure your charger has an IP65 or IP67 rating. This guarantees protection against heavy monsoon rains and dust ingress. Additionally, installing a small weather-proof canopy over the unit can shield the touchscreen or RFID reader from direct sunlight and extreme summer heat, which can cause thermal throttling.
Thermal Management & Cable Sizing: Never compromise on cable thickness. Using a 2.5 sq mm wire for a 32A charger will cause the wire to heat up, melt the insulation, and potentially start a fire. Always use 6 sq mm multi-strand copper wires for 32A applications, and ensure all connections at the DB and charger terminals are tightly torqued to prevent arcing.
Regular Maintenance: Inspect the charging cable for cuts or abrasions periodically. Check the DB connections every six months for signs of scorching or loose terminals, as thermal expansion and contraction can loosen screws over time.
Troubleshooting Common Installation Issues
Even with a professional installation, you may encounter minor hiccups. Here is how to troubleshoot common post-installation issues:
Breaker Tripping Immediately: If the RCCB trips the moment you plug in the car, there is likely an earth leakage fault. This could be due to moisture inside the outdoor socket, a damaged cable insulation, or a faulty onboard charger in the vehicle. If the MCB trips, it indicates an overload or a short circuit; verify that the MCB rating matches the charger’s maximum draw.
Slower Than Advertised Charging Speeds: If your 7.2 kW charger is only delivering 5 kW, you are experiencing voltage drop. This happens when the cable run is too long for the wire gauge used. Measure the voltage at the charger terminals while the car is actively charging; if it drops below 210V, you may need to upgrade to a thicker cable.
Communication Handshake Failures: EV chargers use the Control Pilot (CP) and Proximity Pilot (PP) pins to communicate with the car. If the charger LED shows a fault code and the car refuses to accept a charge, check the connector pins for dirt, debris, or bent pins. Cleaning the connector with electrical contact cleaner often resolves this issue.
Frequently Asked Questions (FAQ)
Do I need a separate electricity meter for my EV charger?
In most cases, no. Your home EV charger will be connected to your existing residential electricity meter, and the energy consumed will be billed at your standard domestic tariff. However, some state DISCOMs offer specialized ‘EV Tariffs’ with lower per-unit rates during off-peak night hours. To avail of this, you may need to apply for a separate sub-meter dedicated solely to the EV charging point.
Can I install a 7.2 kW charger on a standard Indian household connection?
Standard Indian household connections usually have a sanctioned load of 3 kW to 5 kW. A 7.2 kW charger alone exceeds this limit. If you attempt to run it without a load enhancement, your main DISCOM meter will trip or you may face penalties for exceeding your sanctioned demand. You must apply for a load upgrade to at least 8 kW or 10 kW to safely accommodate a 7.2 kW charger alongside your household appliances.
Are there government subsidies for home EV charger installation?
While central government schemes like FAME primarily focus on subsidizing public charging infrastructure and the purchase of commercial electric vehicles, direct subsidies for private home charger installations are rare. However, several state-level EV policies offer incentives such as waivers on DISCOM load enhancement fees, reduced electricity tariffs for EV charging, or tax rebates. It is highly recommended to check your specific state’s current EV policy on the Automotive Research Association of India (ARAI) or state transport department portals.
How long does a typical home EV charger installation take?
The physical installation of the charger, wiring, and testing usually takes between 4 to 8 hours, depending on the complexity of the cable routing and civil work required. However, the overall timeline can stretch to several weeks if your project requires a DISCOM sanctioned load enhancement, as the utility company’s approval and meter upgrade process can be time-consuming.
Is it safe to use an extension cord for my portable EV charger?
No, using a standard household extension cord for EV charging is highly dangerous. EVs draw a continuous, high-amperage load for many hours, which will cause standard extension cords to overheat, melt, and potentially cause a fire. If you must extend the reach of your portable charger, use a heavy-duty, industrial-grade extension cable rated for at least 16A to 32A, with a thick cross-sectional area and proper earthing pins, though direct wall connection is always the safest route.