The Ultimate Guide to EV Charger 240V Plug Installation & Setup
Transitioning from a standard wall outlet to a dedicated 240V circuit is the single most impactful upgrade you can make for your electric vehicle. While Level 1 charging can take days to replenish a depleted battery, a properly installed EV charger 240V plug (Level 2) can add up to 300 miles of range overnight. However, working with high-voltage electricity requires careful planning, strict adherence to safety codes, and an understanding of your home's electrical capacity.
Whether you are researching the best Level 2 EV chargers on the market or preparing for an electrician's visit, this comprehensive guide covers everything you need to know about 240V EV charging installation.
- Difficulty Level: Moderate to Hard (Professional installation highly recommended)
- Estimated Cost: $500 to $2,500+ (excluding the charger unit)
- Estimated Time: 4 to 10 hours (depending on panel upgrades & conduit runs)
Understanding the EV Charger 240V Plug
When discussing 240V EV charging, the term "plug" usually refers to the heavy-duty receptacle installed on your wall, or the physical connector that goes into your car. For the wall receptacle, there are two primary standards used in North America for residential EV charging:
NEMA 14-50 vs. NEMA 6-50
The NEMA 14-50 is the most common 240V plug for EV chargers. It is a 50-amp, 240-volt receptacle that features two hot wires, a neutral wire, and a ground wire. While modern EV chargers do not actually use the neutral wire (they only need the two hot phases and a ground), the NEMA 14-50 remains the gold standard because it is widely used for electric ranges and RV hookups, making it versatile and easy for electricians to source.
The NEMA 6-50 is another 50-amp, 240-volt receptacle, but it lacks the neutral pin, consisting only of two hots and a ground. Some dedicated EV chargers use this plug, but the NEMA 14-50 is generally preferred for future-proofing and resale value. If you are exploring EV charging basics, you will quickly find that most premium portable and wall-mounted chargers ship with a NEMA 14-50 adapter.
Hardwired vs. Plug-in
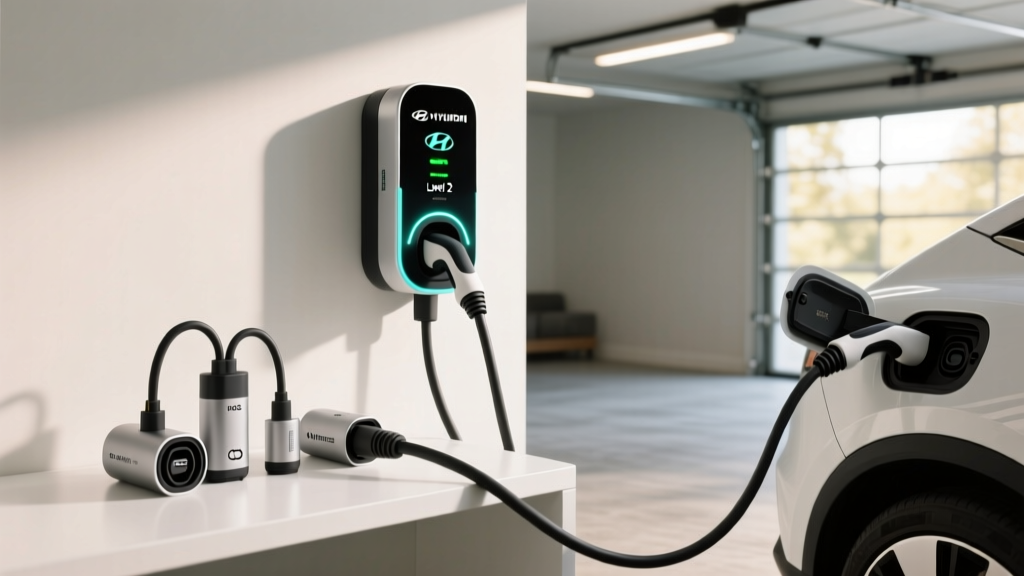
While a plug-in setup offers portability (you can unplug the EVSE and take it with you if you move), many homeowners opt for a hardwired connection. Hardwired chargers bypass the receptacle entirely, connecting directly into a junction box. This method eliminates the risk of a loose plug causing thermal buildup, allows for higher amperage (up to 48A or 80A on commercial setups), and often satisfies strict local electrical codes that prohibit 240V receptacles in certain damp outdoor locations without expensive weatherproof enclosures.
Electrical Requirements & NEC Code Compliance
Installing an EV charger 240V plug is not as simple as swapping out a standard 120V outlet. The National Electrical Code (NEC) has specific mandates for Electric Vehicle Supply Equipment (EVSE) under Article 625.
The 80% Continuous Load Rule
The most critical NEC rule for EV charging is the continuous load requirement. Because charging an EV takes more than three hours, it is classified as a "continuous load." The NEC dictates that a circuit breaker must be rated for 125% of the continuous load. Therefore, if you purchase a 40-amp Level 2 charger, you must install a 50-amp breaker. If you buy a 48-amp charger, you need a 60-amp breaker. Attempting to run a 40A charger on a 40A breaker is a severe fire hazard and a direct code violation.
Wire Gauge & Conduit
To support a 50-amp circuit (for a 40A charger), you will typically need 6 AWG copper wire (THHN/THWN) or 4 AWG aluminum wire. If you are installing a 60-amp breaker for a 48A charger, you will need 4 AWG copper or 2 AWG aluminum. These thick wires must be run through proper conduit (such as EMT metal conduit or PVC Schedule 80) to protect them from physical damage and environmental factors.
Panel Capacity
Before installing any 240V receptacle, an electrician must perform a load calculation on your main electrical panel. If your home has a 100-amp or 150-amp service and you are already running central air conditioning, an electric oven, and an electric dryer, adding a 50-amp EV circuit might overload the system. In such cases, a panel upgrade to 200 amps or the installation of an automated EV energy management system (which throttles the charger when the house demands power) may be required.
Step-by-Step Installation Guide
While we strongly advise hiring a licensed electrician, understanding the process helps you evaluate quotes and ensure the job is done correctly. Here is the standard workflow for a professional home charging setup.
- Site Assessment & Load Calculation: The electrician evaluates your main panel, determines the available amperage, and maps the shortest, safest route from the panel to the charging location (garage or driveway).
- Rough-In & Conduit Installation: Holes are drilled through studs or masonry. Conduit is measured, cut, bent, and secured to the walls. This protects the wiring from moisture, pests, and accidental impacts.
- Wire Pulling: The appropriate gauge wires (two hots, one neutral if using 14-50, and one ground) are pulled through the conduit. Pulling 6 AWG or 4 AWG wire requires specialized lubricants and tools to avoid damaging the wire insulation.
- Breaker & Receptacle Termination: The wires are connected to the new double-pole breaker in the main panel. At the charging end, the wires are terminated into the NEMA 14-50 receptacle. Modern code requires the use of a calibrated torque screwdriver to ensure the terminal screws are tightened to the manufacturer's exact specifications, preventing loose connections that cause arcing.
- Testing & Commissioning: The electrician uses a multimeter to verify the voltage (should read roughly 240V across the two hot legs) and checks the ground fault protection before plugging in the EVSE for a live test.
Permits, Inspections, & Utility Rebates
Skipping permits might save a few hundred dollars upfront, but it is a massive risk. Almost all municipalities require an electrical permit for installing a new 240V circuit or upgrading an electrical panel.
Why Permits Matter
A permit ensures that a licensed inspector will review the electrician's work to verify it meets the NEC and local amendments. If an unpermitted electrical fire occurs, your homeowner's insurance company may deny your claim, leaving you with catastrophic financial liability. Furthermore, if you ever sell your home, unpermitted electrical work can derail the real estate transaction.
Unlocking Utility Rebates
Many local utility companies and state governments offer substantial rebates for EV charger installations, sometimes covering up to $1,000 of the cost or providing free off-peak charging rates. However, these programs almost universally require a copy of the final, signed electrical inspection permit to prove the work was done safely and to code. The Department of Energy maintains databases of state and utility incentives that require permitted installations.
DIY vs. Professional Installation: Which is Right for You?
The internet is full of tutorials showing homeowners wiring their own NEMA 14-50 outlets. While it is physically possible for an advanced DIYer to run conduit and pull wire, working inside a live 200-amp main service panel is incredibly dangerous. A single dropped tool or miswired neutral can result in a fatal arc flash or a slow-burning electrical fire inside your walls.
When to DIY: You might consider DIY only if you are replacing an existing, code-compliant 50-amp receptacle with a new one, or if you are running the conduit and pulling the wire yourself to save on labor, leaving the final panel terminations and inspection to a licensed pro.
When to Hire a Pro: If you need to run new wire from the panel, install a new double-pole breaker, upgrade your service, or mount outdoor weatherproof enclosures, hire a licensed, bonded, and insured electrical contractor. The cost of professional labor is a fraction of the cost of rebuilding a home after an electrical fire.
Cost Breakdown: What to Expect
The total cost of installing an EV charger 240V plug varies wildly based on your home's existing infrastructure. Here is a general breakdown of potential expenses:
- Standard Installation (Panel to Garage): $500 - $1,200. This assumes your panel has space and capacity, and the run is relatively short (under 30 feet) with easy access.
- Long Wire Runs & Trenching: $1,500 - $3,000+. If your panel is on the opposite side of the house, or you need to trench conduit underground to reach a detached garage or driveway pedestal, material and labor costs skyrocket.
- Electrical Panel Upgrade: $1,500 - $3,500. Upgrading from a 100A or 150A panel to a 200A panel is often necessary for older homes to safely accommodate a 50A EV circuit alongside modern appliances.
- Permit Fees: $50 - $250, depending on your local jurisdiction.
- The Charger Unit: $300 - $700 for a high-quality, UL-listed smart charger.
Essential Safety Tips for 240V EV Charging
Safety should be your primary concern when dealing with high-amperage, continuous-load electricity. Follow these critical safety guidelines:
- Use a Torque Screwdriver: The NEC now requires that terminal connections be tightened to the manufacturer's specified torque. Hand-tightening a 14-50 receptacle can lead to micro-gaps that generate immense heat over time, melting the plug and causing a fire.
- Weatherproofing Outdoor Plugs: If your 240V plug is installed outdoors, it must be housed in a NEMA 3R or NEMA 4 weatherproof enclosure. Moisture ingress into a 240V receptacle will cause immediate short circuits and severe shock hazards.
- Avoid Extension Cords: Never use an extension cord to bridge the gap between your 240V receptacle and your EV. Standard extension cords cannot handle the continuous 40-amp load and will melt. If your cable doesn't reach, you must relocate the receptacle.
- Thermal Monitoring: Many premium smart chargers feature built-in thermal sensors inside the plug head. If the plug detects abnormal heat (often caused by a loose wire in the wall receptacle), it will automatically throttle the charging speed or shut down entirely to prevent a fire.
Troubleshooting Common 240V Charging Issues
Even with a professional installation, you may occasionally encounter issues with your 240V charging setup. Here is how to diagnose the most common problems:
The Breaker Trips Immediately
If the breaker trips the moment you plug in the car or start a session, you likely have a dead short, a ground fault, or a GFCI incompatibility. Many modern EVSEs have built-in GFCI protection. If your electrical panel also has a GFCI breaker, the two can conflict, causing nuisance tripping. Swapping the GFCI breaker for a standard breaker (if local code and the EVSE manufacturer allow it) often resolves this.
The Breaker Trips After 10-20 Minutes
This is a classic sign of a thermal issue or an overloaded circuit. The wires or the receptacle may be undersized, or the terminal screws were not torqued properly, causing resistance and heat buildup. The breaker's thermal trip mechanism activates to prevent a fire. Stop charging immediately and have an electrician inspect the terminations with a thermal camera.
Charging Speeds are Slower than Expected
If your 48-amp charger is only pulling 32 amps, check your vehicle's onboard charger settings. Some EVs allow you to manually limit the charging amperage to preserve battery health or accommodate weak grids. Additionally, if the EVSE detects high temperatures at the plug head, it will intentionally derate the current to maintain safety.
Frequently Asked Questions
Can I use my existing electric dryer outlet for my EV charger?
While it is physically possible if you have a NEMA 14-30 or 14-50 dryer outlet, it is generally not recommended for daily use. Dryer outlets are often wired with older, smaller-gauge aluminum wire and may not be rated for the continuous, multi-hour load of EV charging. Furthermore, constantly unplugging and replugging a heavy-duty 240V plug wears out the internal contacts, increasing the risk of arcing and fire. A dedicated circuit is always the safest choice.
Do I need a smart charger or will a dumb charger work?
A "dumb" charger simply acts as a relay, sending power to the car whenever it is plugged in. A "smart" charger connects to Wi-Fi, allowing you to schedule charging during off-peak utility hours, monitor energy usage, and receive firmware updates. Given the potential savings on time-of-use electricity rates, a smart charger is highly recommended and often pays for itself over time.
How fast will a 240V plug charge my electric vehicle?
Charging speed depends on the amperage of the circuit and the capacity of your vehicle's onboard charger. A standard 40-amp circuit (delivering 32 continuous amps) will provide roughly 7.7 kW of power, adding about 25 to 35 miles of range per hour of charging. A 60-amp circuit (delivering 48 continuous amps) provides 11.5 kW, adding up to 45 miles of range per hour. For most drivers, a 50-amp circuit is the perfect sweet spot for overnight replenishment.
Is it safe to leave my EV plugged in for days at a time?
Yes, it is perfectly safe. Modern electric vehicles and EVSEs are designed to communicate continuously. Once the vehicle's battery management system (BMS) detects that the battery is full, it halts the flow of electricity. The charger remains in a low-power standby mode, occasionally waking up to maintain the battery's thermal management system or top off the 12V accessory battery. Leaving your car plugged in is actually better for the vehicle's long-term battery health, especially in extreme hot or cold weather.