Sync Energy EV Charger Installation Guide: Step-by-Step Setup & Requirements
Transitioning to an electric vehicle is an exciting step toward a sustainable future, but the true convenience of EV ownership relies heavily on a reliable home charging setup. The Sync Energy EV charger has quickly become a favorite among EV owners due to its smart features, sleek design, & robust load-balancing capabilities. However, installing a Level 2 charging station is not as simple as plugging in a household appliance. It requires careful electrical planning, adherence to local codes, & a solid understanding of your home electrical infrastructure.
In this comprehensive guide, we will walk you through everything you need to know about the Sync Energy EV charger installation process. Whether you are considering a DIY approach or hiring a licensed professional, this guide covers the essential requirements, step-by-step installation procedures, permit regulations, & cost breakdowns.
Difficulty Level: Moderate to Advanced (High-voltage electrical work required)
Estimated Cost: $500 to $1,500+ (excluding the cost of the charger unit itself, heavily dependent on panel upgrades & wiring distance)
For a deeper dive into the features of this specific unit before you install, be sure to read our full Sync Energy EV charger review. If you are still comparing options, check out our roundup of the best home EV chargers on the market.
Pre-Installation Requirements & Electrical Assessment
Before you unbox your Sync Energy charger or call an electrician, you must assess your home electrical system. Level 2 chargers operate on a 240-volt circuit, similar to what your electric oven or clothes dryer uses. The Department of Energy (DOE) strongly recommends evaluating your electrical panel capacity before proceeding with any EV charger installation.
1. Electrical Panel Capacity
Most modern homes are equipped with a 200-amp main service panel. To determine if you have enough capacity for a Sync Energy charger, you must perform a load calculation. EV chargers are considered continuous loads, meaning they can draw power for three hours or more. According to the National Electrical Code (NEC), continuous loads must not exceed 80% of the circuit breaker rating. Therefore, a 40-amp charger requires a 50-amp breaker, & a 48-amp charger requires a 60-amp breaker. If your panel is already near maximum capacity, you may need a panel upgrade or a smart load-management system, which Sync Energy supports natively.
2. Hardwired vs. NEMA Receptacle
You must decide whether to hardwire the charger directly into your electrical panel or install a 240-volt receptacle. Hardwiring is generally safer, more efficient, & allows for higher amperage outputs without the risk of a loose plug connection causing thermal issues. If you prefer the flexibility of unplugging the unit, a NEMA 14-50 receptacle is the industry standard for 50-amp circuits. Ensure your Sync Energy model matches your chosen installation method.
3. Wi-Fi & Network Requirements
The Sync Energy charger relies on a Wi-Fi connection for firmware updates, remote scheduling, & energy monitoring via the companion app. Ensure your garage or driveway has a strong 2.4 GHz Wi-Fi signal. If your router is far from the installation site, consider installing a Wi-Fi extender or a mesh network node prior to setup.
Step-by-Step Sync Energy EV Charger Installation
If you are a licensed electrician or an advanced DIYer with high-voltage experience, the following steps outline the physical installation process. For a broader understanding of charging speeds & infrastructure, review our guide on EV charging levels explained.
Step 1: Power Down & Verify
Safety is paramount. Turn off the main breaker to your electrical panel to cut power to the entire house. Use a non-contact voltage tester or a multimeter to verify that the bus bars & existing breakers are completely de-energized before touching any internal components.
Step 2: Mount the Bracket & Plan the Route
Hold the Sync Energy mounting bracket against the wall at a comfortable height (typically 48 inches from the floor to the center of the unit). Use a level to ensure it is perfectly straight, mark the screw holes, & secure the bracket to the wall studs using heavy-duty lag screws. Plan the route for your conduit from the electrical panel to the charger location, keeping runs as short & direct as possible to minimize voltage drop.
Step 3: Run Conduit & Pull Wiring
Install your chosen conduit (EMT metal conduit or Schedule 80 PVC for outdoor/exposed runs). For a 50-amp circuit (NEMA 14-50 or 40A hardwire), you will need 6 AWG copper THHN/THWN wire. For a 60-amp circuit (48A hardwire), 4 AWG copper wire is required. You will need two hot wires (black & red), one neutral wire (white, if required by your specific hardwire/receptacle setup), & one ground wire (bare copper or green). Pull the wires through the conduit carefully, using wire lubricant if navigating tight bends.
Step 4: Connect to the Breaker Panel
Install a new double-pole breaker of the appropriate amperage (50A or 60A) into an available slot in your panel. Connect the two hot wires to the breaker terminals. Connect the neutral wire to the neutral bus bar & the ground wire to the grounding bus bar. Ensure all connections are torqued to the manufacturer specifications to prevent arcing.
Step 5: Terminate at the Charger or Receptacle
If hardwiring, route the wires into the Sync Energy junction box, strip the insulation, & connect them to the corresponding terminal blocks (L1, L2, Neutral, Ground) as outlined in the official Sync Energy documentation. If installing a NEMA 14-50 receptacle, wire the outlet according to standard electrical codes, ensuring the ground pin is oriented correctly.
Step 6: Mount, Power Up, & Test
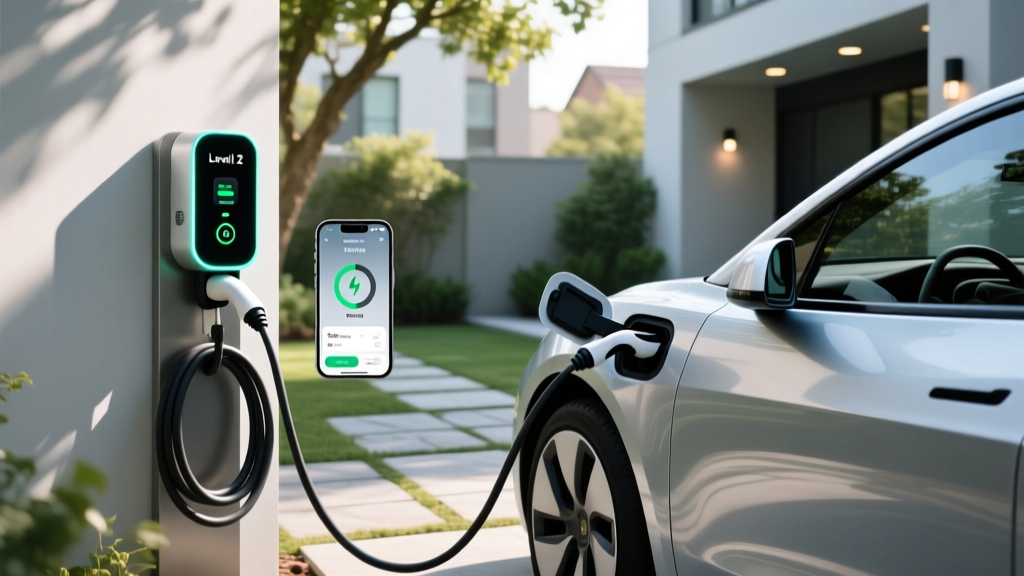
Hang the Sync Energy charger unit onto the mounted bracket. Restore power at the main breaker. The unit should power on, indicated by LED status lights. Download the Sync Energy app, create an account, & follow the on-screen prompts to pair the charger via Bluetooth & connect it to your home Wi-Fi network.
Permits, Inspections, & Local Codes
Skipping the permit process is a common mistake that can lead to severe consequences, including voided home insurance policies & failed home inspections when you eventually sell your property. For a detailed look at the legalities, read our EV charger permit guide.
Why Permits Are Mandatory
Adding a high-amperage, continuous-load circuit to your home significantly alters your electrical footprint. Local building departments require permits to ensure the installation complies with the National Electrical Code (NEC) Article 625, which specifically governs Electric Vehicle Charging System Equipment. The permit process ensures that your wiring, conduit fill, & breaker sizing are safe & up to code.
The Inspection Process
Once the installation is complete, a city or county inspector will visit your home. They will check the torque on your breaker connections, verify the wire gauge, ensure proper grounding, & confirm that the physical mounting is secure. If you installed a NEMA 14-50 receptacle, the inspector will likely check for proper GFCI (Ground Fault Circuit Interrupter) protection, which is now mandated by recent NEC updates for outdoor & garage receptacles.
DIY Installation vs. Hiring a Licensed Electrician
While the step-by-step process above outlines the technical requirements, deciding who should perform the work is a critical choice.
The Case for Professional Installation
Hiring a licensed, insured electrician is highly recommended for the vast majority of EV owners. High-voltage electricity is unforgiving; a single loose connection can lead to a thermal event or house fire. Professionals carry the necessary liability insurance, know how to navigate local permit offices, & can perform complex load calculations on the fly. Furthermore, many utility rebates & federal tax incentives require a signed certificate from a licensed contractor to qualify.
The DIY Route
If you are an experienced DIYer with a deep understanding of residential electrical systems, you may choose to pull your own permit & do the work yourself. However, you must be completely comfortable working inside a live main panel, calculating voltage drop over long distances, & bending conduit. If you have any doubts about your home electrical capacity or local code requirements, hire a professional.
Comprehensive Cost Breakdown
The total cost of installing a Sync Energy EV charger varies wildly based on your home existing infrastructure. Here is a general breakdown of what you can expect to pay.
- Charger Unit: The Sync Energy hardware itself typically ranges from $400 to $700, depending on the amperage & cable length options.
- Basic Installation (Panel Nearby): If your electrical panel is located right next to your garage & has available capacity, expect to pay between $400 & $800 for labor & basic materials (wire, conduit, breaker).
- Complex Installation (Long Runs): If the wire needs to be routed through finished walls, under concrete, or across a long distance, labor & material costs can easily rise to $1,000 - $1,800.
- Electrical Panel Upgrade: If your home has an older 100-amp panel or lacks the physical space for a new double-pole breaker, a panel upgrade to 200 amps can cost anywhere from $1,500 to $3,500.
- Permit Fees: Local jurisdiction permit fees generally range from $50 to $200.
Be sure to check with your local utility provider & state energy office, as many offer substantial rebates that can offset the cost of the hardware & installation labor.
Essential Safety Tips for EV Charging
Safety should always be the primary focus when dealing with high-speed EV charging.
- Thermal Monitoring: The Sync Energy charger features built-in thermal sensors. Ensure the unit is mounted in a well-ventilated area, away from direct, intense sunlight or heat-generating appliances, to prevent thermal throttling.
- Cable Management: Use the included cable holster or a third-party EV cable organizer. Leaving the charging cable on the garage floor increases the risk of tripping, rolling over the cord with your vehicle, & exposing the copper wiring to moisture & degradation.
- Outdoor Ratings: If you are installing the charger outdoors, verify that your specific Sync Energy model carries a NEMA 4 or IP65 rating for water & dust resistance. Ensure the conduit connections are sealed with weatherproof fittings.
- Regular Inspections: Periodically inspect the charging cable for cuts, abrasions, or exposed wires. Check the plug pins for signs of scorching or melting, which indicates a poor connection or overloaded receptacle.
Troubleshooting Common Sync Energy Setup Issues
Even with a flawless physical installation, smart chargers can occasionally experience software or connectivity hiccups. Here is how to resolve the most common Sync Energy setup issues.
Wi-Fi Pairing Failures
If the Sync Energy app cannot find the charger during setup, ensure your smartphone is connected to a 2.4 GHz Wi-Fi network. Many modern routers combine 2.4 GHz & 5 GHz bands under a single name, which can confuse smart home devices. Temporarily disable the 5 GHz band in your router settings, pair the charger, & then re-enable it. Alternatively, use the Bluetooth pairing mode within the app to configure the network credentials directly.
Charger Not Delivering Maximum Power
If your EV is charging slower than expected, check the app settings. The Sync Energy charger allows you to manually limit the output amperage to accommodate weaker electrical circuits. Ensure the slider is set to the maximum allowable amperage for your specific breaker size (e.g., 40 amps on a 50-amp breaker). Additionally, check your vehicle onboard charger settings to ensure it is configured to accept the maximum AC current.
RFID Authentication Issues
If you have enabled RFID security to prevent unauthorized use (useful for outdoor or shared driveway installations) & your card is not being recognized, try re-registering the card through the app. Ensure the card is held flat against the designated reader zone on the face of the unit, & verify that the charger firmware is fully updated via the app.
Load Balancing Errors
If you are utilizing Sync Energy dynamic load balancing to share power with other heavy appliances, ensure the external current transformers (CT clamps) are installed correctly on the main service lines. The arrows on the CT clamps must point toward the main breaker; if installed backward, the charger will misread the home power consumption & restrict charging speeds unnecessarily.
Frequently Asked Questions (FAQ)
Can I plug my Sync Energy charger into a standard household outlet?
No. The Sync Energy Level 2 charger requires a dedicated 240-volt circuit to operate. Standard household outlets in North America provide 120 volts (Level 1 charging), which is insufficient for the hardware. Attempting to use an adapter to plug a 240V charger into a 120V outlet will result in equipment failure & poses a severe fire hazard.
How long does a professional installation take?
A standard installation where the electrical panel is located in the garage, directly behind or adjacent to the charging location, typically takes 2 to 4 hours. If the electrician needs to trench underground, run wires through finished drywall, or upgrade the main service panel, the project can take anywhere from 1 to 3 full days to complete.
Does the Sync Energy charger require a dedicated circuit?
Yes. The National Electrical Code strictly mandates that EV charging equipment must be connected to a dedicated branch circuit. You cannot share the circuit with other high-draw appliances like a dryer, oven, or workshop equipment. Sharing a circuit will result in constant breaker tripping & violates safety codes.
Will installing this EV charger increase my home insurance premiums?
In most cases, adding a professionally installed, permitted Level 2 EV charger will not significantly increase your home insurance premiums. However, you must notify your insurance provider of the installation. If the work was done without a permit or by an unlicensed individual, your insurer may deny coverage in the event of an electrical fire. Always keep your permit sign-off & electrician invoices on file.
How do I update the firmware on my Sync Energy charger?
Firmware updates are delivered Over-The-Air (OTA) via the Sync Energy companion app. As long as the charger is connected to your home Wi-Fi network, it will automatically download & install critical security & performance patches in the background. You can manually check for available updates by navigating to the 'Device Settings' & 'Firmware' section within the app menu.
Installing a Sync Energy EV charger is a transformative upgrade that brings the fueling station directly to your home. By respecting electrical codes, prioritizing safety, & understanding the smart features of your hardware, you will enjoy years of fast, reliable, & cost-effective electric vehicle charging.