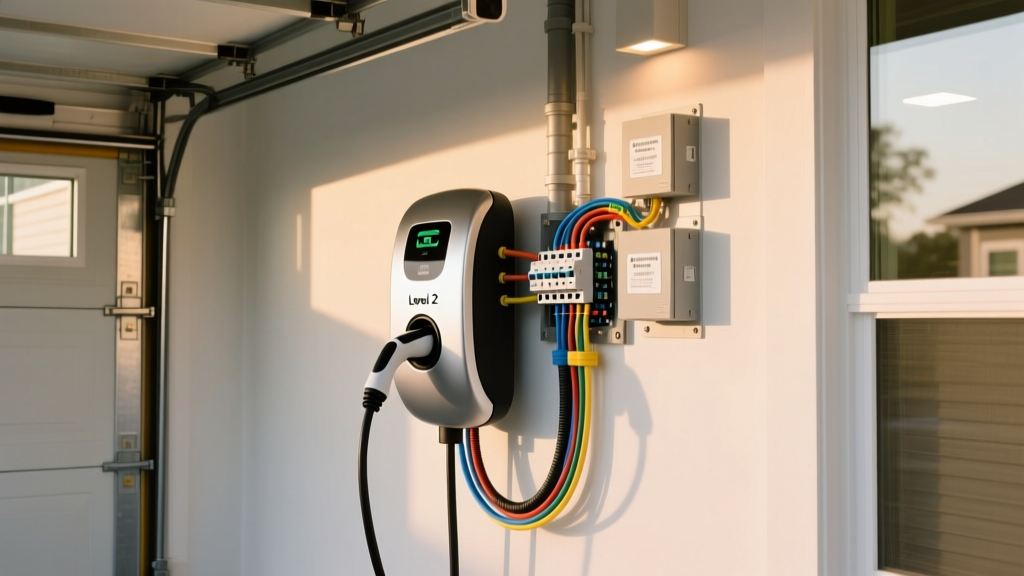
Installing a Sigenergy AC EV charger at home is one of the smartest upgrades any electric vehicle owner can make. Known for sleek design, intelligent energy management, and seamless solar integration, Sigenergy chargers deliver reliable Level 2 charging that can fully replenish your EV battery overnight. But before you plug in and power up, there is a critical step that demands attention: proper installation.
This comprehensive Sigenergy AC EV charger installation guide walks you through every phase of the process — from understanding electrical requirements and gathering tools to navigating permits, inspections, and long-term maintenance. Whether you are considering a DIY approach or planning to hire a licensed electrician, you will find actionable information to ensure a safe, code-compliant, and efficient setup.
Difficulty Level: Moderate to Advanced (electrical work required)
Estimated Time: 2–5 hours (professional installation) or 4–8 hours (experienced DIY)
Estimated Cost: $500–$2,500+ depending on electrical panel upgrades, wiring distance, and local labor rates
Before diving into the installation process, it is worth exploring what makes Sigenergy chargers unique. For a detailed look at specifications, features, and real-world performance, check out our Sigenergy AC EV charger review to understand exactly what you are working with.
Electrical Requirements & Pre-Installation Checklist
Before you unbox your Sigenergy AC EV charger, you need to verify that your home's electrical system can support the demands of Level 2 charging. Sigenergy AC chargers typically operate on a 240-volt circuit and draw between 32 amps and 48 amps depending on the model. This places significant demand on your electrical panel, and overlooking these requirements can lead to tripped breakers, damaged equipment, or even fire hazards.
Electrical Panel Capacity
Your home's main electrical panel must have sufficient capacity to handle the additional load of an EV charger. Most modern homes have a 200-amp service panel, which is generally adequate for adding a 40-amp or 50-amp dedicated circuit for EV charging. However, older homes with 100-amp panels may require a panel upgrade before installation can proceed.
To determine available capacity, perform a basic load calculation. Add up the amperage of all existing major appliances (HVAC, water heater, dryer, oven, etc.) and subtract from your panel's total rated capacity. The U.S. Department of Energy recommends that your EV charging circuit should not exceed 80% of the breaker's rated capacity — a principle known as the continuous load rule outlined in the National Electrical Code (NEC).
Circuit Breaker & Wire Gauge Requirements
Sigenergy AC chargers require a dedicated circuit with the appropriate breaker size and wire gauge:
- 32-amp charger: Requires a 40-amp breaker with 8 AWG copper wire
- 40-amp charger: Requires a 50-amp breaker with 6 AWG copper wire
- 48-amp charger: Requires a 60-amp breaker with 4 AWG copper wire
Wire gauge may need to be thicker if the run from your electrical panel to the charger location exceeds 50 feet, due to voltage drop considerations. Always consult the National Electrical Code (NEC) Article 625, which specifically governs electric vehicle charging system installations, for the most current requirements.
Pre-Installation Checklist
Before beginning any work, confirm the following:
- Your electrical panel has available slots for a double-pole breaker
- You have calculated the total load and confirmed adequate capacity
- You have identified the optimal charger location (within cable reach of your vehicle's charge port)
- You have checked with your local building department about permit requirements
- You have reviewed the Sigenergy installation manual specific to your model
- You have contacted your utility company to inquire about EV charging rates or rebates
If you are still deciding which home charger is right for your setup, browse our guide to the best home EV chargers for comparisons that factor in installation complexity.
Step-by-Step Sigenergy AC EV Charger Installation
With your electrical requirements confirmed and materials on hand, you are ready to begin the physical installation. This section covers the process from mounting to final power-on. Whether you are a licensed electrician or an experienced homeowner, follow each step carefully.
Step 1: Gather Tools & Materials
You will need the following for a typical Sigenergy AC EV charger installation:
- Sigenergy AC EV charger unit & included mounting hardware
- Appropriate gauge copper wire (THHN/THWN in conduit or NM-B cable)
- Double-pole circuit breaker (sized to your charger model)
- Electrical conduit & fittings (if running wire through walls or outdoors)
- Wire nuts, cable clamps, & junction boxes as needed
- Voltage tester or multimeter
- Drill, level, stud finder, & appropriate drill bits
- Wire strippers, screwdrivers, & torque screwdriver
- Personal protective equipment (safety glasses & insulated gloves)
Step 2: Turn Off Power at the Main Breaker
This is the most critical safety step. Locate your main breaker and switch it to the OFF position. Use a non-contact voltage tester to confirm that power is completely de-energized at the panel before touching any wires. Never skip this verification step — assuming a circuit is dead without testing can be fatal.
Step 3: Install the Circuit Breaker
Open your electrical panel cover (with the main breaker OFF) and install the appropriately sized double-pole breaker into an available slot. Ensure the breaker snaps firmly into place on the bus bar. Connect the ground wire to the ground bus bar and the neutral wire to the neutral bus bar if required by your installation configuration.
Step 4: Run Wiring to the Charger Location
Route your cable from the electrical panel to the planned charger location. If running through finished walls, you may need to drill through studs or use conduit for protection. For outdoor installations or garage runs along walls, electrical metallic tubing (EMT) or PVC conduit provides physical protection and is often required by code.
Key wiring considerations include:
- Maintain proper bend radius on all conduit turns
- Use cable clamps where wiring enters junction boxes or the charger enclosure
- Keep wiring away from water lines, gas lines, & HVAC ducts
- Ensure all conduit connections are tight & properly secured
Step 5: Mount the Sigenergy Charger
Choose a mounting location that is within reach of your vehicle's charging port, protected from direct water exposure (unless your model is rated for full outdoor use), and at a comfortable height — typically between 48 and 54 inches from the floor. Sigenergy chargers come with a wall-mounting bracket and hardware.
- Hold the mounting bracket against the wall & use a level to ensure it is straight
- Mark the screw hole locations with a pencil
- Locate wall studs using a stud finder — mounting into studs provides the strongest hold
- Drill pilot holes at the marked locations
- Secure the bracket to the wall using the provided lag screws or appropriate anchors
- Hang the Sigenergy charger unit onto the bracket & secure it per the manufacturer's instructions
Step 6: Make Electrical Connections
With the charger mounted, connect the wiring to the charger's terminal block. Sigenergy chargers typically have clearly labeled terminals for Line 1 (L1), Line 2 (L2), Ground, and in some configurations, Neutral.
- Connect the two hot wires (black & red, or as configured) to L1 & L2
- Connect the ground wire (bare copper or green) to the ground terminal
- Connect the neutral wire (white) if required by your model
- Torque all terminal screws to the specifications listed in the Sigenergy installation manual
Proper torque is essential — loose connections create resistance, heat, & potential fire hazards. A calibrated torque screwdriver is a worthwhile investment for this step.
Step 7: Power On & Configure
Once all connections are made and double-checked, replace the electrical panel cover and turn the main breaker back ON. Then switch on the dedicated EV charger breaker. The Sigenergy unit should power up and display its startup sequence.
Follow the manufacturer's instructions to configure the charger using the Sigenergy mobile app. This typically involves:
- Downloading the Sigenergy app on your smartphone
- Connecting the charger to your home Wi-Fi network
- Setting the maximum charging current to match your circuit breaker rating
- Configuring scheduling, solar integration, or smart charging features as desired
- Running a test charge session with your EV to verify proper operation
For more details on optimizing your charging setup, read our complete guide to EV charging at home.
Permits, Inspections & Code Compliance
Electrical work — especially installations involving high-amperage circuits — almost always requires a permit from your local building department. Skipping permits might seem like a way to save time and money, but it can result in fines, voided insurance coverage, and serious safety risks.
When You Need a Permit
Most jurisdictions require a permit for any new 240-volt circuit installation. This includes hardwired EV charger installations and, in many areas, even NEMA outlet installations intended for EV charging. Contact your local building or electrical inspection department before starting work to determine specific requirements in your area.
The Permit Process
The typical permit process involves these steps:
- Application: Submit an electrical permit application to your local building department, including details about the circuit size, wire gauge, equipment specifications, and installation location
- Fee Payment: Pay the permit fee, which typically ranges from $50 to $200 depending on your jurisdiction
- Installation: Complete the installation according to NEC requirements and local amendments
- Rough-In Inspection: In some jurisdictions, an inspector must examine the wiring before walls are closed or before the charger is connected
- Final Inspection: After the installation is complete, the inspector verifies that all work meets code requirements, including proper grounding, breaker sizing, wire gauge, GFCI protection (where required), and labeling
NEC Requirements for EV Chargers
The National Electrical Code (NEC) Article 625 establishes the baseline safety standards for EV charging installations across the United States. Key provisions include:
- GFCI Protection: NEC requires ground-fault circuit interrupter protection for EV charging outlets and circuits in many locations, particularly garages and outdoor areas
- Circuit Rating: The branch circuit must be rated at least 125% of the charger's maximum continuous load
- Ventilation: Indoor installations may require adequate ventilation depending on local code interpretations
- Disconnecting Means: A readily accessible disconnecting means must be provided within sight of the charger or integral to the unit
- Labeling: The electrical panel must be labeled to identify the EV charger breaker
Your local jurisdiction may have additional amendments beyond the base NEC requirements. Always verify local codes before beginning your installation.
DIY Installation vs. Hiring a Professional Electrician
One of the most common questions EV owners face is whether to install the charger themselves or hire a licensed electrician. Both approaches have merits, but the right choice depends on your skill level, local regulations, and risk tolerance.
When DIY Installation Makes Sense
A DIY installation may be appropriate if:
- You have prior experience with 240-volt electrical work (such as installing a dryer or range outlet)
- Your electrical panel has ample capacity and available breaker slots
- The charger location is close to the panel, requiring a short, straightforward wire run
- Your local jurisdiction allows homeowner-permitted electrical work
- You are comfortable performing load calculations and following NEC guidelines
When to Hire a Professional
Hiring a licensed electrician is strongly recommended — and in many jurisdictions, legally required — when:
- Your panel needs an upgrade or you are unsure about available capacity
- The wire run is long, complex, or requires running through finished walls
- Your local code requires a licensed electrician for 240-volt installations
- You are installing an outdoor charger that requires weatherproof conduit & enclosures
- You want to ensure warranty compliance (some manufacturers require professional installation)
- You are integrating the charger with a solar energy system or home battery like the Sigenergy SigenStor
Cost Comparison
A professional installation typically adds $500 to $1,500 in labor costs on top of materials. However, this investment provides several benefits: code compliance guaranteed, warranty protection, liability coverage through the electrician's insurance, and peace of mind knowing the work was done safely. A panel upgrade, if needed, can add $1,500 to $3,000 or more to the total project cost.
For a broader comparison of installation requirements across different charger brands, see our EV charger installation costs explained guide.
Installation Cost Breakdown
Understanding the full cost picture helps you budget accurately and avoid surprises. Here is a detailed breakdown of what you can expect to spend on a Sigenergy AC EV charger installation.
| Item | Estimated Cost Range |
|---|---|
| Sigenergy AC EV Charger Unit | $400 – $800 |
| Circuit Breaker (double-pole) | $15 – $60 |
| Wiring (per foot, including conduit) | $3 – $8 per foot |
| Conduit, Fittings & Junction Boxes | $50 – $200 |
| Permit Fees | $50 – $200 |
| Professional Electrician Labor | $500 – $1,500 |
| Electrical Panel Upgrade (if needed) | $1,500 – $3,500 |
| Wi-Fi Extender (if needed for connectivity) | $30 – $80 |
Factors That Increase Cost
Several variables can push your installation toward the higher end of the cost range:
- Long wire runs: Every additional foot of wire adds material cost, and longer runs may require thicker gauge wire to compensate for voltage drop
- Panel upgrades: Homes with older 100-amp panels often need an upgrade to 200 amps
- Wall & ceiling repairs: Running wire through finished spaces may require drywall cutting, patching, and repainting
- Outdoor installations: Weatherproof enclosures, buried conduit, and GFCI breakers add cost
- Solar integration: Connecting your Sigenergy charger to a solar array or home battery system adds complexity
Rebates & Incentives
Many utility companies, state governments, and federal programs offer rebates or tax credits for home EV charger installations. The U.S. Department of Energy maintains resources on available incentives. Check with your local utility provider and the Database of State Incentives for Renewables & Efficiency (DSIRE) for programs in your area that can offset installation costs significantly.
Safety Tips & Best Practices
EV charger installation involves working with high-voltage electricity that can cause serious injury or death if handled improperly. Even experienced DIYers should treat every installation with the utmost caution. Follow these safety principles without exception.
Essential Safety Rules
- Always de-energize the panel before performing any electrical work. Turn off the main breaker and verify with a voltage tester that circuits are dead
- Never work alone. Have another person present who can call for help in an emergency
- Use insulated tools rated for the voltage you are working with
- Wear appropriate PPE including safety glasses and insulated gloves
- Follow torque specifications for all terminal connections — under-tightened connections create arcing and fire risks, while over-tightened connections can damage conductors
- Test GFCI functionality after installation to ensure ground-fault protection is working correctly
- Label your electrical panel clearly to identify the EV charger circuit
Long-Term Safety Maintenance
After installation, ongoing maintenance ensures your Sigenergy charger continues to operate safely:
- Inspect the charging cable regularly for cuts, abrasions, or exposed wiring
- Check the charger mounting periodically to ensure it remains securely fastened
- Keep the charger enclosure clean and free of dust, debris, and moisture
- Verify that firmware updates are applied through the Sigenergy app
- Have a licensed electrician inspect the installation every few years, especially if you notice unusual sounds, smells, or heat from the unit
- Replace any damaged cables or connectors immediately — do not attempt to repair them with tape or temporary fixes
For additional safety information specific to electric vehicle ownership and charging, visit our EV charging safety tips resource.
Troubleshooting Common Installation Issues
Even carefully planned installations can encounter issues. Here are the most common problems Sigenergy AC EV charger owners face and how to resolve them.
Charger Will Not Power On
Possible causes: Tripped breaker, loose wire connection at the terminal block, or incorrect wiring configuration.
Solution: Turn off the breaker, open the charger enclosure, and verify all wire connections are tight and correctly placed. Check the breaker for proper seating on the bus bar. If the breaker trips immediately upon reset, you likely have a short circuit — do not continue resetting it. Call an electrician.
Charging Speed Is Slower Than Expected
Possible causes: The charger's maximum current setting in the app is configured lower than the circuit allows, voltage drop due to long wire runs with undersized wire, or the vehicle's onboard charger is the limiting factor.
Solution: Verify the current setting in the Sigenergy app matches your circuit's capacity (80% of breaker rating). Use a multimeter to check voltage at the charger terminals — if it reads significantly below 240V, voltage drop may be the issue. Consult your vehicle's specifications to confirm its maximum AC charging acceptance rate.
Wi-Fi Connectivity Issues
Possible causes: The charger is too far from the Wi-Fi router, the garage walls are blocking the signal, or the network password was entered incorrectly.
Solution: Try relocating your router closer to the garage, installing a Wi-Fi extender, or using a powerline adapter. Re-enter the network credentials in the Sigenergy app and ensure you are connecting to a 2.4 GHz network, as many smart devices do not support 5 GHz bands.
Breaker Trips Repeatedly
Possible causes: The circuit is overloaded (other appliances sharing the circuit), the breaker is defective, the wiring has a short or ground fault, or the charger's current draw exceeds the breaker rating.
Solution: Confirm the EV charger is on a dedicated circuit with no other loads. If the breaker continues to trip, replace it with a new one of the same rating. If the problem persists, the wiring or charger unit may be faulty — contact Sigenergy support or a licensed electrician for diagnosis.
App Shows Error Codes
Possible causes: Firmware bugs, communication errors between the charger and the cloud server, or internal hardware faults.
Solution: Restart the charger by turning off the breaker for 30 seconds and turning it back on. Ensure the app and charger firmware are up to date. Consult the Sigenergy user manual for specific error code definitions and contact Sigenergy customer support if the issue persists.
Frequently Asked Questions
Can I install a Sigenergy AC EV charger myself without an electrician?
Technically, yes — if you have experience with 240-volt electrical work and your local jurisdiction permits homeowner electrical installations. However, most areas require a licensed electrician for new circuit installations, and improper work can void your charger warranty, invalidate your home insurance, and create serious fire or shock hazards. For most homeowners, professional installation is the safest and most practical choice. If you do proceed with DIY, you must still obtain permits and pass inspections.
Do I need to upgrade my electrical panel for a Sigenergy charger?
Not necessarily. If your home has a 200-amp panel with available breaker slots and sufficient remaining capacity after a load calculation, you can likely add an EV charger circuit without an upgrade. Homes with 100-amp panels or those already running near capacity with existing appliances will typically need an upgrade. A licensed electrician can perform a load calculation to determine whether your panel can handle the additional demand. The Department of Energy provides guidance on assessing your home's electrical readiness for EV charging.
How long does a Sigenergy AC charger installation take?
A straightforward installation with a short wire run from the panel to the garage typically takes a professional electrician 2 to 4 hours. More complex installations involving long conduit runs, wall fishing, panel upgrades, or outdoor mounting can take a full day or more. DIY installations generally take longer due to the learning curve and the extra care needed for safe, code-compliant work.
Does the Sigenergy charger work with solar panels?
Yes — one of Sigenergy's standout features is its native solar integration capability. When paired with a Sigenergy home battery system like the SigenStor, the AC EV charger can be configured to prioritize solar-generated electricity for vehicle charging. This means you can charge your EV with clean, free energy during peak sunlight hours. The Sigenergy app allows you to set charging schedules and solar diversion modes to maximize your renewable energy usage.
What maintenance does a Sigenergy AC EV charger require after installation?
Sigenergy AC chargers are designed for minimal maintenance. Periodic visual inspections of the charging cable, connector, and mounting hardware are recommended every few months. Keep the unit clean and free of debris, ensure firmware stays updated through the app, and have the electrical connections inspected by a professional every three to five years. If you notice any discoloration, unusual warmth, buzzing sounds, or burning smells, disconnect power immediately and contact a qualified electrician.
For more information on maintaining your EV charging setup and getting the most from your electric vehicle, explore our complete library of EV charging guides at AutoEdgeView.