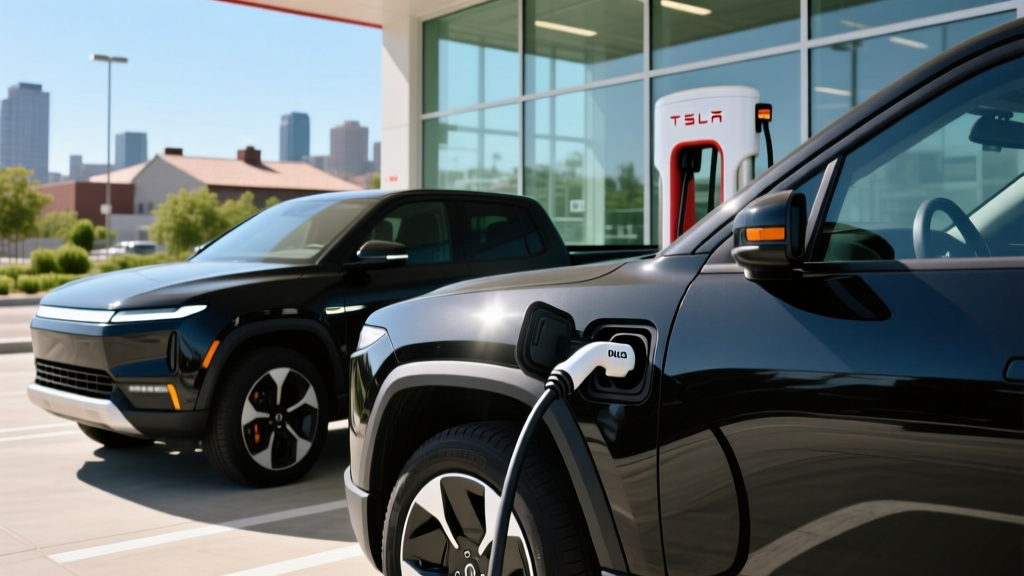
Rivian owners got a major charging upgrade starting in 2024: access to Tesla's Supercharger network via a NACS adapter. For R1T and R1S drivers, this effectively doubled the available DC fast-charging infrastructure overnight. But using a Rivian Supercharger session isn't as simple as pulling up and plugging in — there are adapter requirements, speed limitations, and cost considerations that differ from Tesla's native experience.
This guide covers everything Rivian owners need to know about charging on Tesla Superchargers, plus a full breakdown of home Level 2 installation, public charging costs, and the equipment that makes the most sense for your R1T or R1S.
How Rivian Supercharger Access Works: The NACS Adapter
Rivian vehicles (R1T and R1S, all model years) are equipped with a CCS1 (Combined Charging System) charge port. Tesla's Supercharger network uses the NACS (North American Charging Standard) connector — formerly known as the Tesla connector. To bridge this gap, Rivian partnered with Tesla to provide a NACS-to-CCS1 adapter that allows Rivian owners to charge at Supercharger stalls.
Key facts about the adapter:
- Rivian began shipping NACS adapters to existing owners in mid-2024, and all new vehicles now include one in the box.
- The adapter supports up to 250 kW of DC fast charging at V3 Superchargers — though your Rivian's actual peak charge rate depends on the model and battery pack.
- The adapter works at V3 (250 kW) and V4 Supercharger stalls. Older V2 (150 kW) stalls are also compatible but deliver slower speeds.
- Rivian's in-app navigation can now route you to Supercharger stations, and the adapter is recognized by the vehicle's charging system automatically.
Charging Levels Explained: Speeds for Rivian Owners
Understanding the three charging levels is critical for planning both daily driving and road trips. Here's how each level performs with Rivian's battery packs:
| Level | Power (kW) | Voltage | Miles of Range per Hour | Best Use Case |
|---|---|---|---|---|
| Level 1 (120V outlet) | 1.0–1.4 kW | 120V / 12–15A | 3–5 mi/hr | Emergency top-ups, overnight trickle |
| Level 2 (240V home/public) | 7.7–19.2 kW | 240V / 32–80A | 25–62 mi/hr | Daily home charging, destination charging |
| DC Fast Charging (Supercharger/EA) | 50–220 kW | 400V+ DC | 150–500+ mi/hr | Road trips, rapid top-ups |
kW vs. kWh — the critical distinction: kW (kilowatts) measures the rate of power delivery — think of it as how fast water flows through a hose. kWh (kilowatt-hours) measures the total energy capacity of your battery — the size of the tank. The Rivian R1T Dual-Motor with the Large pack has a usable capacity of approximately 128.9 kWh. Charging at 11.5 kW (Level 2) means you'd add 11.5 kWh of energy per hour.
Rivian DC Fast Charging Speeds: What to Expect at a Supercharger
Rivian's peak DC fast-charge rate varies by configuration. Here's what you'll see at a Tesla V3 Supercharger (250 kW capable) using the NACS adapter:
- R1T / R1S Dual-Motor (Large Pack, 128.9 kWh): Peaks at approximately 200–220 kW under ideal conditions. Expect a 10–80% charge in roughly 40–45 minutes.
- R1T / R1S Dual-Motor (Standard Pack, ~95 kWh LFP): Peaks around 180–190 kW. LFP chemistry allows more consistent charging at higher states of charge, so 10–80% takes roughly 35–40 minutes.
- R1T / R1S Quad-Motor (Max Pack, 149 kWh): Peaks at approximately 200 kW. The larger battery means a 10–80% charge takes around 50–55 minutes despite similar peak power.
Compared to Electrify America or other CCS networks, the Supercharger experience is generally more reliable with better uptime. However, Rivian owners using the NACS adapter may occasionally see slightly slower handshake times (the initial negotiation between vehicle and charger) compared to native Tesla vehicles — typically an extra 15–30 seconds before charging begins.
Home Level 2 Charging: Installation Costs and Electrical Requirements
Most Rivian owners do the majority of their charging at home on a Level 2 circuit. Here's what's required and what it costs.
Electrical Requirements
Rivian's onboard charger accepts up to 11.5 kW (48A at 240V) on Dual-Motor models and 19.2 kW (80A at 240V) on Quad-Motor models with the Max Pack. To get the full charge rate, you need a dedicated circuit rated for at least 25% more amperage than the continuous draw — meaning:
- For 48A charging (11.5 kW): You need a 60-amp dedicated breaker on a 240V circuit.
- For 80A charging (19.2 kW): You need a 100-amp dedicated breaker on a 240V circuit.
Many homes, especially those built before 2000, have 100A or 150A main electrical panels that may not have room for a 60A or 100A dedicated circuit. A panel upgrade to 200A is a common requirement and adds significant cost.
| Component | Cost Range | Notes |
|---|---|---|
| Level 2 EVSE (charger unit) | $350 – $750 | Varies by brand, power output, smart features |
| Electrician labor (basic install) | $500 – $1,500 | Short run from panel to garage; conduit, wiring |
| Electrical permit | $50 – $200 | Required in most jurisdictions; varies by city/county |
| Panel upgrade (if needed) | $1,500 – $4,000 | 100A → 200A service upgrade; older homes most common |
| Trenching / long wire runs | $500 – $3,000 | Detached garages, long distances from panel |
| Total (no panel upgrade) | $900 – $2,450 | Most typical scenario for modern homes |
| Total (with panel upgrade) | $2,400 – $6,450 | Older homes with insufficient service |
The IRS §30D tax credit does not cover home charger installation directly, but the separate §30C Alternative Fuel Vehicle Refueling Property Credit can cover up to 30% of charger equipment and installation costs, capped at $1,000 for residential property — subject to income limits and census-tract eligibility. Consult a tax professional for your specific situation.
What Electrical Upgrades Might You Need?
Beyond the panel itself, common upgrades include:
- Additional breaker slots: If your panel is full, a sub-panel or tandem breakers may be needed.
- GFCI protection: NEC 2020 and later require GFCI protection for EV charging circuits in garages. Some EVSEs have built-in GFCI; your electrician will advise on whether a GFCI breaker is required.
- Outdoor-rated equipment: If your charger is mounted outside (carport, driveway), the EVSE must carry a NEMA 4 or NEMA 4X rating for weather resistance.
- Load management systems: Some homes use smart load-management devices (like the Emporia Vue with EV charger integration) to dynamically limit charger draw when other high-load appliances are running, avoiding a panel upgrade.
Which Chargers Are Compatible With Rivian? Connector Guide
Rivian uses different connectors depending on the charging level. Here's a complete compatibility matrix:
| Charging Type | Rivian Port | Connector Needed | Adapter Required? |
|---|---|---|---|
| Level 1 (120V AC) | J1772 (AC portion) | Standard 120V plug → J1772 | Rivian mobile charger included |
| Level 2 (240V AC, home) | J1772 | J1772 plug | No — native fit |
| Level 2 (Tesla Wall Connector) | J1772 | NACS plug → J1772 adapter | Yes — Tesla-to-J1772 adapter (~$50–$150) |
| DC Fast (CCS stations) | CCS1 | CCS1 plug | No — native fit |
| DC Fast (Tesla Supercharger) | CCS1 | NACS plug → CCS1 adapter | Yes — Rivian NACS adapter (included) |
| DC Fast (CHAdeMO) | CCS1 | CHAdeMO → CCS1 adapter | Yes — rare, expensive (~$400+); avoid if possible |
For home Level 2 charging, any J1772 charger works natively with your Rivian. If you already own a Tesla Wall Connector, you'll need a third-party adapter — or you can simply buy a native J1772 charger and avoid the adapter entirely.
Recommended Home Chargers for Rivian R1T and R1S
Based on power output, reliability, cable length, and smart features, here are our top Level 2 picks for Rivian owners:
Emporia Level 2 EV Charger
- Power: 48A / 11.5 kW (240V)
- Connector: J1772 (native Rivian fit)
- Cable length: 24 ft
- Smart features: Wi-Fi, app scheduling, energy monitoring, solar integration
- Price: ~$399
- Best for: Budget-conscious owners who want energy tracking and solar pairing
ChargePoint Home Flex
- Power: Up to 50A / 12 kW (configurable 16–50A)
- Connector: J1772
- Cable length: 23 ft
- Smart features: Wi-Fi, Alexa, app scheduling, amperage adjustment
- Price: ~$699
- Best for: Flexible amperage settings for homes with limited panel capacity
Grizzl-E Smart
- Power: 40A / 9.6 kW (240V)
- Connector: J1772
- Cable length: 24 ft
- Smart features: OCPP-compatible, app control, built-in GFCI
- Price: ~$499
- Best for: Outdoor installs (NEMA 4X rated), extreme cold climates (-40°F rated)
Tesla Wall Connector (with adapter)
- Power: 48A / 11.5 kW (240V, hardwired)
- Connector: NACS (requires NACS-to-J1772 adapter for Rivian)
- Cable length: 24 ft
- Smart features: Wi-Fi, power sharing between units, OTA updates
- Price: ~$475 (charger) + ~$100 (adapter)
- Best for: Multi-EV households with both Tesla and Rivian vehicles
All of these chargers will fully replenish a Rivian R1T Large Pack (128.9 kWh) overnight in approximately 11–14 hours from near-empty — more than sufficient for daily use since most drivers only need to replace 30–60 kWh of daily driving.
Charging Cost Per Mile: Rivian vs. Gas Truck
One of the strongest arguments for the R1T over a gas-powered truck is fuel cost. Here's a realistic breakdown using the R1T Dual-Motor's efficiency of approximately 2.0–2.3 kWh/mile (EPA combined ~73 MPGe, per fueleconomy.gov):
| Charging/Fuel Scenario | Cost per kWh or Gallon | Rivian R1T Cost/Mile | Gas Truck Cost/Mile (20 MPG) |
|---|---|---|---|
| Home Level 2 (off-peak utility rate) | $0.12/kWh | $0.25 | — |
| Home Level 2 (average US rate) | $0.17/kWh | $0.35 | — |
| Public Level 2 (ChargePoint, etc.) | $0.30/kWh | $0.62 | — |
| DC Fast (Tesla Supercharger avg.) | $0.35/kWh | $0.72 | — |
| DC Fast (Electrify America peak) | $0.48/kWh | $0.99 | — |
| Gasoline (US avg. regular) | $3.40/gal | — | $0.17 |
| Gasoline (premium required) | $3.90/gal | — | $0.20 |
The takeaway: Home charging is dramatically cheaper than gas — roughly $0.25–$0.35/mile vs. $0.17–$0.20/mile for gas. Wait — that actually makes gas cheaper per mile? Not quite. The F-150 4WD with the 3.5L EcoBoost averages closer to 17–19 MPG combined in real-world driving, pushing cost to $0.18–$0.20/mile. The Rivian at home off-peak rates costs $0.25/mile — still slightly higher per mile than gas at current prices, but the gap narrows significantly when you factor in:
- Zero oil changes, no transmission fluid, no spark plugs
- Regenerative braking extends brake pad life to 100,000+ miles
- Lower maintenance costs overall (estimated $0.04–$0.06/mile savings)
- Potential §30D tax credit reducing purchase price by up to $7,500
On road trips using DC fast charging exclusively, the Rivian costs about $0.72–$0.99/mile — more expensive than gas. This is the trade-off for fast-charging convenience. Most owners charge at home 85–95% of the time and use DC fast charging only for road trips.
Safety, Code, and Installation Best Practices
EV charging circuits draw sustained high current for hours — this is fundamentally different from most household circuits that cycle on and off. Proper installation is non-negotiable for safety:
- Dedicated circuit: Your Level 2 charger must be on its own dedicated breaker — never shared with other appliances.
- Proper wire gauge: 60A circuits require 6 AWG copper wire (or 4 AWG aluminum). 100A circuits require 3 AWG copper or 1 AWG aluminum. Your electrician will size this correctly.
- GFCI protection: The 2020 NEC (National Electrical Code) requires GFCI protection for EVSE in garages. Some EVSEs have internal GFCI — confirm with your electrician whether a GFCI breaker is needed or if the unit's built-in protection satisfies code.
- Outdoor rating: For exterior installations, use only NEMA 4 or NEMA 4X rated equipment. All outdoor connections must use weatherproof conduit and fittings.
- Permit and inspection: Most jurisdictions require an electrical permit and post-installation inspection. Skipping this can void your homeowner's insurance in the event of an electrical fire.
- Hardwired vs. plug: Chargers rated above 40A should be hardwired (no plug/receptacle). NEMA 14-50 receptacles are rated for 50A but continuous EV draw should be limited to 40A on a plug-in circuit per NEC 80% rules.
Frequently Asked Questions
How much does it cost to install a home EV charger for my Rivian?
A typical Level 2 home installation runs $900–$2,450 if your electrical panel has sufficient capacity. If you need a panel upgrade from 100A to 200A service, expect a total of $2,400–$6,450. The §30C federal tax credit may cover up to 30% of equipment and installation costs (capped at $1,000) — check current-year eligibility with a tax professional.
Can I use any Tesla Supercharger with my Rivian?
Yes, with the Rivian-provided NACS adapter. All V3 (250 kW) and V4 Superchargers are compatible. V2 (150 kW) stalls also work but charge more slowly. The Rivian app and navigation system can route you to Supercharger stations as of 2024 software updates.
How fast will a Supercharger charge my R1T?
With the Large Pack (128.9 kWh), expect peak rates of 200–220 kW and a 10–80% charge in approximately 40–45 minutes. Real-world speed depends on battery temperature (cold packs charge slower — use preconditioning), current state of charge, and whether the Supercharger stall is shared with another vehicle.
Does my Rivian need preconditioning before Supercharger stops?
Yes. Rivian's navigation system will automatically begin battery preconditioning when you navigate to a charging station. This warms the battery to optimal temperature for faster charging. In cold weather (below 40°F), preconditioning can reduce your 10–80% time by 10–15 minutes. Always navigate to the charger rather than just driving there.
What's the real-world range of the R1T on a road trip using Superchargers?
The R1T Dual-Motor Large Pack carries an EPA range of 352 miles. In real-world highway driving at 70–75 mph, expect 280–310 miles. In cold weather (below freezing), that drops to 240–270 miles. Plan Supercharger stops every 200–250 miles on road trips for a comfortable buffer.
Is it cheaper to charge at home or at Superchargers?
Home charging is 2–4x cheaper per mile than Supercharging. At $0.12/kWh off-peak home rates, you'll pay ~$0.25/mile. At $0.35/kWh Supercharger rates, that jumps to ~$0.72/mile. Reserve DC fast charging for road trips and charge at home whenever possible to minimize costs.