Introduction: Installing Your Ohme EV Charger at Home
The Ohme EV charger has quickly become one of the most popular smart home charging solutions for electric vehicle owners. Known for its intelligent scheduling, energy price optimization, and compact design, the Ohme charger delivers a seamless charging experience — but only if it's installed correctly. Whether you've just unboxed your new Ohme Home Pro or Ohme ePod, having the right installation manual and a clear understanding of the setup process is essential for safety, compliance, and long-term reliability.
In this comprehensive guide, we walk you through everything you need to know about the Ohme EV charger installation manual PDF download, including where to find official documentation, what the installation process involves, whether you can tackle it as a DIY project, and what costs to expect. We also cover permitting, inspection requirements, common troubleshooting scenarios, and expert safety tips backed by industry standards.
Difficulty Level: Advanced (Electrical work required — professional installation strongly recommended)
Estimated Cost: $500 – $1,500 (including charger unit, electrical upgrades, and professional labor)
Time Required: 2 – 5 hours for a certified electrician
Before diving into the installation steps, make sure you explore our complete EV charger installation guide for general background on home charging setups, and check out our Ohme Home Pro review for an in-depth look at the charger's features and performance.
Understanding the Ohme EV Charger: Requirements & Specifications
Before you download the Ohme EV charger installation manual PDF or schedule an electrician, it's important to understand the electrical and physical requirements for your specific Ohme model. Ohme currently offers two primary home charging units, each with distinct installation needs.
Ohme Home Pro Specifications
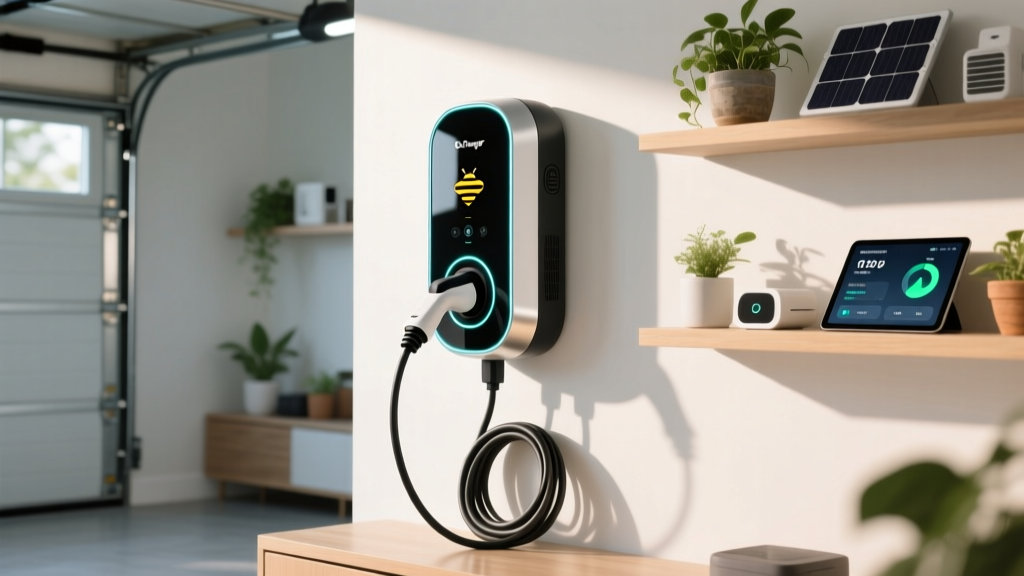
The Ohme Home Pro is a tethered smart charger featuring a Type 2 cable (or Type 1 in certain markets). It supports single-phase charging at up to 7.4 kW (32A) and connects via Wi-Fi and 4G for smart scheduling features. Key installation requirements include:
- Electrical Supply: 230V single-phase (standard in most UK and European homes)
- Circuit Rating: Minimum 40A dedicated circuit breaker (MCB)
- Cable Size: Minimum 6mm² twin and earth cable (10mm² recommended for longer cable runs)
- Mounting: Wall-mounted, suitable for indoor or outdoor installation (IP54 rated)
- Wi-Fi Connectivity: 2.4 GHz network required for smart features
- Earth Rod: Built-in open PEN fault detection — no separate earth rod required in most installations
Ohme ePod Specifications
The Ohme ePod is a more compact, untethered unit designed for homeowners who prefer a minimalist installation. It shares the same 7.4 kW charging capability but requires users to provide their own Type 2 cable. Installation requirements are largely identical to the Home Pro, with the added consideration that the ePod's smaller form factor offers more flexibility in placement.
Pre-Installation Checklist
Before beginning any installation work, ensure you have the following ready:
- Your Ohme charger unit and all included mounting hardware
- The official Ohme installation manual PDF (download link provided below)
- Access to your consumer unit (fuse box) with at least two spare ways
- A suitable mounting location within 5 meters of your parking position
- Confirmation that your property's main supply can handle the additional load (typically 60A – 100A main fuse)
- Any required permits or notifications as per your local electrical regulations
For a deeper comparison of charger specifications across brands, visit our best home EV chargers comparison guide.
How to Download the Ohme EV Charger Installation Manual PDF
Ohme provides official installation documentation through multiple channels. Here's how to access the installation manual PDF for your specific charger model:
Official Ohme Website
The most reliable source for the latest version of the Ohme installation manual is the Ohme support page. Navigate to the support or documentation section, select your charger model (Home Pro or ePod), and download the installation guide PDF directly. Ohme periodically updates these documents, so always verify you have the most current revision before beginning work.
Ohme App Documentation
When you first set up the Ohme app on your smartphone, the onboarding process includes links to relevant installation and user documentation. The app also provides firmware update notes and supplementary setup guides that complement the physical installation manual.
What's Included in the Installation Manual PDF
The official Ohme installation manual PDF typically includes:
- Wiring diagrams for single-phase installations
- Mounting template and dimensions
- Step-by-step wiring instructions for the consumer unit connection
- Configuration procedures for DIP switches and current settings
- Commissioning checklist for installers
- Earth fault protection setup and testing procedures
- Wi-Fi and app pairing instructions
- Troubleshooting flowcharts for common installation issues
According to guidelines published by the U.S. Department of Energy's home charging resources, always review the manufacturer's complete installation documentation before attempting any EV charger setup, as specifications can vary between firmware versions and hardware revisions.
Step-by-Step Ohme EV Charger Installation Guide
The following step-by-step guide outlines the standard installation procedure for an Ohme Home Pro or ePod charger. This work must be performed or supervised by a qualified electrician in compliance with local electrical codes.
Step 1: Site Survey & Planning
Begin by identifying the optimal mounting location. The charger should be positioned:
- On a structurally sound external or garage wall
- Within comfortable reach of your vehicle's charging port
- At a height of approximately 1.2 to 1.5 meters from ground level
- Away from areas prone to physical impact or standing water
- Within effective range of your home Wi-Fi network (for smart features)
Use the mounting template provided in the installation manual PDF to mark drill points. Ensure there is adequate clearance around the unit for ventilation and cable routing.
Step 2: Electrical Circuit Installation
Your electrician will run a dedicated circuit from your consumer unit to the charger location. This involves:
- Installing a dedicated MCB (Miniature Circuit Breaker): A 40A Type B MCB is typically required for the Ohme charger. This protects the circuit from overcurrent conditions.
- Routing the supply cable: A minimum 6mm² SWA (Steel Wire Armoured) cable is used for external installations, routed through conduit or clipped directly to the wall surface. For cable runs exceeding 15 meters, 10mm² cable is recommended to minimize voltage drop.
- Installing an isolation switch: A weatherproof isolation switch should be installed adjacent to the charger for maintenance purposes, as required by most electrical codes.
- Connecting to the consumer unit: The circuit is connected to an available way in your consumer unit, ensuring the total load does not exceed your property's main fuse rating.
Step 3: Mounting the Charger
With the circuit in place, the charger unit is mounted to the wall using the supplied fixing brackets and hardware. The installation manual PDF provides a precise drilling template to ensure proper alignment. Key considerations include:
- Use appropriate wall fixings for your wall type (masonry, brick, or stud wall)
- Ensure the unit is level and securely fastened
- Route the supply cable through the designated cable entry point on the charger
Step 4: Wiring & Termination
The electrician will terminate the supply cable inside the Ohme charger following the wiring diagram in the installation manual. This includes connecting live, neutral, and earth conductors to their respective terminals, ensuring all connections are torqued to the manufacturer's specifications. The built-in PEN fault detection system eliminates the need for a separate earth rod in most TN-C-S (PME) supply installations.
Step 5: Configuration & Commissioning
Once physically installed, the charger must be configured:
- Set the maximum current: Using the DIP switches or app configuration, set the charger to match the circuit rating (typically 32A for a 40A circuit).
- Power on the unit: Switch on the MCB and isolation switch, verifying that the charger powers up correctly.
- Connect to Wi-Fi: Using the Ohme app, pair the charger with your home network to enable smart scheduling and firmware updates.
- Test the charge: Plug in your EV and verify that charging initiates correctly. Monitor the first full charge cycle for any anomalies.
- Complete the commissioning certificate: Your electrician should issue an electrical installation certificate documenting the work performed and test results.
For more details on how different EVs interact with home chargers, read our EV charging compatibility guide.
Permits, Inspections & Regulatory Compliance
EV charger installations are subject to electrical regulations in virtually every jurisdiction. Understanding the permitting and inspection requirements in your area is critical to ensuring your installation is legal, safe, and insurable.
United Kingdom Requirements
In the UK, EV charger installations fall under Part P of the Building Regulations for England and Wales. If you use an installer registered with a competent person scheme (such as NICEIC, NAPIT, or STROMA), they can self-certify the work and notify your local building control authority on your behalf. You should receive an Electrical Installation Certificate (EIC) and, if applicable, a Building Regulations Compliance Certificate within 30 days of completion.
Additionally, UK installations must comply with BS 7671 (IET Wiring Regulations), which mandates specific protections for EV charging circuits, including RCD protection (Type A or Type B depending on the charger's built-in protections) and adherence to Section 722 requirements for electric vehicle charging installations.
United States Requirements
In the U.S., the National Electrical Code (NEC) Article 625 governs EV charging system installations. Key requirements include:
- A dedicated branch circuit with appropriate overcurrent protection
- GFCI protection for outdoor installations
- Proper grounding per NEC Article 250
- A building permit in most municipalities, followed by a final inspection
Many U.S. jurisdictions now require permits specifically for EV charger installations, and failing to obtain one can result in fines, insurance complications, or difficulties when selling your property.
Notifying Your Distribution Network Operator (DNO)
In the UK, your installer is required to notify your local Distribution Network Operator (DNO) of the EV charger installation. This can be done either before installation (if your property's main fuse is close to capacity) or within 28 days of completion. The DNO needs to ensure the local electricity network can accommodate the additional load.
DIY vs. Professional Installation: What You Need to Know
One of the most common questions EV owners ask is whether they can install an Ohme charger themselves. The short answer is: professional installation is strongly recommended, and in many cases, legally required.
Why Professional Installation Is Recommended
EV charger installation involves high-voltage electrical work that carries significant risks if performed incorrectly. Here's why hiring a certified electrician is the wise choice:
- Safety: Working with 230V/240V circuits poses a serious risk of electric shock, fire, or equipment damage without proper training and tools.
- Code Compliance: Certified electricians understand local electrical codes and ensure your installation meets all regulatory requirements.
- Warranty Protection: Ohme's warranty may be voided if the charger is not installed by a qualified professional. The installation manual explicitly states that installation should be carried out by a competent person.
- Insurance Coverage: Most home insurance policies require electrical work to be performed and certified by qualified professionals. A DIY installation could invalidate your coverage in the event of an electrical fire.
- Grant Eligibility: Government EV charger grants and incentives typically require installation by an approved installer to qualify.
When DIY Might Be Acceptable
The only scenario where partial DIY involvement might be appropriate is if you are a qualified electrician yourself. Even then, you must still comply with all notification, certification, and inspection requirements in your jurisdiction. For the vast majority of homeowners, the risks and potential costs of a botched installation far outweigh any savings from attempting a DIY approach.
Finding a Qualified Ohme Installer
Ohme maintains a network of approved installers who are specifically trained on their products. You can find certified installers through the Ohme website or through approved installer schemes in your country. When selecting an installer, verify their credentials, read reviews, and request a detailed quote that includes all materials, labor, and certification costs.
Need help choosing the right charger for your home? Our home EV charger buying guide breaks down the top options available.
Ohme EV Charger Installation Cost Breakdown
Understanding the full cost of installing an Ohme EV charger helps you budget effectively and avoid unexpected expenses. Below is a detailed breakdown of typical installation costs.
| Item | Estimated Cost | Notes |
|---|---|---|
| Ohme Home Pro (unit only) | $400 – $550 | Price varies by retailer and promotions |
| Ohme ePod (unit only) | $350 – $450 | Untethered — cable sold separately |
| Professional installation labor | $300 – $600 | Standard installation, 2-4 hours |
| Cable & materials | $50 – $200 | Depends on cable run length and routing complexity |
| Consumer unit upgrade | $200 – $800 | Required if no spare ways or insufficient capacity |
| Main fuse upgrade | $300 – $1,500 | DNO coordination required; may be free in some areas |
| Permit & certification fees | $50 – $200 | Varies by local authority |
Total Estimated Cost: For a standard installation with no major electrical upgrades, expect to pay between $800 and $1,500 all-inclusive (charger unit plus professional installation). Properties requiring consumer unit upgrades or main fuse replacements may see costs rise to $2,000 or more.
Many governments offer grants, tax credits, or utility rebates that can offset a significant portion of these costs. Check our EV charging incentives and rebates guide for current programs in your area.
Safety Tips & Best Practices for Ohme Charger Installation
Safety should always be the top priority when installing any electrical equipment. The following tips are drawn from manufacturer documentation, the U.S. Department of Energy's EV charging safety guidelines, and industry best practices.
Before Installation
- Turn off all power: Ensure the main switch at your consumer unit is turned off before any work begins. Use a voltage tester to confirm circuits are dead.
- Assess your electrical capacity: Have your electrician perform a maximum demand calculation to confirm your property's supply can handle the additional 7.4 kW load without overloading the main fuse.
- Check for existing issues: Address any pre-existing electrical problems (such as outdated wiring, missing RCDs, or overloaded circuits) before adding an EV charger to the system.
During Installation
- Use the correct cable sizes: Undersized cables can overheat and cause fires. Always follow the cable sizing table in the Ohme installation manual PDF.
- Ensure proper earthing: Verify that your property's earthing arrangement is suitable for EV charging. The Ohme charger's built-in open PEN detection provides an additional layer of protection, but the fundamental earthing must be sound.
- Maintain clearances: Keep the installation area clear of combustible materials and ensure adequate ventilation around the charger unit.
- Secure all connections: Loose connections are a leading cause of electrical fires. All terminations should be tightened to the manufacturer's specified torque values.
After Installation
- Test thoroughly: Your electrician should perform all required tests, including earth loop impedance, RCD trip times, and polarity checks, documenting results on the installation certificate.
- Register your charger: Register your Ohme charger on the Ohme app and create an account to receive firmware updates and safety notifications.
- Schedule periodic inspections: Have your EV charging installation inspected every 3–5 years, or sooner if you notice any issues such as unusual warmth, buzzing sounds, or intermittent charging failures.
- Keep documentation safe: Store your installation certificate, commissioning report, and the Ohme installation manual PDF in a safe place for future reference, insurance purposes, or property sales.
Troubleshooting Common Ohme Charger Installation Issues
Even with professional installation, you may encounter some issues during or after setup. Here are the most common problems and their solutions.
Charger Not Powering On
If your Ohme charger shows no signs of life after installation:
- Verify that the MCB and isolation switch are both in the ON position
- Check that the supply cable connections are secure at both the consumer unit and charger terminals
- Test the circuit with a multimeter to confirm voltage is reaching the charger
- Inspect the charger's internal fuse (if applicable) as indicated in the installation manual
Wi-Fi Connection Failures
Smart features require a stable Wi-Fi connection. If your Ohme charger won't connect:
- Ensure your router broadcasts a 2.4 GHz signal (the Ohme charger does not support 5 GHz networks)
- Check signal strength at the charger location — consider a Wi-Fi extender if the signal is weak
- Verify your network password and ensure MAC address filtering is not blocking the charger
- The Ohme charger also has a built-in 4G connection as a backup in areas with poor Wi-Fi coverage
Charging Starts Then Stops Immediately
This issue is often related to the vehicle or communication between the charger and car:
- Ensure the charging cable is fully seated in both the charger and vehicle
- Check for any error codes displayed on the Ohme app or charger LED indicator
- Verify that the charger's maximum current setting matches the circuit rating
- Test with a different EV if possible to isolate whether the issue is with the charger or vehicle
Earth Fault Errors
If the charger reports an earth fault:
- Have your electrician re-test the earth loop impedance at the charger location
- Verify that the PEN conductor in your supply is intact and properly connected
- Check for any neutral-earth faults elsewhere on the installation that may be causing the charger's protection to trip
- Consult the troubleshooting flowchart in the Ohme installation manual PDF for model-specific diagnostic steps
Charger Getting Warm During Use
Some warmth is normal during charging, but excessive heat indicates a problem:
- Verify that cable connections are properly torqued — loose connections generate heat
- Ensure the cable size is adequate for the load and cable run length
- Check that the charger is not mounted in direct sunlight or an enclosed space without ventilation
- If the charger or cable feels uncomfortably hot, stop charging immediately and contact your installer
For additional help with charging issues across different EV models, see our comprehensive EV charging troubleshooting guide.
Frequently Asked Questions
Where can I download the official Ohme EV charger installation manual PDF?
The official Ohme installation manual PDF can be downloaded from the Ohme support website. Navigate to the documentation section, select your charger model (Home Pro or ePod), and download the latest version of the installation guide. You can also find documentation links within the Ohme mobile app during the initial setup process. Always ensure you have the most recent revision, as Ohme periodically updates their manuals to reflect hardware and firmware changes.
Can I install the Ohme EV charger myself without an electrician?
While technically possible for a qualified electrician to self-install, Ohme strongly recommends that installation be carried out by a certified professional. In most jurisdictions, EV charger installation is notifiable work that must comply with local electrical codes such as BS 7671 in the UK or NEC Article 625 in the United States. Attempting a DIY installation without proper qualifications can result in safety hazards, voided warranties, invalidated home insurance, and potential legal liability. The cost of professional installation is a worthwhile investment in safety and compliance.
Does the Ohme charger require a separate earth rod?
In most cases, no. The Ohme Home Pro and ePod both feature built-in open PEN (Protective Earth and Neutral) fault detection technology. This means that on TN-C-S (PME) supply systems — which is the standard earthing arrangement in most modern properties — a separate earth rod is not required. The charger continuously monitors the integrity of the PEN conductor and will disconnect the supply if a fault is detected. However, if your property uses a TT earthing system (common in rural areas), your electrician may need to install an earth electrode. The Ohme installation manual PDF provides detailed guidance for both scenarios.
How long does a typical Ohme charger installation take?
A standard Ohme charger installation typically takes between 2 and 4 hours when performed by a qualified electrician. This includes running the dedicated circuit from the consumer unit, mounting the charger, making all electrical connections, configuring the unit, and performing the required safety tests. Installations that require consumer unit upgrades, long cable runs through difficult-to-access areas, or main fuse replacements may take 5 hours or more and could require a return visit. It's best to allocate a half-day for the installation to avoid feeling rushed.
What should I do if I lose my Ohme installation manual?
If you've misplaced your physical installation manual or need to re-download the PDF, visit the Ohme support website and navigate to the documentation downloads section. You can also contact Ohme's customer support team directly through the app or via email to request a copy. It's good practice to save a digital copy of the installation manual PDF to your device or cloud storage immediately after downloading it, ensuring you always have access when needed for maintenance, troubleshooting, or future electrical inspections.
Final Thoughts
Installing an Ohme EV charger is a straightforward process when handled by a qualified professional, and having the official installation manual PDF on hand ensures that every step is performed to the manufacturer's exact specifications. From understanding the electrical requirements and downloading the correct documentation to navigating permits, costs, and safety considerations, proper preparation is the key to a successful installation that will serve you reliably for years to come.
Whether you choose the feature-rich Ohme Home Pro or the compact ePod, investing in professional installation protects your safety, your warranty, and your home's electrical integrity. Download the latest installation manual from Ohme's official support channels, connect with a certified installer, and start enjoying the convenience and cost savings of smart home EV charging.
Ready to explore more? Browse our EV charger reviews for detailed comparisons, or visit our charging guides hub for expert advice on every aspect of electric vehicle charging at home and on the road.