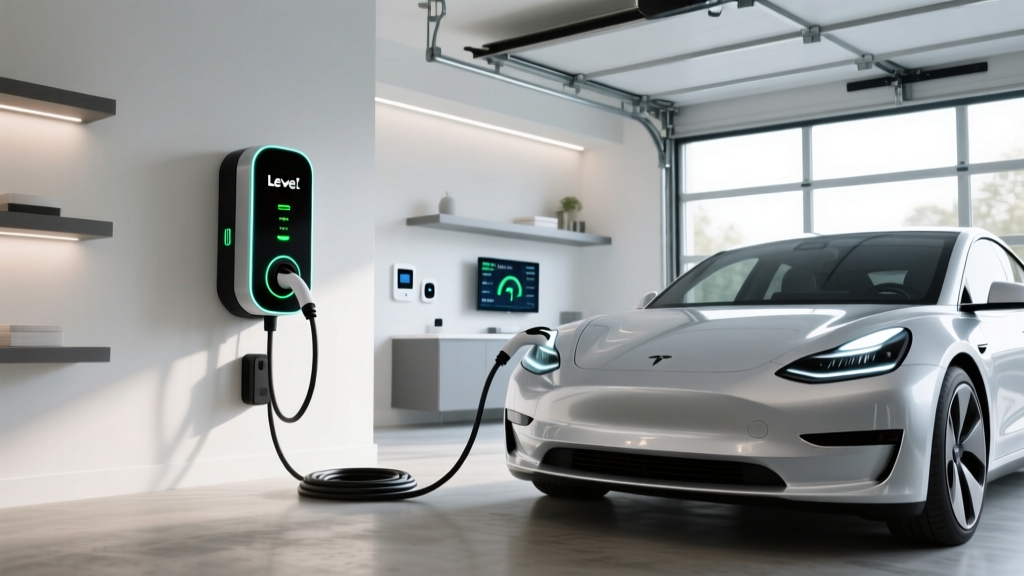
Installing a home electric vehicle charger is one of the smartest upgrades any EV owner can make. The Masterplug EV charger has become a popular choice among drivers looking for a reliable, affordable, and easy-to-use Level 2 charging solution. Whether you have just purchased your first electric vehicle or are upgrading from a basic Level 1 trickle charger, this comprehensive Masterplug EV charger installation guide will walk you through every step of the process — from assessing your electrical panel to flipping the breaker for your very first charge.
Difficulty Level: Moderate to Advanced (electrical work required)
Estimated Cost: $300–$1,200 depending on electrical upgrades needed
Estimated Time: 2–6 hours for a professional installation
Before diving in, it is important to understand that installing a Level 2 EV charger involves working with high-voltage electrical circuits. While some experienced DIYers may handle portions of the preparation, the National Electrical Code (NEC) and most local jurisdictions require that hardwired 240-volt installations be performed or inspected by a licensed electrician. Safety should always be your top priority.
Requirements & Prerequisites for Masterplug EV Charger Installation
Before you unbox your Masterplug EV charger or call an electrician, you need to verify that your home electrical system can support the additional load. Here is a complete checklist of requirements and prerequisites.
Electrical Panel Capacity
The first and most critical step is evaluating your home's electrical service panel. Most modern homes have a 100-amp or 200-amp main service panel. A Masterplug Level 2 EV charger typically requires a dedicated 240-volt circuit rated between 32 amps and 48 amps, depending on the specific model. According to the U.S. Department of Energy, you should ensure your panel has enough spare capacity to handle the continuous load of an EV charger without overloading existing circuits.
To calculate available capacity, add up the amperage of all existing breakers in your panel. If the total approaches or exceeds your main breaker rating, you may need a panel upgrade before installation can proceed. A licensed electrician can perform a load calculation to determine whether your panel can accommodate the new circuit.
Circuit Breaker & Wiring Specifications
The NEC requires that EV charging circuits be rated at 125% of the charger's maximum continuous draw. For example, if your Masterplug charger draws 32 amps continuously, you will need a 40-amp breaker. For a 40-amp charger, a 50-amp breaker is required. The wiring gauge must match the breaker size:
- 40-amp circuit: 8 AWG copper wire (minimum)
- 50-amp circuit: 6 AWG copper wire (minimum)
- 60-amp circuit: 4 AWG copper wire (minimum)
Your installation will also require a properly rated NEMA outlet (typically NEMA 14-50 or NEMA 6-50) if you choose the plug-in version of the Masterplug charger, or direct hardwiring to a junction box for the hardwired model. Check out our EV charger plug types explained guide for a detailed breakdown of connector standards.
Location & Mounting Considerations
Choose a mounting location that meets these criteria:
- Within reach of your vehicle's charge port (the Masterplug cable is typically 18–25 feet)
- Mounted on a structurally sound wall (studs or masonry)
- Protected from direct water exposure unless the unit is rated for outdoor use
- Away from high-traffic areas where the cable could become a tripping hazard
- Close to the electrical panel to minimize wiring runs and reduce material costs
Wi-Fi & Smart Features
Many Masterplug EV chargers include smart features such as scheduling, energy monitoring, and remote control via a mobile app. If your model supports Wi-Fi connectivity, ensure that your home wireless network reaches the garage or installation location. A Wi-Fi extender may be necessary if the signal is weak.
Step-by-Step Masterplug EV Charger Installation
With your prerequisites confirmed, you are ready to begin the installation. The following steps outline a typical installation for a plug-in Masterplug EV charger using a NEMA 14-50 outlet. Hardwired installations follow a similar process but terminate directly at a junction box instead of an outlet.
Step 1: Turn Off Main Power
Locate your main electrical panel and switch the main breaker to the OFF position. Use a non-contact voltage tester to confirm that power is completely de-energized before touching any wiring. Never skip this step — working on a live panel can be fatal.
Step 2: Install the Dedicated Circuit Breaker
Remove the panel cover and identify an available slot that matches the breaker type your panel accepts (common types include Square D Homeline, Siemens, Eaton BR, and GE). Snap the new double-pole breaker into the slot and connect the hot wires. The breaker must be rated appropriately for your Masterplug charger model, as described in the requirements section above.
Step 3: Run the Cable
Run the appropriately gauged cable (typically NM-B, SER, or MC cable depending on local code requirements) from the electrical panel to the outlet or junction box location near your charger mounting point. Use cable staples or conduit as required by the National Electrical Code. If the run passes through unfinished areas, conduit protection may be mandatory.
For runs longer than 50 feet, consider upsizing the wire gauge by one step to minimize voltage drop, which can reduce charging efficiency and potentially damage the charger over time.
Step 4: Install the NEMA Outlet or Junction Box
For plug-in installations, mount a heavy-duty NEMA 14-50 or NEMA 6-50 receptacle in an appropriately rated electrical box. Ensure the outlet orientation matches your Masterplug charger's plug configuration. Tighten all terminal screws to the manufacturer's specified torque values — loose connections are a leading cause of overheating and electrical fires.
For hardwired installations, mount a junction box at the charger location and connect the circuit wires to the charger's internal wiring terminals following the Masterplug installation manual.
Step 5: Mount the Charger Unit
Using the mounting template included with your Masterplug EV charger, mark the screw holes on the wall. Drill pilot holes into wall studs or use appropriate masonry anchors for concrete walls. Secure the mounting bracket firmly, then hang the charger unit on the bracket. Route the cable neatly using the integrated cable management system if your model includes one.
Step 6: Restore Power & Test
Replace the electrical panel cover, restore the main breaker, then switch on the new dedicated EV charger breaker. The Masterplug unit should power on and display its startup sequence. Plug the connector into your vehicle and verify that charging initiates correctly. Check the charger's indicator lights or mobile app to confirm proper operation.
If your model supports smart features, connect it to your Wi-Fi network and complete the initial setup through the companion app. Configure any scheduling preferences, charging limits, or energy monitoring settings to match your utility rate plan.
Permits, Inspections & Code Compliance
Electrical work in most jurisdictions requires a permit, and EV charger installations are no exception. Failing to obtain the proper permits can result in fines, voided insurance coverage, and problems when selling your home.
When Is a Permit Required?
In most municipalities, any new 240-volt circuit installation requires an electrical permit. Some areas have simplified the process for EV charger installations, offering expedited or online permit applications. Contact your local building department to determine the specific requirements in your area.
The Inspection Process
After installation, a licensed electrical inspector will visit your home to verify that the work complies with the NEC and local amendments. The inspector will check:
- Correct breaker sizing and wire gauge
- Proper grounding and bonding
- Adequate working clearance around the panel and charger
- GFCI protection where required by code
- Correct torque on all terminal connections
- Proper cable securing and protection
Some jurisdictions allow the inspection to be scheduled online and completed within a few business days. Keep a copy of the passed inspection report for your records — it may be required to claim federal or state EV charging tax credits and rebates.
NEC Article 625: Electric Vehicle Charging System Equipment
The NEC dedicates Article 625 specifically to EV charging installations. Key provisions include requirements for disconnecting means, ventilation (for indoor installations of certain equipment types), and interactive systems. A qualified electrician will be familiar with these requirements and ensure your installation is fully compliant. Refer to the NFPA NEC resource page for the most current code language.
DIY Installation vs. Hiring a Professional Electrician
One of the most common questions EV owners ask is whether they can install a Masterplug EV charger themselves. The honest answer depends on your experience level, local regulations, and risk tolerance.
When DIY Makes Sense
If your home already has a properly rated 240-volt outlet (such as a NEMA 14-50 installed for a dryer, welder, or previous EV charger) near your desired charging location, the installation may be as simple as mounting the charger on the wall and plugging it in. In this scenario, no electrical panel work is required, and many homeowners can handle the mounting and Wi-Fi setup on their own.
Some jurisdictions also allow homeowners to perform their own electrical work if they pull the required permits and pass inspection. However, this varies widely by location, so check with your local building department first.
When to Hire a Professional
You should hire a licensed electrician if any of the following apply:
- Your electrical panel needs a new breaker or circuit run
- Your panel is at or near capacity and may need an upgrade
- The wiring run is long, complex, or requires conduit
- You are unfamiliar with electrical work or local code requirements
- Your jurisdiction requires licensed professionals for 240-volt work
- You want to qualify for utility rebates that require professional installation
A professional electrician will carry liability insurance, guarantee their work, and ensure the installation passes inspection on the first attempt. For more context on choosing the right charger for your setup, see our best home EV chargers roundup.
Masterplug EV Charger Installation Cost Breakdown
Understanding the total cost of installation helps you budget appropriately and avoid surprises. Here is a detailed breakdown of typical expenses.
Equipment Costs
- Masterplug EV Charger Unit: $350–$600 depending on model and amperage
- Circuit Breaker: $15–$50
- Wire (per foot): $3–$8 depending on gauge and type
- NEMA Outlet & Box: $25–$60
- Conduit & Fittings: $50–$150 (if required)
- Mounting Hardware: Usually included with the charger
Labor Costs
- Simple Installation (short run, panel nearby): $300–$500
- Moderate Installation (longer run, conduit required): $500–$800
- Complex Installation (panel upgrade, trenching, long conduit run): $800–$2,000+
Permit & Inspection Fees
Electrical permits typically cost between $50 and $200 depending on your municipality. Some areas waive permit fees for EV charger installations as an incentive to encourage electric vehicle adoption.
Electrical Panel Upgrade (If Needed)
If your existing panel lacks capacity, upgrading from a 100-amp to a 200-amp service typically costs between $1,500 and $3,000. While this is a significant expense, it adds value to your home and supports future electrical loads such as solar panels, heat pumps, or additional EV chargers.
Available Incentives & Rebates
Many utility companies, state governments, and federal programs offer rebates or tax credits that can offset a significant portion of your installation cost. Check with your local utility provider and review the Department of Energy's EV charging incentives page to see what programs are available in your area.
Safety Tips & Best Practices
Electric vehicle chargers handle substantial electrical power on a daily basis. Following these safety guidelines will protect your home, your vehicle, and your family.
Use a Dedicated Circuit
Never share the EV charger circuit with other appliances or outlets. A dedicated circuit ensures that the charger receives consistent power and eliminates the risk of overloading a shared circuit, which could trip breakers or cause overheating.
Inspect Cables & Connectors Regularly
Periodically examine the charging cable, connector, and plug for signs of wear, cracking, discoloration, or heat damage. If you notice any abnormalities, stop using the charger immediately and contact Masterplug support or a qualified electrician for assessment.
Ensure Proper Grounding
A properly grounded circuit is essential for safe EV charging. Your electrician should verify ground continuity during installation and test the ground fault protection if your charger or circuit includes GFCI functionality.
Avoid Extension Cords
Never use an extension cord with your Masterplug EV charger. Extension cords introduce additional resistance, potential points of failure, and are not rated for the sustained high-current draw that EV charging requires. If the cable does not reach your vehicle, relocate the charger or have an electrician move the outlet.
Install Surge Protection
Consider installing a whole-home surge protector at your electrical panel. This device protects sensitive electronics — including your EV charger and vehicle's onboard charging system — from voltage spikes caused by lightning strikes or utility grid fluctuations.
Keep the Area Clear & Dry
Maintain clear space around the charger and keep the area free from flammable materials, standing water, and debris. If your charger is installed outdoors, ensure it is rated for outdoor use and that all weatherproof enclosures and seals are intact.
Troubleshooting Common Masterplug EV Charger Issues
Even a properly installed charger may occasionally encounter issues. Here are solutions to the most common problems Masterplug EV charger owners experience.
Charger Will Not Power On
Verify that the circuit breaker is in the ON position. Check for tripped GFCI outlets upstream of the charger. Use a multimeter to confirm that 240 volts are present at the outlet or junction box. If power is present but the unit remains off, the charger's internal electronics may require service.
Charging Starts but Stops Intermittently
Intermittent charging can be caused by loose connections at the outlet, breaker, or vehicle charge port. Have an electrician check and retorque all connections. Wi-Fi connectivity issues can also cause smart chargers to pause sessions — try moving your router closer or adding a Wi-Fi extender.
Charging Speed Is Slower Than Expected
If your vehicle is charging slower than the Masterplug charger's rated output, check whether your vehicle's onboard charger is the bottleneck. Some EVs have onboard chargers limited to 6.6 kW or 7.2 kW, which caps charging speed regardless of the charger's capacity. Additionally, verify that the circuit breaker and wire gauge are properly matched to the charger's output rating.
Error Codes or Fault Indicator Lights
Consult the Masterplug user manual for specific error code definitions. Common fault indicators relate to ground faults, over-temperature conditions, or communication errors with the vehicle. Resetting the charger by cycling the circuit breaker off for 30 seconds and back on often clears transient faults.
Vehicle Does Not Recognize Charger
Ensure the connector is fully seated in the vehicle's charge port. Some vehicles require the connector to be inserted firmly until a click is heard. Check for debris or corrosion in the vehicle's charge port. If the issue persists across multiple vehicles, the charger's control pilot signal may be faulty.
Frequently Asked Questions
Can I install a Masterplug EV charger myself without an electrician?
If you already have a properly rated 240-volt NEMA 14-50 or 6-50 outlet in your garage, you can mount the charger and plug it in yourself. However, any new circuit installation, panel work, or hardwired setup should be performed by a licensed electrician. Most local building codes require permits and professional installation for new 240-volt circuits, and improper work can create serious fire hazards and void your home insurance coverage.
What size breaker do I need for a Masterplug EV charger?
The breaker size depends on the specific Masterplug model you are installing. Per the NEC, the breaker must be rated at 125% of the charger's maximum continuous current draw. A 32-amp charger requires a 40-amp breaker, a 40-amp charger requires a 50-amp breaker, and a 48-amp charger requires a 60-amp breaker. Always refer to the installation manual included with your specific model for the exact specifications.
How long does a Masterplug EV charger installation take?
A straightforward installation with a short wiring run from a nearby electrical panel typically takes a professional electrician two to three hours. More complex installations involving long conduit runs, panel upgrades, or trenching for detached garages can take four to eight hours or more. If a panel upgrade is required, the total project may span one to two days.
Do I need a permit to install an EV charger at home?
In most jurisdictions, yes. Any new 240-volt electrical circuit requires a permit and subsequent inspection to ensure code compliance. The permit process protects you by ensuring the work meets safety standards. Some areas have streamlined the permitting process for EV charger installations. Contact your local building department for specific requirements in your area, and be sure to keep your permit documentation for potential tax credit or rebate claims.
Will installing a Masterplug EV charger increase my electric bill significantly?
Your electric bill will increase based on how much you drive and charge, but the cost of home charging is generally far less than paying for gasoline. On average, home EV charging costs between $0.10 and $0.20 per kWh depending on your local utility rates, which translates to roughly $3 to $6 for a full charge on a typical EV battery. Many utilities offer time-of-use rates that provide discounted electricity during off-peak hours, allowing you to schedule charging sessions overnight for maximum savings. Explore our guide to EV charging costs at home for detailed calculations and money-saving strategies.
Installing a Masterplug EV charger is a worthwhile investment that adds convenience, increases your home's value, and ensures you always start each day with a full battery. By following this guide, working with qualified professionals where needed, and adhering to all safety and code requirements, you will enjoy reliable home charging for years to come. For more information on selecting the right charger for your vehicle, browse our complete collection of EV charging guides and charger reviews.