How Much Does It Cost to Install an EV Charger? Complete Home Installation Guide
Switching to an electric vehicle is one of the most impactful decisions you can make for your wallet and the environment. But once you bring that EV home, a critical question arises: how much does it cost to install an EV charger? The answer depends on several variables, from your home's existing electrical infrastructure to the type of charger you choose. This comprehensive guide breaks down every cost factor so you can budget confidently and make informed decisions.
Quick Overview
Difficulty Level: Moderate to Advanced (electrical work involved)
Estimated Cost Range: $300 – $4,500+ depending on setup
Average Cost (Level 2, standard installation): $1,000 – $2,500
Time Required: 2 – 8 hours for professional installation
Tools & Skills Needed: Licensed electrician recommended; electrical panel knowledge required
Whether you are exploring the best home EV chargers on the market or trying to understand whether a simple Level 1 setup will suffice, this guide covers everything you need to know about EV charger installation costs, requirements, and best practices.
Understanding EV Charger Types & Their Installation Requirements
Before diving into costs, it is essential to understand the different levels of EV charging available for residential use. Each level has distinct power requirements, charging speeds, and installation implications that directly affect your bottom line.
Level 1 Charging (120V)
Level 1 charging uses a standard household 120-volt outlet and typically comes included with your electric vehicle. This is the simplest and most affordable option, but also the slowest. You can expect roughly 3 to 5 miles of range per hour of charging, which may be sufficient for plug-in hybrids or drivers with short daily commutes.
Installation cost: $0 – $300. If you have a standard outlet near your parking spot, there is essentially no installation cost. However, you may need to install a dedicated 15-amp or 20-amp circuit to prevent overloading, which typically runs $150 to $300 when performed by a licensed electrician.
Level 2 Charging (240V)
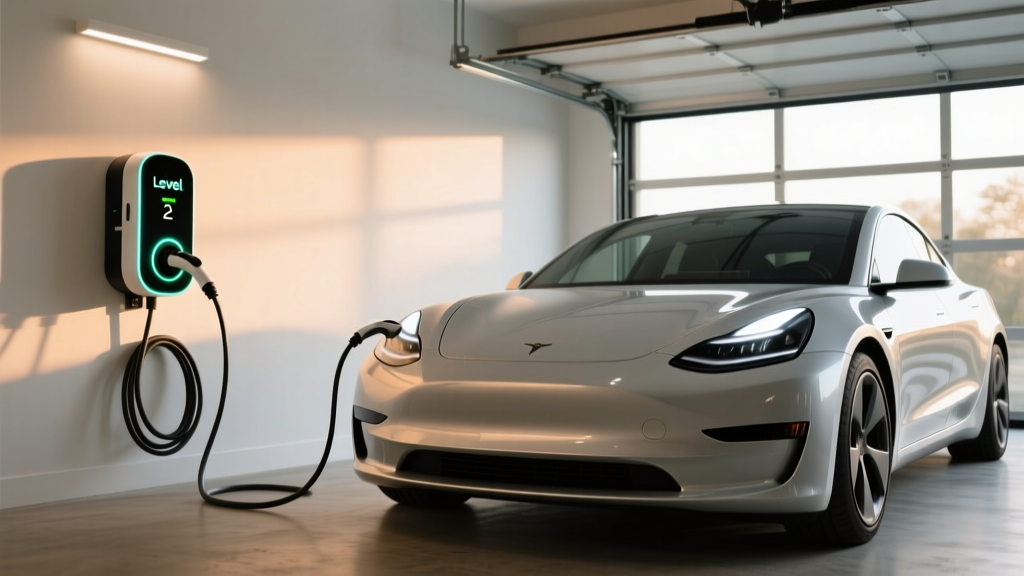
Level 2 chargers operate on 240 volts — the same voltage your electric dryer or oven uses — and deliver significantly faster charging speeds. Most Level 2 home chargers add 15 to 30 miles of range per hour, making them the preferred choice for battery electric vehicle (BEV) owners. According to the U.S. Department of Energy, Level 2 charging is the most practical solution for daily home charging needs.
Installation cost: $500 – $2,500+. This range includes the charger unit itself ($300 – $700 for quality models), electrical panel upgrades if needed, wiring, conduit, permits, and professional labor. Check out our Level 2 EV charger reviews for top-rated options across different budgets.
Level 3 / DC Fast Charging
DC Fast Chargers are typically found in commercial settings and are rarely installed in residential environments due to their extreme power requirements (480V+), massive cost ($10,000 – $50,000+), and complex utility coordination. For virtually all homeowners, Level 2 is the practical maximum, and it provides more than enough speed for overnight charging.
Complete Cost Breakdown: What You Will Actually Pay
Understanding the full cost of EV charger installation requires looking at each individual component. Here is a detailed breakdown of where your money goes.
The Charger Unit
The charger hardware itself represents a significant but variable portion of total cost. Basic Level 2 chargers from reputable manufacturers start around $250 to $400, while smart chargers with Wi-Fi connectivity, load management, and advanced scheduling features typically range from $400 to $700. Premium models with longer cables, higher amperage, or integrated cable management can exceed $800.
- Basic Level 2 charger (24A – 32A): $250 – $450
- Smart Level 2 charger (40A – 48A): $400 – $700
- Premium / hardwired models (48A – 80A): $600 – $1,000+
- Level 1 charger: Usually included with vehicle; replacements $150 – $300
Electrical Panel Upgrades
Your home's electrical panel is one of the biggest cost variables. A Level 2 charger typically requires a dedicated 40-amp to 60-amp circuit, and your panel must have enough spare capacity to support it.
- No upgrade needed (sufficient panel capacity): $0
- Panel upgrade (100A to 200A service): $1,500 – $3,000
- Panel upgrade (200A to 400A service): $2,500 – $5,000+
- Sub-panel installation: $500 – $1,200
Many modern homes with 200-amp service have sufficient capacity for a Level 2 charger without any panel upgrade. Older homes with 100-amp service are more likely to need an upgrade. Some smart chargers now feature load management technology that dynamically adjusts charging power based on your home's real-time electricity usage, potentially avoiding a costly panel upgrade altogether.
Wiring, Conduit & Materials
The physical run from your electrical panel to the charger location requires appropriate gauge wire, conduit, junction boxes, and mounting hardware. Costs increase with distance.
- Short run (under 10 feet, same wall as panel): $100 – $300
- Medium run (10 – 30 feet): $300 – $600
- Long run (30 – 60+ feet): $600 – $1,500+
- Trenching (for detached garages): $500 – $2,000+
Labor Costs
Licensed electricians typically charge between $75 and $150 per hour, though rates vary significantly by region. A straightforward installation with a short wire run and no panel upgrade might take 2 to 4 hours, while complex installations involving panel upgrades, long conduit runs, or trenching can take 6 to 8 hours or more.
- Simple installation: $300 – $600 in labor
- Standard installation: $500 – $1,200 in labor
- Complex installation: $1,000 – $2,500+ in labor
Permits & Inspections
Most local jurisdictions require an electrical permit for EV charger installation. Permit costs are generally modest but mandatory for code compliance and insurance purposes.
- Electrical permit: $50 – $200
- Inspection fee (if separate): $50 – $150
Permits, Inspections & Code Compliance
Skipping permits might seem like an easy way to save money, but it is a decision that can cost you far more in the long run. Unpermitted electrical work can void your homeowner's insurance, create safety hazards, and cause problems when you sell your home. The National Electrical Code (NEC) provides the framework that local jurisdictions use to regulate EV charger installations.
Key NEC Requirements for Home EV Chargers
The National Electrical Code addresses electric vehicle charging in Article 625. Several provisions are particularly relevant to residential installations:
- Dedicated circuit: EV chargers must be on a dedicated branch circuit not shared with other major appliances.
- Circuit sizing: The circuit must be rated for at least 125% of the charger's maximum continuous load. For example, a 40-amp charger requires a 50-amp circuit.
- GFCI protection: Recent NEC editions require Ground Fault Circuit Interrupter protection for EV charging outlets, though many hardwired chargers have built-in ground fault protection.
- Outlet placement: For cord-and-plug connected chargers, the receptacle must be within reach of the charging cord and positioned to prevent the cord from stretching across walkways or driveways.
- Ventilation: Indoor installations may require adequate ventilation depending on the charger type and local amendments to the NEC.
The Permit Process
The typical permit process for EV charger installation follows these steps:
- Application: Your electrician (or you, if DIY) submits a permit application to the local building department with details about the planned installation.
- Plan review: The building department reviews the application to ensure the proposed work meets local electrical codes.
- Permit issuance: Once approved, the permit is issued and work can begin. The permit is usually posted visibly at the work site.
- Rough-in inspection: For complex installations, an inspector may visit before walls are closed to verify wiring is correct.
- Final inspection: After installation is complete, a final inspection confirms everything is safe and code-compliant. The inspector signs off on the permit.
Many jurisdictions now offer expedited or online permitting specifically for EV charger installations to encourage adoption. Check with your local building department for specific requirements in your area.
DIY Installation vs. Hiring a Professional Electrician
The question of whether to install an EV charger yourself or hire a professional is one of the most common dilemmas homeowners face. Let us weigh the pros and cons of each approach.
When DIY Makes Sense
DIY installation can be reasonable in limited scenarios:
- You are installing a Level 1 charger that simply plugs into an existing dedicated outlet.
- You have extensive electrical experience and understand local codes thoroughly.
- You are mounting a plug-in Level 2 charger where a properly rated 240V outlet already exists (such as a former dryer outlet).
- Your local jurisdiction allows homeowner-performed electrical work with proper permitting.
Even experienced DIYers should consider having their work inspected by a licensed electrician before energizing the circuit. The risks of improper electrical work — fire, electrocution, equipment damage — are simply too high to cut corners.
Why Hiring a Professional Is Usually the Better Choice
For the vast majority of homeowners, professional installation is the recommended path. Here is why:
- Safety: Working with 240V circuits carries serious risk. Licensed electricians are trained to handle high-voltage work safely.
- Code compliance: Professional electricians understand NEC requirements and local amendments, ensuring your installation passes inspection.
- Warranty protection: Many charger manufacturers require professional installation to maintain the product warranty. Installing it yourself could void coverage worth hundreds of dollars.
- Insurance coverage: If an electrical fire occurs and the work was unpermitted or performed by an unlicensed individual, your homeowner's insurance may deny the claim.
- Panel assessment: A qualified electrician can accurately assess your panel capacity and recommend the right circuit size, potentially saving you from an unnecessary panel upgrade.
- Time savings: What might take a homeowner an entire weekend (or longer) can often be completed by a professional in a few hours.
If you are researching your options, our EV charger buying guide can help you select the right unit before scheduling installation.
Factors That Increase or Decrease Your Installation Cost
No two EV charger installations are exactly alike. Several key factors can push your costs toward the lower or higher end of the spectrum.
Factors That Lower Cost
- Proximity to electrical panel: When your parking spot is close to the panel, wire runs are short and materials costs drop significantly.
- Adequate panel capacity: Having spare capacity in a 200-amp panel eliminates the need for an expensive upgrade.
- Existing 240V outlet: Repurposing a dryer or range outlet (with proper circuit verification) can save hundreds in wiring costs.
- Attached garage: Installations in attached garages are generally simpler and cheaper than those in detached structures.
- Plug-in vs. hardwired: Plug-in units using a NEMA 14-50 outlet can be slightly cheaper to install and offer portability if you move.
Factors That Increase Cost
- Panel upgrade required: Moving from 100A to 200A service adds $1,500 to $3,000 or more.
- Long wire runs: Every additional foot of conduit and wire adds material and labor costs.
- Detached garage or carport: Running power to a detached structure may require trenching, underground conduit, and a sub-panel.
- Concrete or masonry walls: Drilling through concrete, brick, or stone is more labor-intensive than working with standard drywall and wood framing.
- Multiple chargers: Homes with two or more EVs may need larger panel upgrades and additional circuits.
- Local code requirements: Some jurisdictions have stricter requirements that add material or labor costs.
- High-cost-of-living areas: Electrician rates vary dramatically by region, with urban and coastal areas typically commanding higher prices.
Rebates, Tax Credits & Incentives
The sticker price is not always what you will actually pay. Numerous incentives can significantly offset your installation costs:
- Federal tax credit: The Alternative Fuel Infrastructure Tax Credit may cover up to 30% of installation costs (up to $1,000 for residential installations). Check current eligibility requirements with your tax professional.
- Utility rebates: Many electric utilities offer rebates ranging from $200 to $1,000+ for installing qualified Level 2 chargers. Some utilities also offer reduced electricity rates for EV charging during off-peak hours.
- State & local incentives: Numerous states, counties, and municipalities offer additional rebates, grants, or tax incentives for EV charger installation.
- Manufacturer promotions: Some automakers include complimentary home charger units or installation credits with the purchase of a new EV.
Always research available incentives before scheduling your installation, as some programs require pre-approval or specific equipment to qualify. For more on maximizing savings, read our guide on EV charging costs and savings.
Safety Tips for EV Charger Installation & Operation
Safety should never be an afterthought when dealing with high-voltage electrical equipment. Follow these essential safety guidelines to protect your home, your vehicle, and your family.
Before Installation
- Hire a licensed, insured electrician: Verify their license is current and that they carry adequate liability insurance. Ask for references or reviews from previous EV charger installations.
- Get a panel load calculation: Before committing to a specific charger amperage, have your electrician perform a proper load calculation on your electrical panel to ensure safe operation.
- Choose UL-listed or ETL-listed equipment: Only purchase chargers that have been tested and certified by a nationally recognized testing laboratory. Look for the UL or ETL mark on the product.
- Plan for the future: If you anticipate owning multiple EVs or upgrading your panel eventually, discuss installing conduit or wiring that accommodates future expansion.
During & After Installation
- Verify GFCI protection: Ensure proper ground fault protection is in place, whether through a GFCI breaker or the charger's built-in protection.
- Use proper wire gauge: Undersized wire creates a fire hazard. Your electrician should follow NEC wire sizing tables precisely.
- Secure mounting: The charger should be firmly mounted to a stud or using appropriate anchors. A charger that falls can damage the unit and create electrical hazards.
- Cable management: Install hooks, reels, or cord organizers to keep charging cables off the floor and away from vehicle traffic.
- Test before regular use: After installation, run a full test cycle to verify proper operation, including checking that the charger communicates correctly with your vehicle.
- Keep the area dry: While most outdoor-rated chargers are weather-resistant, ensure the installation location provides reasonable protection from direct water exposure when possible.
- Register your charger: Complete the manufacturer's product registration to receive safety notices, firmware updates, and warranty coverage.
Troubleshooting Common EV Charger Installation Issues
Even professionally installed EV chargers can occasionally encounter issues. Here are common problems and their solutions.
Charger Will Not Power On
If your newly installed charger shows no signs of life, check the circuit breaker first. A tripped breaker is the most common cause. If the breaker has not tripped, verify that all wiring connections at both the panel and the charger are secure. For plug-in units, ensure the plug is fully seated in the outlet. If these checks do not resolve the issue, contact your electrician to inspect the wiring.
Charger Trips the Circuit Breaker Repeatedly
Repeated breaker trips usually indicate one of three problems: the circuit is undersized for the charger's amperage, there is a wiring fault, or the charger's internal settings need adjustment. Many smart chargers allow you to reduce the maximum amperage through their companion app, which can resolve the issue if your circuit is slightly undersized. If the problem persists, a professional electrical inspection is essential.
Slow Charging Speeds
If your Level 2 charger is delivering less range per hour than expected, verify that the charger's amperage setting matches the circuit capacity. Some chargers default to a lower amperage setting for safety and must be manually configured. Also check whether your vehicle is limiting charge rate due to battery temperature or state of charge — this is normal behavior, particularly in extreme weather. For a deeper understanding of charging performance, see our article on understanding EV charging speeds.
Wi-Fi Connectivity Issues (Smart Chargers)
Smart chargers that rely on Wi-Fi for scheduling, monitoring, and firmware updates may struggle with connectivity in garages with poor signal strength. Solutions include installing a Wi-Fi range extender, using a mesh network node near the garage, or connecting the charger via Ethernet if the model supports it. Many chargers will still function as basic chargers even without a network connection.
Error Codes on Charger Display
Most modern EV chargers display error codes when they detect a fault. Common codes indicate ground faults, overvoltage, undervoltage, or communication errors with the vehicle. Consult your charger's user manual for specific code meanings. Ground fault errors in particular should be taken seriously and investigated by a qualified electrician, as they may indicate a wiring problem that poses a safety risk.
Frequently Asked Questions
Is it worth installing a Level 2 charger at home?
For most battery electric vehicle owners, absolutely. A Level 2 charger provides 15 to 30 miles of range per hour of charging, meaning you can fully replenish your battery overnight. Level 1 charging, by contrast, adds only 3 to 5 miles per hour and may not keep up with daily driving needs. The convenience of waking up to a full battery every morning, combined with the ability to take advantage of off-peak electricity rates, makes a Level 2 charger one of the best investments you can make as an EV owner. The cost typically pays for itself in convenience and fuel savings within the first year or two of ownership.
Can I install an EV charger myself to save money?
While technically possible for those with advanced electrical skills, DIY EV charger installation is not recommended for most homeowners. Working with 240-volt circuits carries serious risks including fire and electrocution. Additionally, many charger warranties require professional installation, and unpermitted work can create problems with your homeowner's insurance. The labor savings from DIY are typically outweighed by the risks and potential costs of improper installation. If you do choose to DIY, you must still obtain proper permits and pass all required inspections.
Do I need to upgrade my electrical panel for an EV charger?
Not necessarily. Many homes with 200-amp electrical service have sufficient spare capacity to add a Level 2 charger circuit without any panel upgrade. Your electrician will perform a load calculation to determine your panel's available capacity. Homes with 100-amp service are more likely to need an upgrade, which typically costs $1,500 to $3,000. Some newer smart chargers with load management features can dynamically adjust power draw to stay within your panel's capacity, potentially avoiding an upgrade even in tighter situations.
How long does EV charger installation take?
A straightforward Level 2 charger installation with a short wire run and no panel upgrade typically takes 2 to 4 hours. More complex installations involving longer conduit runs, panel upgrades, or trenching to a detached garage may take 6 to 8 hours or span multiple days. The permitting and inspection process adds additional time — typically a few days to a couple of weeks depending on your local building department's workload — but the actual physical installation is usually completed in a single visit.
Will installing an EV charger increase my home's value?
Yes, in most markets. As electric vehicle adoption continues to grow, homebuyers increasingly view EV charging capability as a desirable feature — similar to how solar panels or smart home technology add value. A professionally installed, permitted Level 2 charger can make your home more attractive to the growing segment of EV-driving buyers. Real estate studies have shown that homes with EV charging infrastructure tend to sell faster and at a premium compared to similar homes without it. The exact value added varies by market, but the installation cost is often partially or fully recouped at resale.
Ready to choose the right charger for your home? Browse our top-rated home EV charger recommendations and explore our complete EV ownership guide for everything else you need to know about making the switch to electric.