Transitioning to an electric vehicle (EV) is an exciting step toward sustainable driving, but it brings up a crucial logistical question: how much does it cost to install an EV charger at home? While plugging into a standard wall outlet is technically possible, most EV owners opt for a dedicated Level 2 charging station to ensure fast, reliable, and safe charging. Understanding the financial commitment upfront is essential for a smooth transition to electric mobility.
Difficulty Level: Moderate to Advanced (Requires professional electrical expertise, load calculations, and permitting).
Estimated Cost Range: $500 to $2,500+ (including equipment and professional labor, excluding major panel upgrades).
In this comprehensive guide, we will break down every factor that influences the final price tag, from the charger unit itself to hidden costs like electrical panel upgrades and trenching. Whether you are researching the best Level 2 EV chargers on the market or trying to understand local permitting, this guide will help you budget accurately and safely.
Understanding the Requirements for Home EV Charging
Before calculating costs, you must understand the electrical requirements for a dedicated home charging setup. According to the U.S. Department of Energy (DOE), while Level 1 charging uses a standard 120-volt household outlet, it only provides about 3 to 5 miles of range per hour. For daily driving needs, a Level 2 charger operating on a 240-volt circuit is the gold standard, delivering 15 to 30 miles of range per hour.
To support a Level 2 charger, your home typically needs a dedicated 40-amp to 60-amp circuit. This requires a 240-volt connection, similar to what is used for heavy-duty appliances like electric dryers or ovens. The National Electrical Code (NEC) mandates that continuous loads, such as EV charging, must not exceed 80% of the circuit breaker's rated capacity. Therefore, a 50-amp breaker is required to safely deliver 40 amps of continuous charging current to your vehicle.
Furthermore, your home's main electrical panel must have the physical space for a new double-pole breaker and the overall amperage capacity to handle the additional load. Most modern homes have a 200-amp service, which is generally sufficient. However, older homes with 100-amp service may require a costly panel upgrade before an EV charger can be safely installed. For a deeper dive into the differences between charging levels, check out our EV charging basics guide.
Detailed Cost Breakdown: Where Does Your Money Go?
The total cost of installing a home EV charger is not just the price of the unit itself. It is a combination of hardware, labor, site preparation, and potential electrical upgrades. Here is a detailed breakdown of what you can expect to pay.
1. The EV Charger Unit ($300 - $700)
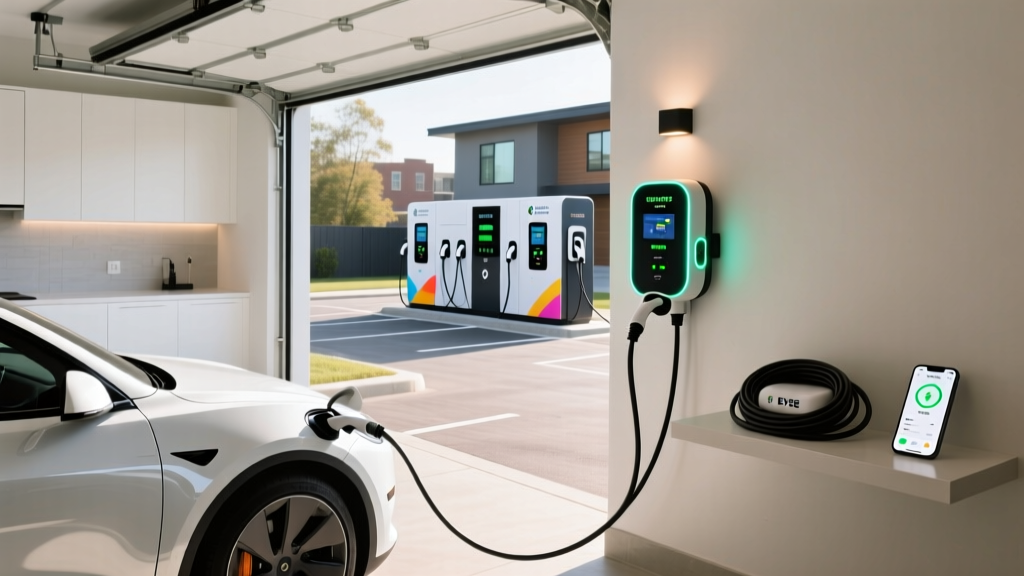
The cost of the charging hardware varies based on features like Wi-Fi connectivity, cable length, and smart scheduling capabilities. Basic, non-smart Level 2 chargers start around $300, while premium smart chargers, such as the ChargePoint Home Flex, can cost between $500 and $700. Smart chargers allow you to schedule charging during off-peak hours when electricity rates are lowest, potentially saving you money in the long run.
2. Professional Labor ($300 - $1,500)
Labor costs depend heavily on the complexity of the installation and your geographic location. If your electrical panel is located in the garage right next to where you plan to park your EV, the electrician will only need to run a short conduit and wire, keeping labor costs on the lower end ($300 - $600). However, if the panel is in the basement and the garage is on the opposite side of the house, labor costs will rise significantly due to the time required to route wires through walls, ceilings, or crawlspaces.
3. Electrical Panel Upgrades ($1,000 - $3,000+)
If your home's electrical panel is maxed out or only offers 100-amp service, you will need a panel upgrade or a complete service replacement to safely support an EV charger. Upgrading to a 200-amp service typically costs between $1,500 and $3,000. In some cases, electricians can install an automated energy management system that monitors your home's power usage and dynamically throttles the EV charger to prevent tripping the main breaker, which can bypass the need for a full panel upgrade.
4. Trenching, Conduit, and Site Prep ($500 - $2,500)
For detached garages or driveways where the charger must be mounted on a freestanding pedestal, trenching is required to bury the electrical conduit safely. Trenching costs are usually calculated per linear foot and can quickly add up if you have a long driveway or need to navigate around concrete landscaping. Additionally, mounting a charger on a masonry or brick wall may require specialized drilling equipment, slightly increasing labor fees.
Permits, Inspections, and Available Rebates
Skipping the permitting process might seem like an easy way to save a few hundred dollars, but it is a critical step that ensures your installation is safe, legal, and insurable. Most municipalities require an electrical permit for installing a new 240-volt circuit. Permit fees generally range from $50 to $200, depending on your local jurisdiction.
After the installation is complete, a local inspector will visit your home to verify that the work complies with the NEC and local building codes. This inspection is vital; if an unpermitted electrical fire occurs, your homeowner's insurance company may deny your claim. Furthermore, many utility companies and local governments require proof of a passed inspection before they will issue rebates.
Speaking of rebates, you should always research local incentives before purchasing your equipment. Many utility providers offer rebates ranging from $200 to $500 for installing a smart Level 2 charger, and some will even cover the cost of the permit or provide a free charger unit if you agree to participate in demand-response programs. Additionally, federal and state tax credits may be available to offset a percentage of your installation costs. Visit our guide on EV tax credits and rebates to see what incentives you might qualify for.
DIY vs. Professional Installation: Why You Should Hire a Pro
While the DIY community thrives on tackling home improvement projects, installing a 240-volt EV charger is not a standard weekend project. The NEC Article 625 specifically outlines the rigorous safety standards required for Electric Vehicle Charging System Equipment. Working with high-voltage electricity carries severe risks, including arc flashes, electrical fires, and fatal shocks.
Beyond the immediate physical dangers, a DIY installation will almost certainly void the manufacturer's warranty on the charger unit. Leading manufacturers explicitly state in their documentation that the unit must be installed by a licensed and insured electrician to maintain warranty coverage. Furthermore, if you ever decide to sell your home, an unpermitted DIY electrical job can become a major red flag during the buyer's home inspection, potentially derailing the sale or forcing you to pay for a professional retrofit out of pocket.
Hiring a licensed electrician guarantees that a proper load calculation is performed, the correct wire gauge is used, and the installation is fully permitted and inspected. It provides peace of mind that your home and your vehicle are protected.
Step-by-Step Installation Overview
Knowing what to expect can help you prepare your home and schedule your time accordingly. Here is the standard workflow for a professional EV charger installation:
- Step 1: Site Assessment and Load Calculation. The electrician evaluates your electrical panel to ensure it can handle the new load and determines the most efficient route for the wiring.
- Step 2: Permitting. The electrician or contractor submits the necessary paperwork and electrical diagrams to your local building department to secure the required permits.
- Step 3: Rough-In and Wiring. The team runs the conduit, pulls the heavy-gauge copper wire (typically 6 AWG or 4 AWG depending on the amperage), and installs the junction boxes or NEMA receptacles.
- Step 4: Mounting and Connection. The charger unit is mounted to the wall or pedestal, hardwired or plugged in, and the breaker is installed in the main panel.
- Step 5: Testing and Inspection. The electrician tests the voltage, verifies the grounding, and ensures the charger communicates with the vehicle. Finally, the city inspector signs off on the work.
Essential Safety Tips and Best Practices
Safety should always be the paramount concern when dealing with high-voltage automotive charging. First, ensure your electrician installs a Ground Fault Circuit Interrupter (GFCI) breaker if required by your local code, especially for outdoor installations or garages where moisture might be present. The NEC has increasingly strict GFCI requirements for EV receptacles to prevent shock hazards.
If your charger is installed outdoors, it must be rated for exterior use. Look for units with a NEMA 4 or NEMA 4X enclosure rating, which guarantees protection against windblown dust, rain, and hose-directed water. Additionally, invest in proper cable management. Leaving a heavy charging cable coiled on the ground creates a tripping hazard and exposes the cable to physical damage, moisture, and pests. Wall-mounted cable organizers or retractable cord reels keep your garage tidy and protect your investment.
Troubleshooting Common Installation Issues
Even with a professional installation, you may encounter minor hiccups. Here is how to troubleshoot the most common issues:
The Breaker Keeps Tripping: If your charger repeatedly trips the breaker, it may be drawing more current than the circuit can handle, or there could be a loose connection generating excess heat. Ensure your charger's software is configured to match the breaker size (e.g., setting a 48-amp charger to draw only 40 amps on a 50-amp circuit). If the issue persists, call your electrician to check for loose terminations.
Slow Charging Speeds: If your vehicle is charging slower than expected, check the vehicle's onboard charger limitations. Some EVs can only accept a maximum of 32 amps, meaning installing a 60-amp charger will not yield faster speeds. Additionally, verify that the charger is not in a "reduced power" mode via its companion app.
Smart Charger Wi-Fi Connectivity Issues: Many modern chargers rely on Wi-Fi for scheduling and firmware updates. Garages often act as Faraday cages, blocking router signals. If your charger cannot connect, consider installing a Wi-Fi extender in the garage or running a hardwired Ethernet connection to the charger if the model supports it.
Frequently Asked Questions
Can I install an EV charger myself to save money?
While it is physically possible for someone with advanced electrical knowledge to wire a 240-volt outlet, it is highly discouraged. EV charging represents a continuous, high-draw load that generates significant heat. Improper wire gauges or loose connections can easily lead to electrical fires. Furthermore, DIY installations violate most manufacturer warranties, void local building codes, and can cause your home insurance provider to deny claims in the event of an electrical fire.
Does a home EV charger increase my property value?
Yes, a professionally installed, permitted Level 2 EV charger is increasingly viewed as a desirable home upgrade. As EV adoption continues to grow, homebuyers are actively looking for properties that are "EV-ready." A hardwired or NEMA 14-50 setup in the garage can make your home stand out in the real estate market and provide a strong return on investment.
What is the difference between hardwired and plug-in chargers?
Plug-in chargers connect to a 240-volt receptacle (like a NEMA 14-50 outlet), offering the flexibility to unplug the unit and take it with you if you move. Hardwired chargers are connected directly to your home's electrical junction box. Hardwired units are generally safer, eliminate the need for GFCI breakers in some jurisdictions (reducing nuisance tripping), and often support higher amperages (up to 80 amps) compared to plug-in models.
How long does the installation process take?
The physical installation typically takes between 2 to 6 hours, depending on the complexity of the wire routing and whether trenching is required. However, the entire process—from the initial site assessment and load calculation to securing permits and passing the final city inspection—can take anywhere from a few days to a few weeks depending on your local municipality's processing times.
Will charging my EV at home drastically increase my electric bill?
While your overall electricity usage will increase, charging at home is significantly cheaper than purchasing gasoline. The exact cost depends on your local utility rates and the efficiency of your vehicle. On average, driving an EV costs the equivalent of $1.00 to $1.50 per gallon of gas. To minimize costs, program your smart charger to charge exclusively during off-peak hours (usually late at night) when utility companies offer their lowest time-of-use rates.