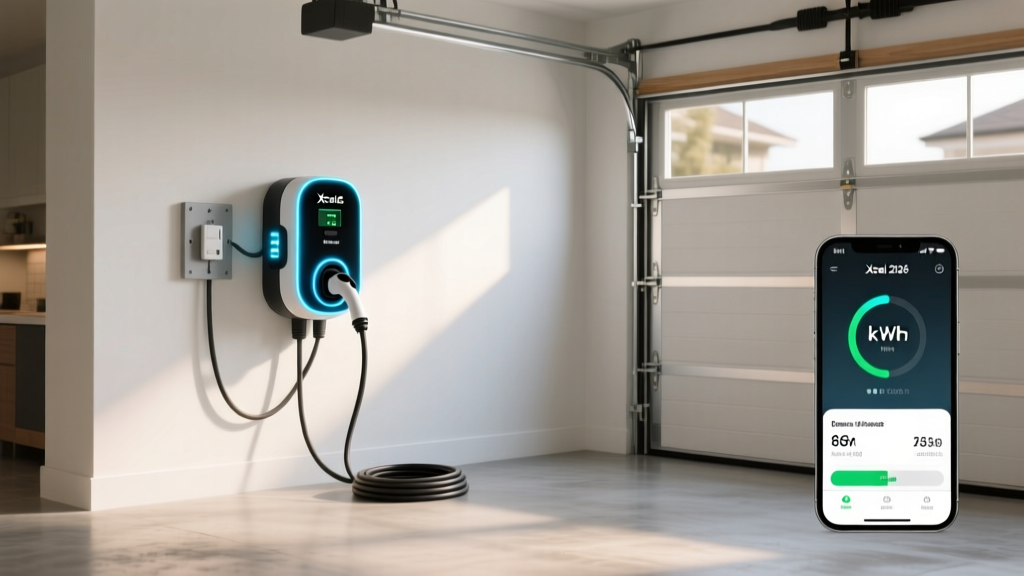
SolarEdge EV Charger Quick Installation Guide: Everything You Need to Know
If you have invested in a SolarEdge energy ecosystem — or are simply looking for a reliable, high-performance Level 2 EV charger — the SolarEdge EV charger is a compelling choice. Known for its seamless integration with SolarEdge solar inverters and energy management platforms, this charger lets you power your electric vehicle with clean, renewable energy while intelligently managing your home's electrical load.
But before you can start charging, you need to get the unit properly installed. Whether you are an experienced DIYer evaluating the scope of work or a homeowner preparing to hire a licensed electrician, this comprehensive guide walks you through every aspect of the SolarEdge EV charger installation process.
⚡ Quick Overview
- Difficulty Level: Advanced — requires 240V electrical work & knowledge of your home's panel capacity
- Estimated Cost: $500–$2,500 (installation only, charger sold separately)
- Time Required: 2–6 hours for a professional electrician; longer for DIY
- Permit Required: Yes, in most jurisdictions
Before diving in, we strongly recommend reviewing your local building codes & consulting a licensed electrician if you are unsure about any part of this process. Electrical work carries serious safety risks, and improper installation can void warranties, cause fire hazards, or result in failed inspections.
Pre-Installation Requirements & Planning
Successful installation begins long before you pick up a screwdriver. Proper planning ensures that your SolarEdge EV charger operates safely, efficiently, & in compliance with local codes. Here is what you need to assess before installation day.
Electrical Panel Capacity Assessment
The SolarEdge EV charger typically requires a dedicated 240V circuit with a 40-amp or 50-amp breaker, depending on the model & desired charging speed. Before installation, you must confirm that your home's electrical panel has sufficient capacity to support the additional load.
A standard residential panel is rated for 100 to 200 amps. The National Electrical Code (NEC) requires that the total continuous load on a panel must not exceed 80% of its rated capacity. For a 200-amp panel, that means no more than 160 amps of continuous load. If your panel is already near capacity, you may need a panel upgrade or a load management device before proceeding.
Choosing the Installation Location
The SolarEdge EV charger is rated for both indoor & outdoor use, giving you flexibility in placement. Consider the following when selecting a location:
- Proximity to your parking spot: Ensure the cable can comfortably reach your vehicle's charging port without stretching across walkways
- Distance from the electrical panel: Longer wire runs increase material costs & may require thicker gauge wiring
- Wi-Fi signal strength: The SolarEdge charger relies on a network connection for smart features, energy management, & firmware updates
- Wall structure: The unit must be mounted to a structurally sound surface — stud-mounted on drywall or anchored to masonry
- Solar inverter proximity: If you plan to integrate with a SolarEdge inverter for solar-only charging, placing the charger near the inverter simplifies communication wiring
Required Tools & Materials
Whether you are doing the work yourself or verifying your electrician's preparation, here is a checklist of tools & materials typically needed:
- SolarEdge EV charger unit & mounting hardware (included)
- Appropriate gauge copper wire (typically 6 AWG for 50A circuits or 8 AWG for 40A circuits)
- Dedicated double-pole circuit breaker (matching the charger's amperage rating)
- Conduit & fittings (if running wire through walls, ceilings, or outdoors)
- Wire nuts, electrical tape, & cable clamps
- Voltage tester & multimeter
- Drill, level, stud finder, & appropriate mounting screws
- Torque screwdriver (for proper terminal tightening per manufacturer specifications)
- Personal protective equipment (insulated gloves & safety glasses)
For more context on what to expect with different charger models, check out our guide to the best Level 2 home EV chargers to compare features & requirements across brands.
Step-by-Step SolarEdge EV Charger Installation
With planning complete & materials on hand, you are ready to begin the physical installation. The following steps outline the process from start to finish. These steps assume a hardwired installation, which is the most common & recommended configuration for the SolarEdge EV charger.
Step 1: Shut Off Power at the Main Breaker
Safety is non-negotiable. Before touching any wiring, locate your main electrical panel & switch off the main breaker to cut power to the entire panel. Use a voltage tester to confirm that no current is flowing through the bus bars or the area where you will be working. Never assume a circuit is dead — always test.
Step 2: Install the Dedicated Circuit Breaker
Open the panel cover & identify an available slot that accommodates a double-pole breaker of the correct amperage. Snap the new breaker into the panel's bus bar, ensuring it seats firmly. Connect the circuit wires to the breaker terminals & tighten them to the manufacturer's specified torque values. Loose connections are a leading cause of electrical fires, so do not skip this step.
Step 3: Run Wiring from Panel to Charger Location
Route the appropriately sized copper wire from the electrical panel to the planned charger location. If the wire passes through walls, crawl spaces, or exterior surfaces, it must be protected by conduit per NEC requirements. Key wiring considerations include:
- Wire gauge: Use 6 AWG copper wire for a 50-amp circuit or 8 AWG for a 40-amp circuit. Longer runs (over 50 feet) may require upsizing to compensate for voltage drop
- Conduit fill: Do not exceed NEC conduit fill limits — typically 40% of the conduit's cross-sectional area for three or more conductors
- Grounding: A dedicated equipment grounding conductor must be run with the circuit wires & bonded to both the panel's ground bus & the charger's ground terminal
- Labeling: Clearly label the new breaker in the panel directory as "EV Charger" for future reference
Step 4: Mount the SolarEdge EV Charger
Using the mounting template included with your SolarEdge charger, mark the screw locations on the wall. Drill pilot holes into wall studs or use appropriate masonry anchors for concrete or brick surfaces. Secure the mounting bracket, ensuring it is level & firmly attached. Then hang the charger unit on the bracket & secure it per the manufacturer's instructions.
Step 5: Make Electrical Connections at the Charger
Feed the circuit wires through the charger's knock-out opening & secure them with a cable clamp. Strip the wire ends & connect them to the charger's terminal block:
- Line 1 (L1): Connect to the L1 terminal
- Line 2 (L2): Connect to the L2 terminal
- Ground: Connect to the ground terminal or grounding screw
Tighten all terminals to the torque values specified in the SolarEdge EV charger installation manual. Double-check that no bare wire is exposed outside the terminals & that all connections are secure.
Step 6: Restore Power & Perform Initial Test
Replace the electrical panel cover, then switch the main breaker back on. Turn on the dedicated EV charger breaker. The SolarEdge charger's LED indicator should illuminate, signaling that it has power. At this stage, do not plug in your vehicle yet — first complete the network setup & configuration.
Step 7: Network Configuration & SolarEdge App Setup
The SolarEdge EV charger is a smart device that connects to your home network for monitoring, scheduling, & solar integration. Follow these steps:
- Download the SolarEdge ONE app (or the mySolarEdge app, depending on your system generation) on your smartphone
- Create an account or log in to your existing SolarEdge account
- Follow the in-app pairing instructions to connect the charger to your Wi-Fi network
- If integrating with a SolarEdge inverter, configure the communication link between the charger & inverter for solar-only or solar-priority charging modes
- Set your preferred charging schedule, maximum current, & any energy management preferences
Once configuration is complete, plug in your EV & verify that charging begins. Monitor the first full charging session through the app to confirm everything is operating correctly.
Permits, Inspections & Code Compliance
Installing a dedicated 240V circuit for an EV charger is classified as electrical work that requires a permit in most jurisdictions across the United States. Skipping the permitting process can lead to fines, voided insurance coverage, & complications when selling your home.
When Is a Permit Required?
In general, any new circuit installation or modification to your electrical panel requires an electrical permit. This applies whether you are doing the work yourself or hiring a professional. The permit process typically involves:
- Application: Submit an electrical permit application to your local building department, including details about the circuit size, wire gauge, breaker rating, & installation location
- Fee payment: Permit fees vary by locality but typically range from $50 to $200
- Rough-in inspection: An inspector may visit before walls are closed to verify wiring methods & conduit installation
- Final inspection: After the charger is installed & energized, the inspector verifies proper grounding, breaker sizing, labeling, & overall code compliance
Key NEC Requirements for EV Charger Installations
The National Electrical Code (NEC) Article 625 specifically addresses electric vehicle charging systems. Key requirements include:
- The circuit must be dedicated to the EV charger — no shared loads
- The circuit must be rated for at least 125% of the charger's maximum continuous load (e.g., a 40-amp charger requires a 50-amp circuit)
- Outdoor installations must use weatherproof enclosures & fittings rated for wet locations
- The disconnecting means must be readily accessible & within sight of the charger or integrated into the unit
- All conductors must be properly sized for the circuit ampacity & installation conditions
The U.S. Department of Energy also recommends working with a certified electrician to ensure compliance & safety, particularly for homes with older electrical systems.
DIY Installation vs. Hiring a Professional Electrician
One of the most common questions homeowners face is whether to install the SolarEdge EV charger themselves or hire a licensed professional. Both approaches have merits, but the decision carries significant safety & legal implications.
When DIY Might Make Sense
If you have prior experience with 240V electrical work — such as installing a dryer outlet, sub-panel, or workshop wiring — you may feel confident tackling this project. DIY installation can save $500 to $1,500 in labor costs. However, you should only proceed if you:
- Fully understand your home's electrical panel & can accurately calculate available capacity
- Are comfortable working inside a live panel (with proper safety precautions)
- Know how to properly size wire, breakers, & conduit per NEC standards
- Are willing to pull permits & schedule inspections
- Have the necessary tools, including a torque screwdriver & multimeter
Why Hiring a Professional Is Usually the Better Choice
For most homeowners, hiring a licensed electrician is the safer & more practical option. Here is why:
- Safety: Licensed electricians are trained to handle high-voltage work safely, reducing the risk of shock, arc flash, or fire
- Code compliance: Professionals know local codes & NEC requirements, ensuring your installation passes inspection the first time
- Warranty protection: Some manufacturers require professional installation to maintain the product warranty
- Insurance coverage: If an electrical fire results from unpermitted DIY work, your homeowner's insurance may deny the claim
- Time savings: An experienced electrician can typically complete the installation in 2–4 hours
If you are exploring different charger options before committing to an installation, our EV charger comparison reviews can help you evaluate the SolarEdge against other leading brands.
Cost Breakdown: What to Expect
Understanding the full cost of a SolarEdge EV charger installation helps you budget accurately & avoid surprises. Here is a detailed breakdown of the typical expenses involved.
| Cost Category | Estimated Range |
|---|---|
| SolarEdge EV Charger Unit | $500–$750 |
| Circuit Breaker & Wiring Materials | $100–$300 |
| Conduit & Fittings | $50–$150 |
| Electrical Permit | $50–$200 |
| Professional Electrician Labor | $500–$1,500 |
| Panel Upgrade (if needed) | $1,500–$3,000+ |
| Total (typical, no panel upgrade) | $1,200–$2,900 |
Factors That Increase Cost
Several variables can push your installation toward the higher end of the range:
- Long wire runs: If the charger is far from the panel, you will need more wire, possibly a larger gauge, & additional conduit
- Panel upgrades: Homes with 100-amp panels or panels at capacity may require an upgrade to 200 amps
- Complex routing: Running wire through finished walls, across attics, or underground adds labor time
- Local labor rates: Electrician rates vary significantly by region, from $75/hour in some areas to $150+/hour in high-cost markets
Rebates & Incentives
Many utility companies, state governments, & local municipalities offer rebates or tax incentives for EV charger installations. These can offset $200 to $1,000 or more of your total cost. Check with your local utility provider & the Department of Energy's EV charging resources for current programs in your area.
Safety Tips & Best Practices
Working with 240V electricity demands respect & caution. Follow these safety guidelines throughout the installation process & during the charger's operational lifetime.
During Installation
- Always shut off the main breaker before working inside the electrical panel
- Test before touching: Use a non-contact voltage tester & a multimeter to verify that circuits are de-energized
- Wear insulated gloves & safety glasses when handling wires & breakers
- Never work alone: Have someone nearby who can call for help or shut off power in an emergency
- Use a torque screwdriver: Overtightened or undertightened terminal connections are a fire hazard — follow the manufacturer's torque specifications exactly
- Keep the work area dry: Never perform electrical work in wet or damp conditions
After Installation
- Inspect periodically: Every few months, visually inspect the charger, cable, & connector for signs of wear, discoloration, or damage
- Keep the area clear: Do not store flammable materials near the charger or electrical panel
- Use a GFCI breaker if required: Some local codes require ground-fault circuit interrupter protection for EV chargers, particularly in garages & outdoor locations
- Update firmware regularly: Keep your SolarEdge charger's firmware up to date through the app for the latest safety & performance improvements
- Know your emergency shutoff: Ensure all household members know where the breaker is located & how to turn it off
For additional safety information related to home EV charging setups, read our home EV charging safety guide for comprehensive best practices.
Troubleshooting Common SolarEdge EV Charger Issues
Even with a proper installation, you may encounter issues during setup or daily use. Here are solutions to the most common problems reported by SolarEdge EV charger owners.
Charger Does Not Power On
If the LED indicator does not illuminate after restoring power:
- Verify that the dedicated breaker is in the ON position
- Check that all wire connections at the breaker & charger terminals are secure
- Use a multimeter to confirm 240V is reaching the charger's terminal block
- Inspect the breaker for tripping — a breaker that trips immediately may indicate a short circuit or wiring error
Charger Will Not Connect to Wi-Fi
Network connectivity issues are among the most common setup challenges:
- Confirm that your Wi-Fi network is broadcasting on the 2.4 GHz band (many smart devices do not support 5 GHz-only networks)
- Move your router closer to the charger or install a Wi-Fi extender to improve signal strength at the charger location
- Reset the charger's network settings by holding the reset button (refer to the SolarEdge manual for the specific procedure)
- Ensure your router's firewall is not blocking the charger's communication with SolarEdge servers
Charging Starts Then Stops Intermittently
Intermittent charging can be caused by several factors:
- Loose connections: Check all wire terminals at both the breaker & charger — thermal cycling can cause connections to loosen over time
- Voltage drop: If the wire run is long & the gauge is undersized, voltage drop may cause the charger to shut down. Measure voltage at the charger during a charging session
- Overheating: Ensure the charger is installed in a well-ventilated area, out of direct sunlight, & with adequate clearance per the manufacturer's specifications
- Vehicle-side issues: Some EVs have their own charging system faults that can interrupt sessions — try charging at a public station to isolate the problem
Solar Integration Not Working
If you have configured solar-priority charging but the charger is drawing from the grid:
- Verify that the communication link between the SolarEdge inverter & the charger is properly configured in the app
- Ensure both the inverter & charger are on the same network & running the latest firmware
- Check that your solar system is generating sufficient power to meet the charger's minimum threshold
- Review the energy management settings in the SolarEdge app to confirm solar-only or solar-priority mode is active
Breaker Trips Repeatedly
A breaker that trips consistently indicates a serious issue that must be resolved before continuing to use the charger:
- Confirm the breaker is properly sized — a 40-amp charger needs a 50-amp breaker (125% rule per NEC)
- Check for a ground fault — moisture in outdoor installations or damaged wire insulation can cause GFCI breakers to trip
- Inspect for overloaded circuits — ensure no other loads are on the same circuit
- If the problem persists, consult a licensed electrician to diagnose potential wiring faults or a defective breaker
Frequently Asked Questions
Can I install the SolarEdge EV charger myself without an electrician?
Technically, yes — if you have experience with 240V electrical work & your local jurisdiction allows homeowner electrical permits. However, due to the safety risks, code complexity, & potential warranty implications, professional installation is strongly recommended for most homeowners. A licensed electrician ensures the work is done safely, meets all NEC requirements, & passes inspection on the first attempt.
Does the SolarEdge EV charger require solar panels to function?
No. The SolarEdge EV charger works as a standard Level 2 charger even without solar panels. It will draw power from the grid like any other EV charger. However, if you do have a SolarEdge solar inverter system, the charger can be configured to prioritize solar-generated electricity, reducing your grid consumption & charging costs. This solar integration is one of the charger's standout features & a key reason many SolarEdge ecosystem owners choose this unit.
How long does it take to fully charge an EV with the SolarEdge charger?
Charging time depends on your vehicle's battery capacity & the charger's power output. The SolarEdge EV charger delivers up to 9.6 kW (40 amps) or 12 kW (50 amps) depending on the model & circuit configuration. At 9.6 kW, you can expect roughly 30–35 miles of range per hour of charging. A typical 60 kWh battery would charge from empty to full in approximately 6–7 hours. For most drivers who charge overnight, this is more than sufficient to start each day with a full battery.
What maintenance does the SolarEdge EV charger require?
The SolarEdge EV charger is designed for minimal maintenance. Recommended upkeep includes periodically inspecting the charging cable & connector for physical damage, ensuring the unit's ventilation openings are free of dust & debris, keeping firmware updated through the SolarEdge app, & visually checking electrical connections at the breaker panel annually. If installed outdoors, inspect the weatherproof seals & enclosure for signs of moisture intrusion. Beyond these basic checks, the charger is largely maintenance-free.
Will installing an EV charger increase my home insurance premiums?
In most cases, adding a professionally installed, permitted EV charger will not significantly impact your homeowner's insurance premiums. However, you should notify your insurance provider about the installation, as some companies offer discounts for EV-related home upgrades. If the charger was installed without permits or by an unlicensed individual, your insurer could deny a claim related to electrical damage — which is another strong reason to ensure proper installation & documentation.
For more information on choosing the right charger for your setup, explore our complete EV charging guides or browse our EV ownership guides for tips on maximizing your electric vehicle experience.