EV Charger Level 2 Plug: Complete Installation & Setup Guide
Upgrading to a Level 2 EV charger is one of the smartest moves any electric vehicle owner can make. While Level 1 charging relies on a standard 120-volt household outlet and can take well over 24 hours to fully charge a depleted battery, a Level 2 charger operates on a 240-volt circuit — the same kind of power your electric dryer or oven uses — and can replenish your battery in a fraction of the time. But before you can enjoy those faster charging speeds, you need to understand the ins & outs of the EV charger Level 2 plug, the electrical requirements, and the installation process.
This comprehensive guide walks you through everything you need to know about Level 2 EV charger plug installation, from electrical panel requirements and wiring specifications to permits, inspections, costs, and critical safety considerations. Whether you are planning a DIY approach or hiring a licensed electrician, this article will prepare you for a successful setup.
At a Glance
Difficulty Level: Intermediate to Advanced (electrical work involved)
Estimated Cost: $500 – $2,500+ (charger unit + installation)
Time Required: 2 – 8 hours (depending on panel upgrades & conduit runs)
Tools Needed: Voltage tester, wire strippers, conduit bender, drill, torque screwdriver, fish tape
Understanding the Level 2 EV Charger Plug & Electrical Requirements
Before you pick up any tools, it is essential to understand what a Level 2 EV charger actually requires from your home's electrical system. Level 2 chargers operate on a 240-volt alternating current (AC) circuit, typically drawing between 16 amps & 48 amps depending on the unit. The plug type you will encounter most often is the NEMA 14-50, a four-prong plug commonly used for electric ranges & RV hookups. Some chargers also support the NEMA 6-50 or NEMA 10-50 configurations, while others are designed to be hardwired directly into your electrical panel.
The SAE J1772 connector is the universal standard for the vehicle-side plug on all Level 2 chargers sold in North America. This means regardless of which brand of charger you purchase — whether it is a ChargePoint Home Flex, a Tesla Wall Connector, or an Emporia Vue — the plug that connects to your car will be the same J1772 connector (Tesla vehicles use an adapter, which is included with most chargers or built into newer Tesla models with the North American Charging Standard port).
Here are the key electrical specifications you need to know:
- Voltage: 240V (split-phase, single-phase residential power)
- Amperage: 16A to 48A continuous load
- Circuit Breaker Size: Must be rated at 125% of the continuous load (e.g., a 40A charger requires a 50A breaker)
- Wire Gauge: 6 AWG copper for up to 50A circuits; 4 AWG for 60A circuits
- Outlet Type: NEMA 14-50 (most common), NEMA 6-50, or hardwired connection
According to the U.S. Department of Energy, Level 2 home charging adds roughly 14 to 35 miles of range per hour of charging, making it the most practical solution for daily driving needs. Understanding these baseline requirements is the first step toward a safe & effective installation.
If you are still exploring which charger to purchase, check out our best Level 2 EV charger reviews for detailed comparisons of top-rated models.
Step-by-Step Level 2 EV Charger Installation Guide
Installing a Level 2 EV charger involves several critical steps. Even if you plan to hire a professional, understanding this process will help you evaluate quotes, ask the right questions, & ensure the job is done correctly.
Step 1: Assess Your Electrical Panel Capacity
Your home's electrical panel is the starting point for any Level 2 charger installation. Most modern homes have a 100-amp or 200-amp main service panel. You need to calculate whether your panel has enough spare capacity to handle the additional load of an EV charger.
To perform a basic load calculation, add up the amperage of all major appliances & circuits in your home (HVAC, water heater, dryer, oven, lighting circuits, etc.) & compare the total to your panel's rated capacity. The National Electrical Code (NEC) Article 220 provides the formal methodology for residential load calculations. If your panel is already near capacity, you may need a panel upgrade or a service upgrade from your utility company before proceeding.
Step 2: Choose the Installation Location
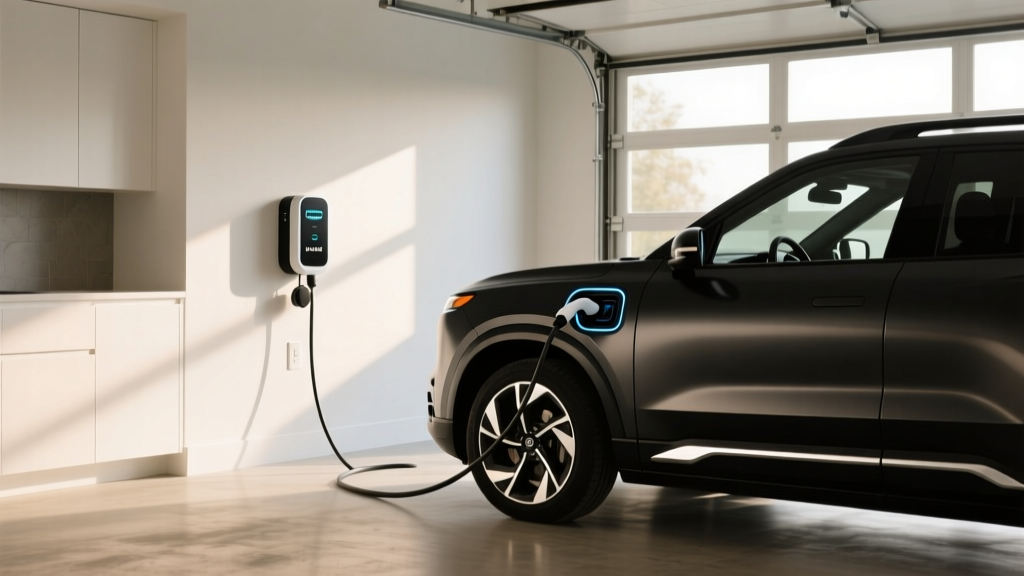
The ideal location for your Level 2 charger is close to your electrical panel to minimize wiring costs. Most homeowners install their charger in the garage, near where they park their EV. Consider the following when selecting a spot:
- Proximity to the electrical panel (longer wire runs increase cost)
- Cord reach — ensure the charger's cable can comfortably reach your vehicle's charge port
- Wall mounting surface — drywall, concrete, or wood studs each require different mounting hardware
- Protection from weather if installing outdoors (use an outdoor-rated unit or a weatherproof enclosure)
- Adequate clearance around the unit for ventilation & access
Step 3: Run the Circuit from Panel to Charger Location
This is where the real electrical work begins. A new dedicated 240-volt circuit must be run from your electrical panel to the charger location. This involves:
- Installing a new double-pole breaker in your panel, sized appropriately for your charger (typically 40A, 50A, or 60A)
- Running conduit (EMT, PVC, or flexible metal conduit) from the panel to the charger location
- Pulling wires through the conduit — you will need two hot wires (black & red), one neutral wire (white, required for NEMA 14-50), & one ground wire (bare copper or green)
- Making connections at the panel & at the outlet or hardwire junction box
For NEMA 14-50 installations, a four-wire configuration (two hots, neutral, & ground) is required. The National Electrical Code (NEC) mandates that the neutral conductor must be the same gauge as the hot conductors for a NEMA 14-50 receptacle. This is a common point of confusion & errors in DIY installations.
Step 4: Mount the Charger & Make Final Connections
Once the circuit is in place, mount the charger unit to the wall using the manufacturer's provided bracket & hardware. For hardwired units, connect the wires directly to the charger's internal terminal block following the manufacturer's wiring diagram. For plug-in units, install the NEMA 14-50 receptacle, ensuring it is oriented correctly (ground pin up is recommended by many manufacturers to prevent debris from falling into the ground slot).
Torque all connections to the manufacturer's specifications using a calibrated torque screwdriver. Loose connections are a leading cause of overheating & electrical fires.
Step 5: Test the Installation
Before plugging in your vehicle, use a multimeter to verify the voltage at the outlet reads approximately 240V between the two hot legs & 120V from each hot leg to neutral & ground. Once verified, plug in your charger, power it on, & initiate a test charge with your vehicle. Monitor the first several charging sessions for any unusual sounds, smells, or excessive heat at the outlet or breaker.
Permits, Inspections & Code Compliance
One of the most frequently overlooked aspects of EV charger installation is the permitting process. In most jurisdictions, adding a new 240-volt circuit to your home requires an electrical permit. This is not just bureaucratic red tape — it is a critical safety measure that ensures your installation meets the National Electrical Code (NEC) standards & your local amendments.
Here is what you need to know about permits & inspections:
- When a permit is required: Virtually all municipalities require a permit for new circuit installations. Some areas have streamlined EV-specific permit processes.
- How to apply: Contact your local building department or apply online. You will typically need to provide details about the circuit size, wire gauge, conduit type, & charger specifications.
- Inspection process: After installation, a licensed electrical inspector will visit your home to verify the work meets code. They will check wire sizing, breaker sizing, grounding, GFCI protection (required by NEC 2020 & later for EV charging outlets), conduit fill, & proper labeling.
- GFCI requirements: The NEC requires GFCI protection for all receptacles used for EV charging. This means your 240V outlet must be protected by a GFCI breaker or a GFCI device. Some hardwired chargers have built-in GFCI protection, which may satisfy this requirement — check with your local inspector.
- Consequences of skipping permits: Unpermitted work can void your homeowner's insurance, create liability issues, cause problems when selling your home, & most importantly, pose serious safety risks.
Many utility companies also offer rebates or incentives for permitted EV charger installations, so obtaining a permit can actually save you money. Visit our EV charging rebates & incentives guide to see what savings may be available in your area.
DIY Installation vs. Hiring a Professional Electrician
One of the biggest decisions you will face is whether to install your Level 2 EV charger yourself or hire a licensed electrician. Both approaches have merits, but the stakes are high when working with 240-volt circuits.
When DIY Might Make Sense
If you have prior experience with residential electrical work, understand the NEC requirements, & are comfortable working inside your electrical panel, a DIY installation is technically feasible. Some scenarios where DIY may be reasonable include:
- Your panel has ample spare capacity & available breaker slots
- The charger location is close to the panel (short wire run)
- You are installing a plug-in unit (NEMA 14-50) rather than hardwiring
- You are willing to obtain the required permits & pass inspection
- You own the necessary tools (conduit benders, wire pullers, torque screwdriver, multimeter)
When You Should Hire a Professional
For most homeowners, hiring a licensed electrician is the safer & more practical choice. You should strongly consider professional installation if:
- You have never worked inside an electrical panel before
- Your panel needs an upgrade or sub-panel installation
- The wire run is long, complex, or requires running conduit through finished walls, attics, or crawl spaces
- Your local jurisdiction requires licensed electricians to pull permits (some areas do not allow homeowners to self-permit electrical work)
- You want the work warrantied & guaranteed
Professional electricians typically charge between $300 & $1,500 for labor on a standard Level 2 charger installation, depending on the complexity of the job. While this is a significant expense, it provides peace of mind, code compliance, & protection against electrical hazards. Many charger manufacturers also require professional installation to maintain the product warranty.
For a deeper look at what to expect from professional installation services, read our complete EV charger installation cost breakdown.
Complete Cost Breakdown for Level 2 Charger Installation
Understanding the full cost picture helps you budget appropriately & avoid surprises. Here is a detailed breakdown of what you can expect to spend:
| Item | Estimated Cost |
|---|---|
| Level 2 Charger Unit (32A – 48A) | $300 – $700 |
| NEMA 14-50 Receptacle & Box | $15 – $50 |
| Double-Pole Breaker (40A – 60A) | $15 – $60 |
| Wire (6 AWG or 4 AWG copper, per foot) | $2 – $5/ft |
| Conduit & Fittings | $50 – $200 |
| Permit Fees | $50 – $200 |
| Professional Electrician Labor | $300 – $1,500 |
| Electrical Panel Upgrade (if needed) | $1,000 – $3,000+ |
| Total (Standard Installation) | $500 – $2,500 |
Several factors can push costs toward the higher end of the range:
- Long wire runs: If your charger is far from the panel, wire & conduit costs increase significantly
- Panel upgrades: Older homes with 100A service may need a panel upgrade to 200A
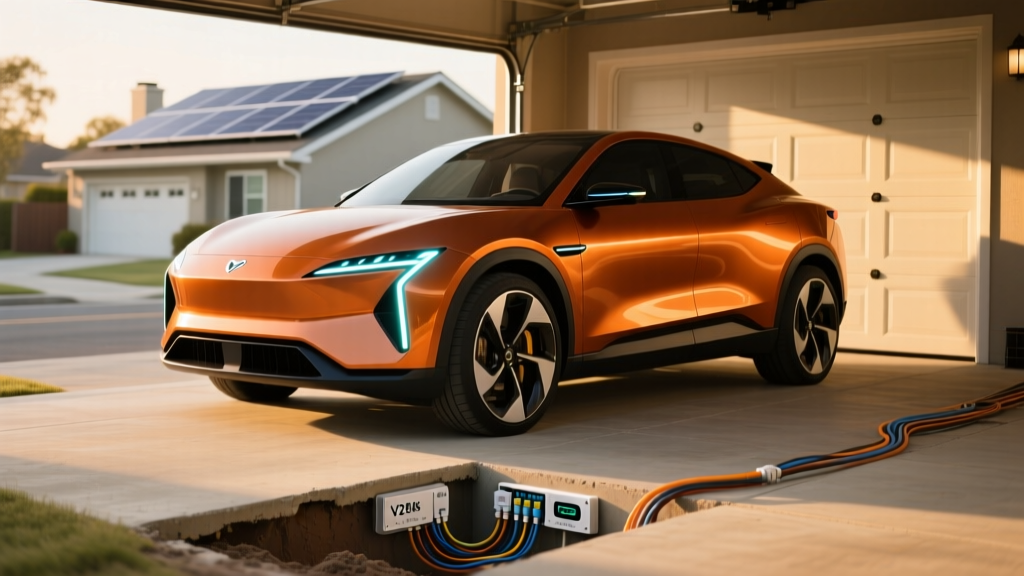
- Trenching: If you need to run conduit underground to a detached garage, trenching adds substantial cost
- Smart features: Wi-Fi-enabled chargers with load management capabilities cost more upfront but can save money by avoiding panel upgrades
- Local labor rates: Electrician rates vary widely by region, from $75/hour in rural areas to $150+/hour in major metropolitan areas
Remember to factor in available utility rebates & federal or state tax credits, which can offset a significant portion of the installation cost. Some utilities offer rebates of $250 to $500 or more for Level 2 charger installations.
Essential Safety Tips for Level 2 EV Charger Installation
Working with 240-volt electricity is inherently dangerous. A shock from a 240V circuit can be fatal, & improper installations can lead to electrical fires that endanger your home & family. Follow these safety guidelines without exception:
- Always turn off the main breaker before working inside your electrical panel. Use a non-contact voltage tester to confirm power is off before touching any wires.
- Never work alone. Have someone nearby who can call for help or administer CPR in case of an electrical emergency.
- Use properly rated components. All wire, breakers, outlets, & conduit must be rated for the amperage & voltage of your circuit. Using undersized wire is one of the most dangerous mistakes you can make.
- Torque all connections to specification. Both loose & over-tightened connections can cause arcing, overheating, & fire. Use a torque screwdriver set to the manufacturer's recommended values.
- Install GFCI protection. Ground fault circuit interrupter protection is required by code for EV charging receptacles & provides critical protection against electrical shock.
- Label your panel clearly. Mark the new breaker with a permanent label identifying it as the EV charger circuit, including the amperage rating.
- Do not daisy-chain extension cords or use adapters to connect your Level 2 charger to an incompatible outlet. This creates a serious fire hazard.
- Inspect regularly. Periodically check the outlet, plug, & cable for signs of heat damage, discoloration, melting, or unusual odors. If you notice any of these signs, stop charging immediately & consult an electrician.
- Follow manufacturer instructions. Every charger model has specific installation requirements outlined in the product documentation. Deviating from these instructions can void warranties & create safety hazards.
The Department of Energy recommends having all home EV charging equipment installed by a qualified electrician to ensure compliance with all applicable safety standards. Even experienced DIYers should consider this recommendation given the risks involved.
Troubleshooting Common Level 2 Charger Issues
Even a properly installed Level 2 charger can occasionally encounter issues. Here are the most common problems & how to address them:
Charger Will Not Power On
Check that the breaker has not tripped. If it has, reset it by switching it fully off & then back on. If the breaker trips repeatedly, do not keep resetting it — this indicates a fault in the circuit or charger that needs professional diagnosis. Also verify that the outlet has power using a multimeter.
Charging Speed Is Slower Than Expected
Several factors can cause slow charging: the vehicle's onboard charger may be limiting the charge rate, the charger's amperage setting may be configured lower than the circuit allows, or voltage drop over a long wire run may be reducing effective power. Check your charger's app or display for the actual amperage being delivered & compare it to the rated output.
Outlet or Plug Feels Hot
Some warmth is normal during extended charging sessions, but excessive heat is a warning sign. It typically indicates a loose connection at the outlet terminals, an undersized wire, or a worn-out receptacle. Stop charging immediately, let everything cool, & have an electrician inspect the connections. NEMA 14-50 outlets from certain manufacturers have been known to have quality issues — many electricians recommend industrial-grade outlets from reputable brands.
GFCI Breaker Keeps Tripping
Nuisance GFCI tripping is a known issue with some EV charger & breaker combinations. This can be caused by the charger's internal electronics creating small leakage currents that the GFCI interprets as a fault. Solutions include trying a different brand of GFCI breaker, ensuring the charger has the latest firmware update, or switching to a hardwired installation if the charger has built-in GFCI protection.
Wi-Fi Connectivity Issues (Smart Chargers)
Many modern Level 2 chargers feature Wi-Fi connectivity for scheduling, monitoring, & firmware updates. If your charger cannot connect to Wi-Fi, check the signal strength at the charger location. Garages often have poor Wi-Fi coverage. Consider a Wi-Fi extender or mesh node near the garage to improve connectivity.
For more help with specific charger models, browse our EV charger reviews section where we cover setup tips for each unit we test.
Frequently Asked Questions
Can I plug a Level 2 EV charger into a regular household outlet?
No. Level 2 EV chargers require a 240-volt circuit, which is fundamentally different from the standard 120-volt outlets found throughout your home. Standard household outlets (NEMA 5-15) are only used for Level 1 charging, which is significantly slower. A Level 2 charger requires a dedicated 240V outlet such as a NEMA 14-50 or must be hardwired directly to your electrical panel. Attempting to use adapters or converters to connect a Level 2 charger to a standard outlet is extremely dangerous & will not work.
What is the difference between a NEMA 14-50 & hardwired Level 2 charger installation?
A NEMA 14-50 installation uses a plug & receptacle, allowing you to unplug the charger & take it with you if you move. This is the more flexible option. A hardwired installation connects the charger's wires directly to your home's electrical system through a junction box, eliminating the plug entirely. Hardwired installations are generally considered slightly safer because they eliminate one potential point of failure (the plug-receptacle connection), they may not require GFCI breakers if the charger has built-in GFCI protection, & they can sometimes support higher amperage. The choice depends on your preference for portability versus maximum performance.
Do I need to upgrade my electrical panel for a Level 2 charger?
Not necessarily. It depends on your panel's existing capacity & the amperage of the charger you want to install. A 200-amp panel in a typical home usually has enough capacity for a 32-amp or 40-amp Level 2 charger without any upgrades. However, if you have an older home with a 100-amp panel, or if your panel is already heavily loaded with large appliances, you may need an upgrade. A qualified electrician can perform a load calculation to determine if your panel can handle the additional load. Some smart chargers feature dynamic load management that automatically adjusts charging speed based on available household power, which can eliminate the need for a panel upgrade.
How long does it take to charge an EV with a Level 2 charger?
Charging time depends on three factors: the battery capacity of your vehicle, the power output of your charger, & the state of charge when you begin. As a general rule, a 48-amp Level 2 charger delivering approximately 11.5 kW can add about 35-40 miles of range per hour of charging. For a typical EV with a 75 kWh battery charging from 20% to 80%, you can expect approximately 4-5 hours on a 48A charger or 6-7 hours on a 32A charger. Most EV owners find that overnight charging on a Level 2 unit is more than sufficient to start each day with a full battery.
Is it safe to leave my EV plugged into a Level 2 charger overnight?
Yes, absolutely. Modern EVs & Level 2 chargers are designed with multiple safety systems that manage the charging process automatically. Your vehicle's battery management system (BMS) will stop drawing power once the battery reaches the target charge level, preventing overcharging. The charger itself has built-in protections against overcurrent, overvoltage, overheating, & ground faults. Leaving your EV plugged in overnight is the most common & convenient way to use a Level 2 home charger. Many chargers also offer scheduled charging features that allow you to charge during off-peak hours when electricity rates are lower, saving you money on your utility bill.
Final Thoughts on Level 2 EV Charger Plug Installation
Installing a Level 2 EV charger is one of the most rewarding home improvement projects an electric vehicle owner can undertake. The combination of dramatically faster charging speeds, daily convenience, & potential energy cost savings makes it a worthwhile investment. However, the electrical work involved is not trivial — it requires careful planning, proper materials, code compliance, & a strong commitment to safety.
Whether you choose to tackle the installation yourself or hire a licensed electrician, the information in this guide will help you make informed decisions every step of the way. Remember to always prioritize safety over speed or cost savings, obtain the necessary permits, & never hesitate to call a professional when you are unsure about any aspect of the installation.
Ready to find the right charger for your home? Explore our top-rated Level 2 EV charger reviews & our complete EV charging guides to make the most of your electric vehicle ownership experience.