Level 2 EV Charger Near Me: The Complete Installation & Setup Guide
Searching for a Level 2 EV charger near me is one of the first steps every electric vehicle owner takes after bringing their new car home. While public charging networks continue to expand, nothing beats the convenience of waking up to a fully charged vehicle in your own garage or driveway. A Level 2 charger delivers significantly faster charging speeds than the standard Level 1 cord that came with your EV, adding anywhere from 12 to 60 miles of range per hour of charging depending on the unit and your vehicle's onboard charger capacity.
Whether you are looking to hire a local electrician, explore nearby charging stations, or tackle a home installation project, this comprehensive guide walks you through everything you need to know. We cover electrical requirements, step-by-step installation, permits, costs, safety considerations, and troubleshooting — all in one place.
- Difficulty Level: Moderate to Advanced (electrical work involved)
- Estimated Cost: $500 – $2,500+ (charger unit + professional installation)
- Time Required: 2 – 8 hours for professional installation
- Tools Needed: Voltage tester, wire strippers, conduit benders, drill, torque screwdriver
- Permits Required: Yes, in most jurisdictions
Understanding Level 2 EV Chargers & Electrical Requirements
Before you start searching for an "EV charger Level 2 near me" or calling local electricians, it is essential to understand what a Level 2 charger actually requires from your home's electrical system. Level 2 chargers operate on a 240-volt circuit, the same type of electrical supply that powers your electric dryer, oven, or central air conditioning unit. This is fundamentally different from Level 1 charging, which uses a standard 120-volt household outlet and can take 40 or more hours to fully charge a depleted battery.
According to the U.S. Department of Energy, Level 2 home chargers typically require a dedicated circuit rated between 20 and 80 amps, with most residential installations falling in the 30 to 50 amp range. The most common setup is a 40-amp circuit supporting a 32-amp continuous charge, which aligns with the National Electrical Code (NEC) requirement that continuous loads must not exceed 80% of the circuit's rated capacity.
Key Electrical Specifications
- Voltage: 208V or 240V (single-phase, split-phase for residential)
- Amperage: 16A to 80A continuous (depending on unit and circuit)
- Circuit Breaker Size: 20A to 100A (sized at 125% of continuous load per NEC Article 210.20)
- Wire Gauge: 6 AWG to 2 AWG copper (varies by amperage and run length)
- Connector Type: SAE J1772 (standard for all non-Tesla EVs in North America; Tesla vehicles include an adapter or use the proprietary NACS connector)
Your home's electrical panel must have sufficient capacity to support the additional load. Most modern homes with a 200-amp service panel can accommodate a Level 2 charger without issue. However, older homes with 100-amp service may require a panel upgrade, which adds significantly to the overall cost. A licensed electrician can perform a load calculation per NEC Article 220 to determine whether your panel can handle the additional demand.
If you are evaluating which charger to purchase before installation, our reviews of the best Level 2 EV chargers break down the top-performing units on the market by speed, durability, smart features, and value.
Finding Level 2 EV Chargers Near You: Home vs. Public Options
When you search for "EV charger Level 2 near me," you will encounter two distinct categories: public charging stations in your area and home installation services. Both serve important roles in your EV ownership experience, and understanding the difference helps you plan your charging strategy effectively.
Public Level 2 Charging Stations
Public Level 2 chargers are commonly found at shopping centers, workplaces, parking garages, hotels, and municipal lots. These stations typically deliver between 6.6 kW and 19.2 kW of power and are ideal for topping off your battery while you run errands, work, or enjoy a meal. Apps like PlugShare, ChargePoint, and EVgo make it easy to locate nearby public Level 2 stations, check real-time availability, and review pricing.
However, relying exclusively on public charging comes with drawbacks. You may encounter occupied stations, out-of-service units, or incompatible connectors. Session fees and per-kWh rates can add up over time, often costing more than home electricity rates. For daily charging needs, a home Level 2 installation remains the most convenient and cost-effective solution.
Home Installation Services Near You
Finding a qualified electrician to install your Level 2 charger is easier than ever. Many charger manufacturers now offer installation services through certified partner networks. Additionally, platforms like HomeAdvisor, Angi, and Thumbtack allow you to compare quotes from licensed electricians in your area who specialize in EV charger installations.
When evaluating local installers, look for the following qualifications:
- Valid state or local electrical license
- Experience specifically with EV charger installations
- Familiarity with local permit requirements and inspection processes
- Adequate liability insurance and workers' compensation coverage
- Positive reviews from previous EV charger installation clients
Some utility companies also offer rebates or incentives for home EV charger installations, which can offset a meaningful portion of your costs. Check with your local utility provider to see what programs are available in your service area. For a broader overview of EV ownership considerations, our complete EV ownership guide for beginners covers charging, maintenance, and cost savings in detail.
Step-by-Step Level 2 EV Charger Installation Process
Whether you are working with a professional electrician or considering a DIY approach (more on that below), understanding the installation process helps you set realistic expectations and ensure the job is done correctly. Below is a detailed breakdown of a typical Level 2 EV charger installation.
Step 1: Site Assessment & Planning
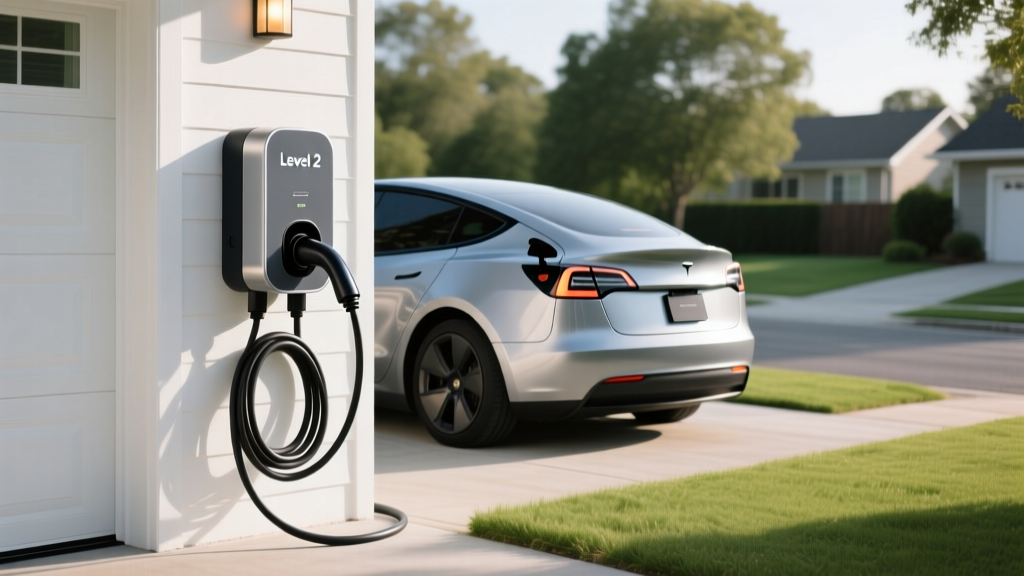
The first step involves evaluating where the charger will be installed. Most homeowners choose a location on the garage wall near where the vehicle is parked. Key considerations include:
- Proximity to the electrical panel: Shorter wire runs reduce material costs and voltage drop
- Cable reach: Ensure the charger's cable (typically 18 to 25 feet) can comfortably reach your vehicle's charge port
- Mounting surface: Drywall, concrete, and brick all require different mounting hardware
- Indoor vs. outdoor: Outdoor installations require a NEMA 4-rated (weatherproof) enclosure and appropriate conduit
- Wi-Fi signal strength: Smart chargers require a stable Wi-Fi connection for app features and scheduling
Step 2: Electrical Panel Evaluation
A licensed electrician will inspect your main electrical panel to determine available capacity. This involves calculating the existing load on your panel and ensuring the new circuit will not exceed the panel's rated capacity. If your panel is at or near capacity, you may need:
- A panel upgrade (e.g., from 100A to 200A service)
- A sub-panel installation to distribute loads more efficiently
- A load management device that dynamically adjusts charger power based on overall household consumption
Step 3: Circuit Installation
With the plan in place, the electrician will install a dedicated circuit from your electrical panel to the charger location. This involves:
- Installing a new double-pole breaker of the appropriate amperage in your main panel
- Running appropriately gauged copper wire (typically 6 AWG for 50A circuits or 8 AWG for 40A circuits) through conduit
- Installing conduit (EMT, PVC, or flexible metal) to protect the wiring, especially for runs through unfinished spaces or outdoors
- Terminating the wiring at either a NEMA 14-50 or NEMA 6-50 receptacle (for plug-in chargers) or directly connecting to a hardwired charger unit
The National Electrical Code (NEC) governs all aspects of this wiring process, including conductor sizing, overcurrent protection, grounding, and bonding requirements. Compliance is not optional — it ensures your safety and protects your home from electrical fire hazards.
Step 4: Charger Mounting & Connection
Once the circuit is in place, the charger unit is mounted to the wall using the manufacturer's provided bracket and hardware. For hardwired units, the electrician connects the supply wires directly to the charger's internal terminal block. For plug-in units, the NEMA receptacle is tested to confirm correct voltage and polarity before the charger is plugged in.
Step 5: Testing & Configuration
After physical installation, the charger must be tested and configured:
- Verify correct voltage at the unit (should read approximately 240V across the two hot legs)
- Confirm proper grounding with a ground impedance test
- Power on the charger and check for error codes or indicator light patterns
- Connect the charger to your home Wi-Fi network (for smart chargers)
- Download the manufacturer's app and complete initial setup
- Perform a test charge with your vehicle to confirm proper communication between the charger and the vehicle's onboard charger
Permits, Inspections & Code Compliance
One of the most frequently overlooked aspects of EV charger installation is the permitting and inspection process. In the vast majority of U.S. jurisdictions, installing a new 240-volt circuit requires an electrical permit. This is not merely bureaucratic red tape — it is a critical safety measure that ensures the installation meets minimum code requirements and does not create a fire or shock hazard.
Why Permits Matter
Failing to obtain a required permit can result in several serious consequences:
- Fines and penalties: Many municipalities impose fines for unpermitted electrical work that can exceed the original permit cost
- Insurance complications: If an electrical fire occurs and the investigation reveals unpermitted work, your homeowner's insurance company may deny the claim
- Home sale issues: Unpermitted electrical work can surface during a home inspection and derail a real estate transaction
- Safety risks: The inspection process catches errors that even experienced electricians can make
The Permit Process
The typical permit process for a Level 2 EV charger installation follows these steps:
- Application: Submit an electrical permit application to your local building department. This usually includes a description of the work, the circuit specifications, and the electrician's license information
- Fee payment: Permit fees typically range from $50 to $200 depending on your jurisdiction
- Installation: The electrician completes the installation according to NEC and local code requirements
- Rough inspection: In some jurisdictions, an inspector must examine the wiring before the walls are closed up (if the run goes through finished walls)
- Final inspection: After the charger is installed and operational, the inspector verifies proper wiring, grounding, breaker sizing, labeling, and GFCI protection (required by NEC 2020 and later for EV charging outlets)
Many jurisdictions now offer expedited or online permitting for EV charger installations to encourage adoption. Some cities even issue permits within 24 hours for straightforward residential installations. Check with your local building department for specific requirements in your area.
NEC Requirements for EV Chargers
The National Electrical Code includes several provisions specifically addressing EV charging equipment under Article 625. Key requirements include:
- The branch circuit must be rated at least 125% of the charger's maximum continuous load (NEC 625.41)
- GFCI protection is required for receptacles used for EV charging (NEC 625.54)
- EV charging equipment must be listed and labeled by a nationally recognized testing laboratory (UL, ETL, or equivalent)
- The disconnecting means must be readily accessible and within sight of the charging equipment
DIY vs. Professional Installation: Which Is Right for You?
The question of whether to install a Level 2 EV charger yourself or hire a professional is one that many handy homeowners wrestle with. While the physical installation may seem straightforward — mount a box, run some wire, connect a breaker — the reality is that working inside your electrical panel carries significant risks and requires specialized knowledge.
When Professional Installation Makes Sense
For the majority of homeowners, hiring a licensed electrician is the recommended path. Professional installation is strongly advised when:
- Your electrical panel needs an upgrade or modification
- The wire run from the panel to the charger location is long, complex, or requires running through finished walls, attics, or crawl spaces
- You are not experienced working with 240-volt circuits
- Your jurisdiction requires a licensed electrician to pull the permit (many do)
- You want a warranty on the installation work
- You plan to sell your home and want documented, permitted work
Professional electricians typically charge between $500 and $1,500 for labor on a straightforward installation, with the total project cost (including the charger, materials, and permit) averaging between $1,200 and $2,500. Complex installations involving panel upgrades, long conduit runs, or trenching for detached garages can push costs to $3,000 or more.
When DIY Might Be Feasible
Experienced homeowners with electrical knowledge may consider a DIY installation under the following conditions:
- You have prior experience working with 240-volt circuits and your home's electrical panel
- The installation is a simple, short run from a panel with ample available capacity
- You are installing a plug-in unit (NEMA 14-50 receptacle) rather than a hardwired charger
- Your jurisdiction allows homeowners to perform their own electrical work with a homeowner's permit
- You are committed to following all NEC requirements and scheduling the required inspections
Regardless of whether you go the DIY or professional route, always ensure the installation is inspected and approved by your local building authority. For more information on choosing the right charger for your setup, check out our complete guide to EV charging at home.
Cost Breakdown: What to Expect
Understanding the full cost picture helps you budget accurately and avoid surprises. The total cost of installing a Level 2 EV charger at home includes several components, each of which can vary significantly based on your specific situation.
Charger Unit Costs
| Charger Type | Amperage | Typical Price Range |
|---|---|---|
| Basic Level 2 (non-smart) | 16A – 32A | $200 – $400 |
| Smart Level 2 (Wi-Fi enabled) | 32A – 48A | $400 – $700 |
| Premium / High-Power | 48A – 80A | $600 – $1,200 |
Installation & Material Costs
| Component | Estimated Cost |
|---|---|
| Electrician labor (standard install) | $500 – $1,500 |
| Wire, conduit & breaker | $100 – $400 |
| NEMA 14-50 receptacle (if plug-in) | $15 – $50 |
| Permit fees | $50 – $200 |
| Electrical panel upgrade (if needed) | $1,500 – $4,000 |
| Trenching (for detached garages) | $500 – $2,000 |
Rebates & Incentives
Many utility companies, state governments, and local municipalities offer rebates and tax incentives for home EV charger installations. These can significantly reduce your out-of-pocket costs. Common incentive types include:
- Utility rebates: $200 – $1,000 toward the purchase and installation of a qualified Level 2 charger
- State tax credits: Some states offer tax credits covering a percentage of installation costs
- Federal tax credit: The Alternative Fuel Infrastructure Tax Credit (AFITC) may cover up to 30% of charging equipment and installation costs, subject to eligibility requirements and caps
- Time-of-use rate plans: While not a direct rebate, many utilities offer reduced electricity rates during off-peak hours, dramatically lowering your ongoing charging costs
Always check with your utility provider and state energy office for current incentive programs before purchasing your charger. These programs change frequently and can make a meaningful difference in your total investment.
Safety Tips for Level 2 EV Charger Installation & Use
Safety should be your top priority throughout the installation process and during everyday use of your Level 2 EV charger. The following tips address the most common hazards and best practices recommended by electrical safety professionals and charger manufacturers.
Installation Safety
- Always turn off the main breaker before working inside your electrical panel. Use a non-contact voltage tester to confirm that circuits are de-energized before touching any wires
- Never work alone when performing electrical work. Have someone nearby who can call for help in an emergency
- Use properly rated tools — insulated screwdrivers, wire strippers rated for the gauge you are working with, and a reliable multimeter
- Torque all connections to specification. Loose connections generate heat and are a leading cause of electrical fires. Use a calibrated torque screwdriver per the manufacturer's specifications and NEC 110.14(D) requirements
- Install GFCI protection as required by code. For receptacle-based installations, this typically means a GFCI breaker in the panel. Many hardwired chargers include built-in ground fault protection
- Label the circuit breaker clearly in your panel directory as "EV Charger" with the amperage noted
Ongoing Usage Safety
- Inspect the charging cable regularly for signs of wear, cracking, or damage. Replace damaged cables immediately — do not attempt to repair them with tape
- Keep the charger and surrounding area free of flammable materials, including gasoline, solvents, and paper products
- Ensure the charging area is well-ventilated, especially in enclosed garages. While EVs do not produce exhaust gases, batteries can off-gas during charging
- Do not use extension cords with your Level 2 charger. If the cable does not reach your vehicle, relocate the charger or have an electrician move the outlet
- If your charger is installed outdoors, ensure the weatherproof enclosure remains sealed and that no moisture has entered the unit
- Follow the NEC guidelines and your charger manufacturer's recommendations for periodic inspection and maintenance
For a deeper comparison of charger safety features across popular models, see our Level 2 charger reviews, where we evaluate each unit's safety certifications, thermal management, and protective features.
Troubleshooting Common Level 2 Charger Issues
Even with a professional installation, you may encounter occasional issues with your Level 2 EV charger. Below are the most common problems and their solutions.
Charger Will Not Power On
- Check the circuit breaker in your electrical panel. If it has tripped, reset it by switching fully to OFF and then back to ON
- Verify that the charger is properly plugged in (for plug-in models) or that the hardwired connections are secure
- Check for a tripped GFCI breaker and reset if necessary
- Inspect the charger's built-in fuse (if applicable) per the manufacturer's documentation
Vehicle Is Not Charging or Charging Slowly
- Ensure the charging connector is fully seated in your vehicle's charge port. A partial connection can prevent charging or limit amperage
- Check the charger's app or display for error codes. Consult the manufacturer's troubleshooting guide for specific code meanings
- Verify that your vehicle's charge settings are not limiting the charge current. Some vehicles allow you to reduce amperage in the settings menu
- Extreme temperatures (both hot and cold) can cause the vehicle's battery management system to reduce charging speed to protect the battery
- If you are using a smart charger, ensure it is not in a scheduled charging window that has not yet begun
Wi-Fi Connectivity Issues (Smart Chargers)
- Move your Wi-Fi router closer to the garage or install a Wi-Fi range extender
- Check if the charger supports 5 GHz Wi-Fi; many smart chargers only support 2.4 GHz networks
- Restart the charger by turning off the circuit breaker for 30 seconds and then restoring power
- Delete and re-add the charger in the manufacturer's app
Breaker Trips Repeatedly
- A breaker that trips repeatedly indicates a serious issue. Do not simply reset it and continue using the charger.
- Verify that the breaker is properly sized for the charger's amperage (125% of continuous load)
- Check for loose wire connections at both the breaker and the charger/receptacle
- Inspect the wiring for damage, nicked insulation, or pinched conductors
- If the problem persists, contact a licensed electrician immediately — repeated breaker trips can indicate a fault condition that poses a fire risk
Ground Fault Errors
- Ground fault errors typically indicate moisture intrusion, damaged wiring insulation, or a fault in the charger's internal components
- For outdoor installations, check that all weatherproof seals and gaskets are intact
- Inspect the NEMA receptacle (if applicable) for signs of corrosion or water damage
- Reset the GFCI breaker. If the fault recurs, discontinue use and contact the charger manufacturer or a qualified electrician
Frequently Asked Questions
How fast does a Level 2 EV charger charge my vehicle?
A Level 2 charger typically adds between 12 and 60 miles of range per hour of charging, depending on the charger's amperage output and your vehicle's onboard charger capacity. A common 32-amp Level 2 charger delivers approximately 7.7 kW of power, which translates to roughly 25 to 30 miles of range per hour for most EVs. This means a vehicle with a 250-mile range battery can go from empty to full in approximately 8 to 10 hours — easily achievable with overnight charging. For a detailed comparison of charging speeds across different EV models, visit our EV charging speeds explained guide.
Do I need a permit to install a Level 2 EV charger at home?
Yes, in most jurisdictions you need an electrical permit to install a new 240-volt circuit for a Level 2 EV charger. The permit ensures the installation is reviewed and inspected for compliance with the National Electrical Code and local amendments. Permit fees typically range from $50 to $200. Skipping the permit can result in fines, insurance claim denials, and complications when selling your home. Always check with your local building department for specific requirements in your area.
Can I install a Level 2 EV charger myself?
Technically, yes — if your local jurisdiction allows homeowner electrical work and you have sufficient experience with 240-volt circuits. However, for most homeowners, professional installation is strongly recommended. Working inside an electrical panel exposes you to lethal voltages, and mistakes can cause fires or electrocution. Professional electricians carry liability insurance, pull the required permits, and guarantee their work. The labor cost of $500 to $1,500 is a worthwhile investment in safety and code compliance.
What is the difference between a plug-in and hardwired Level 2 charger?
A plug-in Level 2 charger connects to a NEMA 14-50 or NEMA 6-50 receptacle, making it portable and easy to replace or upgrade. A hardwired charger is connected directly to the circuit wiring with no plug, which eliminates the receptacle as a potential failure point and may allow for higher amperage installations (above 50A). Hardwired installations are generally considered more reliable for permanent setups, while plug-in units offer flexibility if you plan to move or take the charger with you.
Will installing a Level 2 charger increase my electric bill significantly?
The impact on your electric bill depends on how much you drive and your local electricity rates. On average, charging an EV at home costs between $0.10 and $0.20 per kWh, which translates to roughly $3 to $5 for a full charge of a typical 60-75 kWh battery. For a driver covering 1,000 miles per month, expect an increase of approximately $30 to $60 on your monthly electric bill — significantly less than the equivalent gasoline cost. Enrolling in a time-of-use rate plan and scheduling charging during off-peak hours can further reduce costs. Learn more about optimizing your charging costs in our home EV charging guide.