Transitioning to an electric vehicle (EV) is an exciting step toward a more sustainable and cost-effective lifestyle. However, one of the most common hurdles new EV owners face is understanding the logistics and expenses of home charging. While a standard Level 1 charger plugs into a regular household outlet, it often lacks the speed required for daily driving needs. This is where a Level 2 EV charger becomes essential. In this comprehensive guide, we will explore everything you need to know about Level 2 EV charger costs, installation requirements, and safety protocols.
Difficulty Level: Moderate to Advanced (Electrical work required)
Estimated Cost: $500 to $2,500+ (depending on panel upgrades and wiring distance)
Understanding Level 2 EV Charger Requirements
Before diving into the financial aspects, it is crucial to understand what a Level 2 charging setup actually requires. Unlike Level 1 chargers that operate on a standard 120-volt AC plug, Level 2 chargers require a dedicated 240-volt circuit—the same type of heavy-duty electrical supply used by electric dryers and ovens. If you are completely new to this, our guide on EV charging basics provides a great foundational overview.
Most Level 2 chargers draw between 16 amps and 48 amps of continuous current. Because the National Electrical Code (NEC) Article 625 classifies EV charging as a "continuous load" (operating for three hours or more), the circuit must be rated for 125% of the charger's maximum amperage. For example, a 40-amp charger requires a 50-amp breaker, while a 48-amp charger requires a 60-amp breaker.
You will also need to choose between a plug-in configuration (typically a NEMA 14-50 receptacle) or a hardwired connection. Hardwired setups are generally preferred for higher-amperage chargers (48 amps and above) because they eliminate the need for expensive GFCI breakers mandated by recent NEC updates for receptacles, and they offer a slightly cleaner aesthetic.
Detailed Cost Breakdown: Equipment, Labor, and Upgrades
The total cost of installing a Level 2 EV charger varies wildly from home to home. A straightforward installation in a garage with an adjacent electrical panel might cost under $800, while an older home requiring a full service upgrade could exceed $3,500. Here is a detailed breakdown of where your money goes.
1. The Charger Hardware ($300 - $700)
The cost of the charging unit itself is often the most predictable expense. Basic, non-smart Level 2 chargers can be found for around $300, while premium smart chargers with Wi-Fi connectivity, load balancing, and integration with solar panels can cost up to $700 or more. To find the right unit for your budget and vehicle, check out our curated list of the best Level 2 EV chargers on the market.
2. Electrical Panel Upgrades ($1,500 - $3,000+)
This is the wildcard in your budget. If your home has an older 100-amp electrical panel, adding a 50-amp EV circuit might exceed your panel's safe capacity. An electrician will perform a load calculation to determine if you need a panel upgrade to 200 amps. If an upgrade is required, expect to pay between $1,500 and $3,000 for the new panel and the associated utility coordination.
3. Wiring, Conduit, and Labor ($500 - $1,500)
If your electrical panel has sufficient capacity, the primary cost will be running the wire from the panel to your charging location. Electricians typically charge $50 to $150 per hour. The material cost depends on the distance: running 20 feet of 6 AWG copper wire through an open, unfinished garage ceiling is vastly cheaper than trenching 80 feet of conduit through a concrete driveway to reach a detached carport.
4. Permits and Inspections ($50 - $250)
Most local municipalities require an electrical permit for installing a new 240-volt circuit. Permit fees generally range from $50 to $250. Skipping this step is highly discouraged, as it can void your home insurance and cause major issues when you eventually sell your home.
Step-by-Step Installation Process
Whether you are hiring a professional or assessing the scope of work for your own knowledge, understanding the installation process is vital. Here is how a standard Level 2 charger installation unfolds.
- Load Calculation and Planning: The electrician evaluates your home's total electrical load to ensure the panel can handle the new continuous draw. They will also plan the most efficient route for the wiring to minimize material costs and aesthetic disruption.
- Mounting the Receptacle or Junction Box: For plug-in setups, a NEMA 14-50 receptacle box is mounted to a wall stud. For hardwired setups, a junction box is installed. The ideal height for a NEMA 14-50 outlet is typically 18 to 24 inches from the floor, allowing the charger's cord to hang naturally without straining the plug.
- Running Conduit and Wire: If the wiring is exposed in a garage, it must be protected by conduit (such as EMT or PVC) to prevent physical damage. The electrician pulls the appropriate gauge wire (usually 6 AWG or 4 AWG copper THHN) through the conduit.
- Termination and Connection: The wires are terminated at the breaker panel and the receptacle or charger junction box. Torque screwdrivers are used to ensure all connections meet manufacturer specifications, preventing loose connections that could cause arcing or fires.
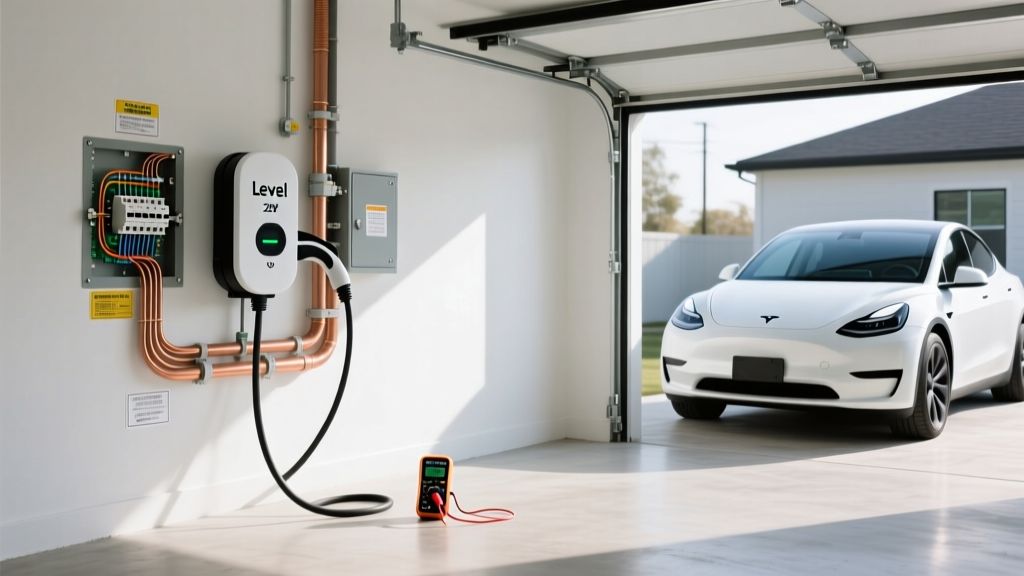
- Testing and Commissioning: Once physically installed, the circuit is tested with a multimeter to verify correct voltage and grounding. Smart chargers are then connected to Wi-Fi and configured via their respective mobile apps.
Permits, Inspections, and NEC Code Compliance
Compliance with local and national electrical codes is not just a bureaucratic hurdle; it is a critical safety measure. The Department of Energy (DOE) strongly advises adhering to all local building codes and utilizing licensed professionals for EV infrastructure setup.
Under recent editions of the NEC, if you choose to install a plug-in NEMA 14-50 receptacle for your EV charger, the circuit must be protected by a Ground Fault Circuit Interrupter (GFCI) breaker. Because EV chargers already have internal ground-fault protection, adding a GFCI breaker can sometimes lead to "nuisance tripping." This is one of the primary reasons many electricians and smart charger manufacturers now recommend hardwired installations, which do not require a GFCI breaker under current NEC guidelines.
After the installation is complete, a local city or county inspector will visit your home to verify that the wire gauge, breaker size, conduit fill, and torque markings all meet code. Only after passing this inspection is the installation officially certified.
DIY vs. Professional Installation: Which is Right for You?
The internet is full of tutorials on how to wire a 240-volt outlet, leading some handy homeowners to consider a DIY approach. However, when it comes to EV charging, professional installation is almost always the correct choice.
The Case Against DIY: Working inside a live electrical panel is inherently dangerous; a single mistake can result in severe arc flashes, electrocution, or an electrical fire that starts inside your walls and smolders for months. Furthermore, most premium EV charger manufacturers explicitly state in their warranty terms that the unit must be installed by a licensed electrician. If your charger fails or causes a fire and the manufacturer discovers it was self-installed, your warranty will be voided, and your home insurance may deny the claim.
The Professional Advantage: A licensed electrician brings expertise in load calculations, code compliance, and proper torque specifications. They also pull the necessary permits and handle the inspection process, giving you total peace of mind. When searching for an installer, look for electricians who have specific experience with EVSE (Electric Vehicle Supply Equipment) installations, as they will be up-to-date on the latest NEC Article 625 nuances.
Essential Safety Tips for Home EV Charging
Once your Level 2 charger is installed, maintaining a safe charging environment is paramount. Follow these safety tips to protect your home and your vehicle:
- Weatherproofing: If your charger is installed outdoors, ensure the unit is rated for outdoor use (NEMA 4 or NEMA 4X enclosure). While the charger itself may be weatherproof, the connections and any exposed receptacles must be protected from driving rain and snow.
- Cable Management: Avoid leaving the charging cable on the ground where it can be run over by a vehicle, tripped over by pedestrians, or exposed to standing water. Invest in a wall-mounted cable organizer or a retractable reel system.
- Thermal Monitoring: High-quality Level 2 chargers feature built-in thermal sensors that monitor the temperature of the plug and internal components. If the unit detects overheating, it will automatically throttle the charging speed or pause the session entirely to prevent melting or fire.
- Avoid Extension Cords: Never use an extension cord with a Level 2 EV charger. If the provided cable is too short, you must have an electrician relocate the charger or the receptacle closer to your vehicle's charging port.
Troubleshooting Common Level 2 Charger Issues
Even with a flawless installation, you may occasionally encounter issues with your Level 2 charging setup. Here is how to troubleshoot the most common problems.
Issue: The breaker trips immediately upon plugging in.
Solution: This usually indicates a ground fault or a short circuit. First, ensure the breaker is properly sized (e.g., a 50-amp breaker for a 40-amp charger). If you are using a NEMA 14-50 receptacle with a GFCI breaker, nuisance tripping is common; consider having an electrician hardwire the unit to bypass the GFCI breaker requirement. Check the receptacle for moisture or debris.
Issue: Charging speeds are significantly slower than advertised.
Solution: Verify the amperage settings on both the charger and the vehicle. Some smart chargers have internal DIP switches or software settings that limit the amperage output to match smaller electrical circuits. Additionally, check your vehicle's onboard charger limit; if your car's maximum AC acceptance rate is 32 amps, a 48-amp charger will only deliver 32 amps.
Issue: Wi-Fi connectivity drops, preventing scheduled charging.
Solution: Garages often act as Faraday cages, blocking Wi-Fi signals from the main house. Try relocating your router, installing a Wi-Fi mesh node in the garage, or utilizing a charger that supports Ethernet hardwiring or cellular connectivity.
Issue: The vehicle pauses charging mid-session.
Solution: Check your vehicle's mobile app and the charger's app for conflicting schedules. Furthermore, if you are enrolled in a utility demand-response program, your utility company may be temporarily throttling or pausing your charger during peak grid hours.
Frequently Asked Questions
Can I use my existing dryer outlet for my EV charger?
While it is physically possible to plug into an existing NEMA 10-30 or 14-30 dryer outlet using an adapter, it is generally not recommended for daily use. Dryer outlets are often wired with older, lower-temperature-rated cables and may not be on a dedicated circuit. Continuous EV charging can cause older wiring to overheat. If you must use a dryer outlet, ensure you use a high-quality, EV-rated adapter and set your vehicle's charging amperage to 80% of the outlet's rated capacity (e.g., 24 amps on a 30-amp outlet).
Will installing a Level 2 charger increase my home insurance premium?
In most cases, adding a professionally installed, permitted Level 2 EV charger will not significantly increase your home insurance premium. However, you should always notify your insurance provider. If the installation was done without a permit or by an unlicensed individual, your insurer could deny a future fire claim, which is why professional installation and proper documentation are vital.
How much does a Level 2 charger add to my monthly electric bill?
The cost to charge at home depends on your local electricity rates and your driving habits. On average, driving 1,000 miles a month requires about 300 kWh of electricity. At the national average rate of $0.16 per kWh, this adds roughly $48 to your monthly bill. Many utility companies offer Time-of-Use (TOU) plans that provide heavily discounted rates for charging overnight, which can reduce this cost even further.
Are there tax credits or rebates available for home EV charger installation?
Yes, financial incentives are frequently available, though they vary by location and time. The federal government has historically offered tax credits for alternative fuel vehicle refueling property, which can cover a percentage of the hardware and installation costs. Additionally, many local utility companies and state environmental agencies offer point-of-sale rebates or bill credits for installing smart Level 2 chargers. Check the DOE Alternative Fuels Data Center for the most current incentive programs in your zip code.
Do I need a smart charger, or will a basic dumb charger suffice?
A basic "dumb" charger will safely and reliably charge your vehicle. However, a smart charger offers significant advantages, including the ability to schedule charging during off-peak utility hours, track your energy usage, and receive over-the-air firmware updates. If your home requires a panel upgrade, some smart chargers offer "load balancing" technology, which monitors your home's real-time power usage and dynamically adjusts the charger's draw to prevent tripping the main breaker, potentially saving you thousands of dollars on a panel upgrade.