Installing a home EV charger is one of the smartest upgrades any electric vehicle owner can make — and thanks to federal and state tax incentives, it may cost you far less than you think. The EV charger installation tax credit can offset a significant portion of your equipment and labor costs, making the transition to home charging more affordable than ever.
In this comprehensive guide, we break down everything you need to know about claiming the EV charger installation tax credit, from eligibility requirements and step-by-step installation to permits, costs, and safety considerations.
Difficulty Level: Moderate to Advanced (electrical work required)
Estimated Total Cost: $500 – $2,500 (before tax credits)
Estimated Cost After Tax Credit: $250 – $1,750
Time Required: 2 – 6 hours for professional installation
Understanding the EV Charger Installation Tax Credit
The federal government offers a tax credit for the purchase and installation of qualified electric vehicle charging equipment. Officially known as the Alternative Fuel Vehicle Refueling Property Credit, this incentive is designed to encourage EV adoption by reducing the financial barrier to home charging infrastructure.
Under current federal guidelines, eligible taxpayers can claim a credit worth up to 30% of the cost of qualified EV charging equipment and its installation, with a maximum credit of $1,000 for residential installations. This credit applies to both the charger hardware and the associated installation labor costs, which can add up quickly when electrical panel upgrades or new wiring runs are required.
According to the U.S. Department of Energy, home charging is the most convenient and cost-effective way to fuel an electric vehicle, and tax incentives are specifically structured to make this option accessible to more Americans.
Key details about the federal tax credit include:
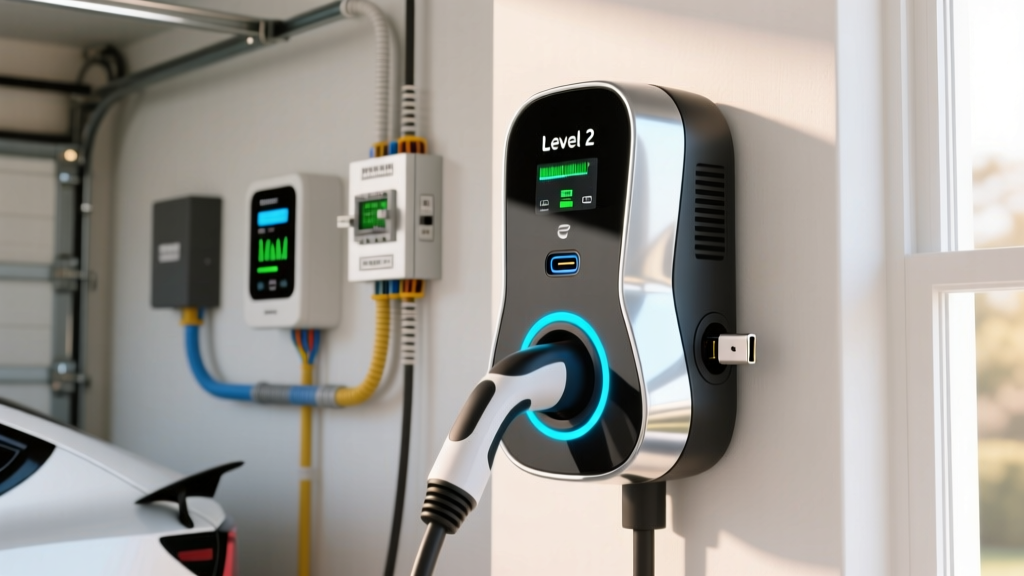
- The credit covers Level 2 (240-volt) home charging stations and associated installation costs
- The equipment must be new and installed at your primary residence
- The credit is non-refundable, meaning it reduces your tax liability but won't result in a refund beyond what you owe
- The property where the charger is installed must be located in the United States
- The charger must be installed in a location that is not eligible for certain other federal energy credits on the same expenditure
In addition to the federal credit, many states, municipalities, and utility companies offer their own rebates and incentives. Some states provide additional credits worth hundreds or even thousands of dollars, and certain utility providers offer rebates that can be stacked with federal incentives. Always check with your local utility and state energy office for programs available in your area.
Eligibility Requirements for the Tax Credit
Before you purchase a charger or schedule an installation, it is essential to confirm that you meet the eligibility criteria for the EV charger installation tax credit. Failing to meet even one requirement can result in a denied claim when you file your taxes.
Equipment Requirements
The charging equipment must meet specific standards to qualify for the tax credit. The charger must be a qualified electric vehicle charging property, which generally means it must be certified by a recognized testing laboratory such as UL (Underwriters Laboratories) or ETL. The equipment should be designed to recharge electric vehicles and must be installed at a property you own.
Level 1 chargers (standard 120-volt outlets) typically do not qualify because they do not require professional installation in most cases. The credit is primarily aimed at Level 2 chargers that require dedicated 240-volt circuits, similar to what powers a clothes dryer or electric oven. If you are shopping for a qualified charger, our best Level 2 EV chargers guide reviews top-rated models that meet certification standards.
Property and Location Requirements
The charger must be installed at your main home — the residence where you live most of the time. Rental properties, vacation homes used primarily as rentals, and commercial properties have different rules and may not qualify for the residential credit. The installation site must be located within the United States.
Tax Filing Requirements
Because the credit is non-refundable, you must have sufficient federal tax liability to benefit from it. If your total tax liability for the year is less than the credit amount, you can only claim up to the amount you owe. The unused portion of the credit generally cannot be carried forward to future tax years. Consult with a tax professional to understand how the credit applies to your specific financial situation.
Income and Geographic Considerations
Some versions of the credit include income caps or geographic restrictions. Certain provisions prioritize installations in low-income communities or rural census tracts. Check the current IRS guidance and IRS publications on the Alternative Fuel Vehicle Refueling Property Credit for the most up-to-date eligibility details.
Step-by-Step EV Charger Installation Process
Installing a Level 2 EV charger at home involves several important steps, from choosing the right location to final inspection. Here is a detailed walkthrough of the entire process.
Step 1: Assess Your Electrical Panel
Before anything else, evaluate your home's electrical panel to determine whether it can support a new 240-volt circuit. Most Level 2 chargers require a dedicated circuit rated between 20 and 60 amps, depending on the charger's power output. Your electrical panel must have enough spare capacity to accommodate this new load without overloading the system.
A general rule of thumb, as outlined in the National Electrical Code (NEC), is that the total load on your panel should not exceed 80% of its rated capacity. If you have a 200-amp panel that is already heavily loaded, you may need a panel upgrade before installing a charger — a significant cost factor to consider.
Step 2: Choose the Installation Location
Select a location for your charger that is close to where you park your EV, ideally within reach of the charging cable. Most EV charging cables range from 18 to 25 feet in length. The location should be:
- Protected from direct weather exposure if possible (garage installation is ideal)
- Close to the electrical panel to minimize wiring costs
- Mounted on a structurally sound wall or post
- Positioned so the cable reaches your vehicle's charging port comfortably
For a detailed comparison of wall-mounted versus pedestal installations, see our wall-mount vs. pedestal EV charger guide.
Step 3: Obtain Permits
Most jurisdictions require an electrical permit for the installation of a new 240-volt circuit. Your licensed electrician will typically handle this step, submitting the permit application to your local building department. Permit costs generally range from $50 to $200, depending on your municipality.
Step 4: Install the Dedicated Circuit
A licensed electrician will run a new dedicated circuit from your electrical panel to the charger location. This involves:
- Installing a new double-pole breaker in your electrical panel
- Running appropriately gauged wire through conduit from the panel to the charger location
- Installing a NEMA outlet (for plug-in chargers) or hardwiring the unit directly
- Ensuring all wiring meets NEC standards for the circuit amperage and installation type
Step 5: Mount and Connect the Charger
Once the circuit is in place, the charger unit is mounted to the wall or pedestal and connected to the new circuit. For plug-in models, the unit simply plugs into the newly installed NEMA 14-50 or NEMA 6-50 outlet. For hardwired models, the electrician connects the charger's wires directly to the circuit wiring in a junction box.
Step 6: Test and Inspect
After installation, the electrician will test the charger to verify proper operation, correct voltage, and grounding. Your local building inspector will then visit to confirm the installation meets code requirements. Passing this inspection is critical — not only for safety but also for documentation purposes when claiming your tax credit.
Permits, Inspections & Code Compliance
Skipping permits and inspections may seem like a way to save time and money, but it can lead to serious consequences. Unpermitted electrical work can void your home insurance, create fire hazards, and disqualify you from claiming the EV charger installation tax credit, as the IRS may require proof of professional, code-compliant installation.
Why Permits Matter
Electrical permits exist to protect homeowners. When a permit is pulled, the local building department sends an inspector to verify that the work meets the National Electrical Code. This ensures that wire gauges are correct, breakers are properly sized, grounding is adequate, and the installation will not create a fire or shock hazard.
The NEC specifically addresses EV charging installations under Article 625, which covers Electric Vehicle Charging System Equipment. Key code requirements include:
- The branch circuit must be rated for 125% of the charger's maximum continuous load
- GFCI (Ground Fault Circuit Interrupter) protection is required for outlets used for EV charging
- Outdoor installations must use weather-resistant enclosures and fittings
- The disconnecting means must be readily accessible
The Inspection Process
After your electrician completes the installation, the local inspector will review the work. The inspection typically takes 15 to 30 minutes and covers the breaker installation, wiring run, outlet or hardwired connection, mounting, and grounding. If the inspector identifies any issues, your electrician will need to correct them before the installation receives final approval.
Keep all permits, inspection reports, and receipts in a safe place. You will need documentation of the total installation cost — including equipment, labor, and permit fees — when you claim the tax credit on your federal return.
DIY vs. Professional Installation: What You Need to Know
One of the most common questions EV owners ask is whether they can install a charger themselves to save money. The answer depends on your electrical knowledge, local regulations, and risk tolerance.
When DIY Might Work
If you already have a suitable 240-volt outlet (such as a NEMA 14-50) near your parking spot, and your electrical panel has sufficient capacity, you may be able to simply plug in a compatible Level 2 charger without any electrical modifications. In this scenario, the "installation" is essentially hanging the charger on the wall and plugging it in — a task most homeowners can handle.
However, even in this simple case, some jurisdictions require a permit and inspection for any EV charger installation. Always check with your local building department before proceeding.
When You Absolutely Need a Professional
If any of the following apply, hiring a licensed electrician is not optional — it is essential:
- You need a new 240-volt circuit installed
- Your electrical panel needs an upgrade
- The wiring run is long or complex (through walls, crawl spaces, or underground)
- Your local jurisdiction requires licensed professionals for electrical work
- You want to ensure the installation qualifies for the tax credit and utility rebates
- You are not experienced with electrical work
Working with a licensed electrician also provides liability protection. If an electrical fire occurs and the work was done without a permit or by an unlicensed individual, your homeowner's insurance may deny the claim. The peace of mind alone is often worth the professional installation fee.
Cost Comparison
A DIY installation where you simply plug into an existing outlet might cost as little as the price of the charger itself — typically $300 to $700. A professional installation with a new circuit typically adds $500 to $1,500 in labor and materials, depending on the complexity of the wiring run and whether panel upgrades are needed.
When you factor in the tax credit — which can cover 30% of both equipment and installation costs — the price difference between DIY and professional installation narrows significantly. For most homeowners, professional installation is the safer and more cost-effective choice after incentives are applied.
Complete Cost Breakdown & How to Maximize Your Tax Credit
Understanding the full cost picture helps you plan your budget and maximize the savings available through the EV charger installation tax credit and other incentives.
Equipment Costs
Level 2 home chargers range widely in price depending on features, brand, and power output:
- Basic Level 2 chargers (16-32 amps): $250 – $500
- Smart Wi-Fi-enabled chargers (32-48 amps): $400 – $750
- Premium chargers with advanced features (48-80 amps): $600 – $1,200
For detailed reviews and comparisons of top models across all price ranges, check out our best home EV chargers roundup.
Installation Labor and Materials
Professional installation costs vary based on several factors:
- Simple installation (short run, panel nearby): $300 – $600
- Moderate installation (longer wire run, conduit required): $600 – $1,200
- Complex installation (panel upgrade, long underground run): $1,200 – $3,000+
Materials such as wire, conduit, breakers, and outlets typically account for $100 to $400 of the total installation cost, with labor making up the remainder.
Permit Fees
Expect to pay $50 to $200 for an electrical permit, depending on your local jurisdiction. Some municipalities waive permit fees for EV charger installations as an incentive to promote clean transportation.
Maximizing Your Total Savings
To get the most out of available incentives, consider these strategies:
- Stack incentives: Combine the federal tax credit with state rebates, utility company rebates, and local incentives. Some utility companies offer rebates of $250 to $500 for installing a smart charger.
- Time your purchase: If you expect higher tax liability in a particular year, time your installation to coincide with that year to fully utilize the non-refundable credit.
- Keep detailed records: Save all receipts, invoices, permit documents, and inspection reports. You will need these to substantiate your tax credit claim.
- Choose qualified equipment: Ensure the charger you purchase is certified and qualifies under IRS guidelines. Check the manufacturer's documentation for tax credit eligibility statements.
- Consider off-peak utility rates: Many utilities offer special EV charging rates that reduce your ongoing electricity costs, compounding your savings beyond the installation credit.
For more tips on reducing your EV ownership costs, read our EV charging cost comparison guide.
Safety Tips for EV Charger Installation
Electrical safety should always be the top priority when installing an EV charger. Even if you are working with a professional electrician, understanding these safety principles helps you verify the quality of the work and maintain a safe charging environment.
Electrical Safety Fundamentals
- Never work on live circuits: All work on the electrical panel must be done with the main breaker turned off. Only qualified professionals should open the panel.
- Use the correct wire gauge: Undersized wire can overheat and cause fires. The NEC specifies minimum wire gauges based on circuit amperage — for example, a 50-amp circuit typically requires 6 AWG copper wire.
- Ensure proper grounding: The charger circuit must be properly grounded to protect against electrical shock. Your electrician should verify grounding continuity during installation.
- Install GFCI protection: Ground Fault Circuit Interrupter protection is required by the NEC for EV charging outlets, especially in garages and outdoor locations where moisture may be present.
Ongoing Safety Practices
After installation, follow these practices to keep your charging setup safe:
- Inspect the charging cable regularly for signs of wear, cracking, or damage
- Keep the charger and outlet area clean and free of debris
- Do not use extension cords with your EV charger — they are not rated for the continuous high-current draw
- Ensure outdoor chargers and outlets have proper weatherproof covers
- If you notice burning smells, discolored outlets, or tripped breakers, stop using the charger immediately and contact a licensed electrician
For more information on maintaining your home charging setup safely, visit our EV charger maintenance tips article.
Troubleshooting Common Installation Issues
Even with a professional installation, you may encounter issues with your EV charger from time to time. Here are the most common problems and how to resolve them.
Charger Will Not Power On
If your charger shows no signs of life after installation, check the following:
- Verify the breaker in the electrical panel is in the ON position
- Check for a tripped GFCI outlet (if applicable) and reset it
- Confirm the charger is properly plugged in or hardwired
- Test the outlet with a multimeter to verify voltage is present
Charging Speeds Are Slower Than Expected
If your EV is charging more slowly than the charger's rated output suggests:
- Check that the circuit breaker is properly sized for the charger's amperage
- Verify the charger's amperage setting matches the circuit capacity
- Ensure the vehicle's onboard charger is not the limiting factor — some EVs cannot accept the full output of a 48-amp charger
- Look for voltage drop issues caused by undersized wire or excessively long wire runs
Breaker Trips Repeatedly
A breaker that trips frequently is a sign of an overloaded circuit or a wiring issue. Possible causes include:
- The circuit is shared with other appliances (EV chargers require a dedicated circuit)
- The breaker is undersized for the charger's draw
- The wire gauge is too small for the circuit amperage
- There is a short circuit or ground fault in the wiring
If your breaker trips repeatedly, discontinue use and have a licensed electrician inspect the installation immediately. Do not simply replace the breaker with a larger one — this can create a serious fire hazard.
Wi-Fi or Smart Features Not Connecting
For smart chargers with Wi-Fi connectivity:
- Ensure your Wi-Fi signal reaches the charger's location (garages often have poor coverage)
- Consider a Wi-Fi extender or mesh network node near the charger
- Verify the charger is connected to a 2.4 GHz network if it does not support 5 GHz
- Check the manufacturer's app for firmware updates
Frequently Asked Questions
Can I claim the EV charger tax credit if I rent my home?
Generally, the EV charger installation tax credit is available only to homeowners who install qualified charging equipment at their primary residence. If you rent, you typically cannot claim the credit because you do not own the property. However, you can discuss installation with your landlord — they may be willing to install a charger and claim the credit themselves, especially if it increases the property's value. Some states also offer renter-specific EV incentives, so check your local programs.
Does the tax credit apply to used EV chargers?
No. The federal tax credit applies only to new, qualified electric vehicle charging equipment. Used or refurbished chargers do not qualify for the credit. Additionally, the charger must be purchased new and installed during the tax year for which you are claiming the credit. Always buy from authorized retailers and keep your purchase receipt as documentation.
Can I claim the credit for a charger installed at my workplace or business?
The Alternative Fuel Vehicle Refueling Property Credit has separate provisions for commercial installations. Businesses can claim a credit for qualified charging equipment installed at commercial properties, but the credit limits and rules differ from the residential credit. Consult with a tax professional who specializes in business energy credits to understand what your company may be eligible for.
What happens if my tax liability is less than the credit amount?
Because the EV charger installation tax credit is non-refundable, it can only reduce your tax liability to zero — it will not generate a refund beyond what you owe in federal taxes. For example, if the credit amount is $1,000 but your total federal tax liability is only $600, you can only use $600 of the credit. The remaining $400 is generally forfeited and cannot be carried forward. Plan your installation timing accordingly, ideally in a year when you expect sufficient tax liability.
Do I need to file any special forms to claim the EV charger installation tax credit?
Yes. To claim the credit, you must file IRS Form 8911 (Alternative Fuel Vehicle Refueling Property Credit) along with your federal tax return. You will need to provide information about the equipment cost, installation cost, and the date the charger was placed in service. Retain all supporting documentation — including receipts, invoices from your electrician, permit records, and inspection reports — in case the IRS requests verification. Working with a tax professional can help ensure the form is completed accurately and that you claim the maximum credit available.
Final Thoughts
The EV charger installation tax credit represents a meaningful opportunity to reduce the cost of home charging infrastructure. When combined with state incentives, utility rebates, and the ongoing fuel savings that come with driving electric, the financial case for installing a home charger becomes compelling.
Whether you opt for a basic Level 2 charger or a feature-rich smart charging station, the key is to ensure your installation is performed safely, permitted properly, and documented thoroughly. This protects your home, your investment, and your ability to claim every dollar of available incentives.
Ready to find the right charger for your EV? Browse our complete EV charger reviews to compare top models, or explore our EV charging basics guide if you are new to electric vehicle ownership.