Level 2 EV Charger Installation: Your Complete Step-by-Step Guide
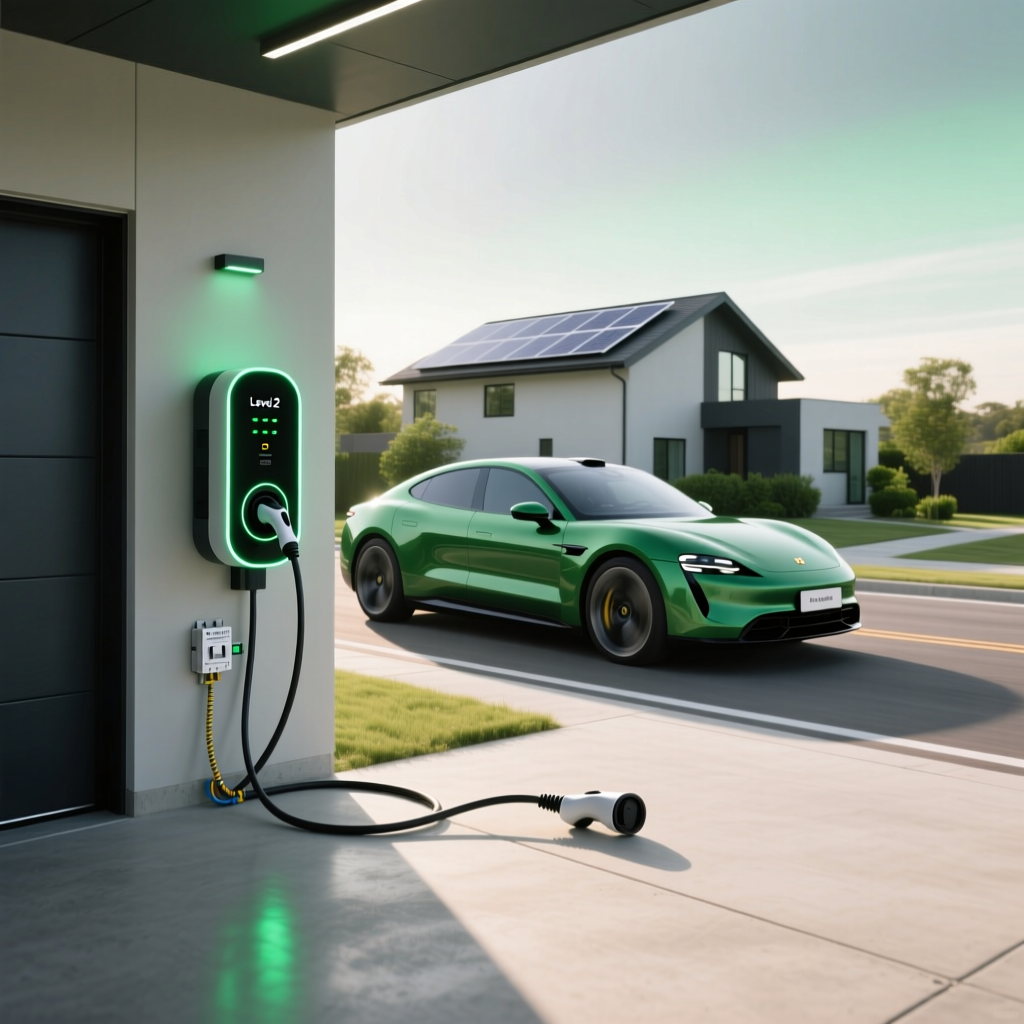
Upgrading to a Level 2 EV charger is one of the smartest moves any electric vehicle owner can make. While a standard Level 1 charger plugged into a regular 120-volt outlet might add only 3 to 5 miles of range per hour, a properly installed Level 2 charger can deliver between 12 and 60 miles of range per hour — transforming your overnight charging routine from frustrating to effortless.
But before you unbox that shiny new charging station and start running wire, there is a lot to understand about the installation process. From electrical panel capacity and dedicated circuits to permits, inspections, and safety codes, a Level 2 EV charger installation requires careful planning and execution.
At a Glance
Difficulty Level: Moderate to Advanced (electrical work involved)
Estimated Cost: $500 – $2,500+ (charger unit + installation labor + materials)
Time Required: 2 – 8 hours for installation; 1 – 4 weeks for permits & inspection
Tools Needed: Voltage tester, wire strippers, drill, conduit bender, torque screwdriver, fish tape
In this comprehensive guide, we will walk you through every aspect of Level 2 EV charger installation — whether you are considering a DIY approach or planning to hire a licensed electrician. We will also link you to our complete EV charging guides and charger reviews so you can make the best decision for your setup.
Understanding Level 2 Charging Requirements
Before you begin any installation work, it is critical to understand what a Level 2 EV charger actually requires from your home's electrical system. Level 2 chargers operate on 240-volt alternating current (AC), the same type of power that runs your electric dryer, oven, or central air conditioning unit.
Voltage & Amperage Basics
Most Level 2 chargers require a dedicated 240V circuit and draw anywhere from 16 amps to 80 amps, depending on the unit. The most common residential installations use either a 40-amp or 50-amp circuit breaker, which supports chargers rated at 32 amps or 40 amps respectively. According to the U.S. Department of Energy, a 40-amp Level 2 charger can add roughly 25 to 30 miles of range per hour of charging — more than enough for most daily driving needs.
The National Electrical Code (NEC), specifically Article 625, governs the installation of electric vehicle charging systems. One of the most important rules is the 80% continuous load rule: because EV charging is classified as a continuous load (operating for three hours or more), the circuit breaker must be rated at 125% of the charger's maximum amperage. For example, a 40-amp charger requires a 50-amp breaker, and a 48-amp charger requires a 60-amp breaker.
Circuit & Wiring Specifications
The wire gauge you need depends on the amperage of your circuit and the distance from your electrical panel to the charger location. Common specifications include:
- 40-amp circuit: 8 AWG copper wire (THHN in conduit or NM-B cable)
- 50-amp circuit: 6 AWG copper wire
- 60-amp circuit: 4 AWG copper wire (or 6 AWG for shorter runs with certain wire types)
- 80-amp circuit: 3 AWG or 2 AWG copper wire depending on insulation type
For runs longer than 100 feet, you may need to increase wire gauge to compensate for voltage drop. Always consult the National Electrical Code (NEC) tables or a licensed electrician for your specific situation.
Hardwired vs. Plug-In (NEMA 14-50)
Level 2 chargers come in two connection styles: hardwired units that connect directly to your electrical circuit, and plug-in units that use a NEMA 14-50 receptacle. Hardwired installations are generally considered safer and more permanent, and they often support higher amperages (48A and above). Plug-in installations offer flexibility — you can unplug the charger and take it with you if you move — but they are typically limited to 40 amps on a 50-amp circuit.
Both options are valid, and your choice will depend on your specific charger model, your mobility needs, and local code requirements. Check out our best Level 2 EV chargers roundup to compare hardwired and plug-in models side by side.
Electrical Panel Capacity
Your home's electrical panel must have enough spare capacity to support the additional load of an EV charger. Most modern homes have a 200-amp main panel, which is typically sufficient for a Level 2 charger. However, older homes with 100-amp service may require a panel upgrade — a significant added cost that can range from $1,500 to $3,000 or more.
To assess your panel capacity, an electrician will perform a load calculation per NEC Article 220. This calculation considers all existing loads (HVAC, water heater, kitchen appliances, lighting) and determines whether adding a 40- to 60-amp EV circuit will exceed your panel's rated capacity. If you are close to the limit, a smart charger with load management capabilities or a panel upgrade may be necessary.
Step-by-Step Level 2 EV Charger Installation
Whether you are working with a professional electrician or tackling the project yourself (where legally permitted), understanding the installation process helps you plan effectively and ensure a safe, code-compliant result.
Step 1: Choose the Installation Location
Select a location for your charger that is close to where you park your EV and within practical reach of your electrical panel. Most homeowners install Level 2 chargers in the garage, but outdoor installations on an exterior wall are also common. Consider the following factors:
- Proximity to parking: The charging cable should comfortably reach your vehicle's charge port without stretching across walkways
- Cable length: Most Level 2 chargers come with 18- to 25-foot cables; measure the distance from your desired mount point to your car's charge port
- Weather protection: For outdoor installations, ensure the charger is rated for outdoor use (look for NEMA 4 or IP65 ratings) and consider mounting under an eave or carport
- Wi-Fi signal: If you choose a smart charger, verify that your home Wi-Fi network reaches the installation location
Step 2: Assess & Prepare the Electrical Circuit
Once you have selected a location, the next step is running a dedicated 240V circuit from your electrical panel to the charger. This involves:
- Shutting off the main breaker to de-energize the panel
- Installing a new double-pole breaker of the appropriate amperage (e.g., 50A for a 40A charger)
- Running conduit (EMT, PVC, or flexible metal conduit) from the panel to the charger location
- Pulling wire through the conduit — typically two hot wires (black and red), one neutral (white, if required), and one ground (green or bare copper)
- Making connections at both the panel and the charger or receptacle
For hardwired installations, the wires connect directly to the charger's terminal block. For plug-in installations, the wires terminate at a NEMA 14-50 receptacle mounted on the wall near the charger.
Step 3: Mount the Charger
Most Level 2 chargers come with a wall-mounting bracket and hardware. Use a stud finder to locate wall studs and secure the bracket with appropriate fasteners. If mounting on masonry or concrete, use concrete anchors. The charger should be mounted at a comfortable height — typically 48 inches from the floor to the center of the unit, which also complies with ADA accessibility guidelines in many jurisdictions.
Step 4: Connect & Configure
After the wiring is complete and the charger is mounted, it is time to connect everything and power up:
- Connect the wires to the charger's terminal block or plug the unit into the NEMA 14-50 outlet
- Double-check all connections for proper torque using a calibrated torque screwdriver (per manufacturer specifications)
- Restore power at the main panel and then switch on the new breaker
- Verify the charger powers on and displays a ready status
- Configure Wi-Fi, scheduling, and any smart features through the manufacturer's app
- Perform a test charge with your EV to confirm proper operation
If you are evaluating which charger to purchase for your installation, our EV buying guides cover the top models across every price range and feature set.
Permits, Inspections & Code Compliance
One of the most overlooked aspects of EV charger installation is the permitting and inspection process. In most jurisdictions across the United States, adding a new 240V circuit requires an electrical permit, and the completed work must pass inspection before it is considered legal and safe.
Why Permits Matter
Electrical permits exist to protect you. The inspection process ensures that your installation meets the minimum safety standards defined by the NEC and any local amendments. Skipping a permit can result in:
- Voided insurance claims: If an electrical fire occurs and the work was unpermitted, your homeowner's insurance may deny the claim
- Fines & rework: Your local building department can require you to tear out unpermitted work and start over
- Resale complications: Unpermitted electrical work can become a liability during a home inspection when selling your property
- Safety hazards: Without inspection, improper wiring or overloaded circuits could go undetected
The Permitting Process
The typical permitting process involves these steps:
- Application: Submit an electrical permit application to your local building department (city or county). Many jurisdictions now offer online applications. The fee typically ranges from $50 to $200 depending on the scope of work and your location.
- Plan review: Some jurisdictions require a brief plan review, particularly for larger installations or commercial properties. For a standard residential Level 2 charger, this step is often minimal or waived.
- Installation: Complete the installation according to NEC Article 625, NEC Article 210 (branch circuits), and any local electrical codes.
- Rough-in inspection: If conduit and wiring are run inside walls, an inspector may need to see the work before drywall is closed up.
- Final inspection: Once the installation is complete, the inspector will verify proper breaker sizing, wire gauge, grounding, GFCI protection (where required), mounting, and labeling.
NEC Code Requirements to Know
The National Electrical Code outlines several specific requirements for EV charger installations under Article 625:
- Dedicated circuit: EV chargers must be on a dedicated branch circuit not shared with other outlets or appliances
- GFCI protection: NEC 2020 and later editions require GFCI protection for receptacles used for EV charging (this is built into most hardwired chargers but must be added at the breaker for plug-in installations in many cases)
- Disconnecting means: A means to disconnect the charger from its power source must be readily accessible
- Ventilation: If charging in an enclosed space where hydrogen gas could accumulate (relevant primarily for certain battery types), ventilation requirements must be met
- Labeling: The electrical panel must be labeled to identify the EV charger circuit
DIY Installation vs. Hiring a Professional Electrician
One of the biggest decisions you will face is whether to install the Level 2 charger yourself or hire a licensed electrician. Both paths have advantages and drawbacks, and the right choice depends on your skill level, local regulations, and risk tolerance.
When DIY Makes Sense
A DIY installation may be appropriate if:
- You have prior experience with residential electrical work, including running conduit, pulling wire, and working inside an electrical panel
- Your local jurisdiction allows homeowners to perform their own electrical work (most do, but some require a licensed contractor for any panel work)
- The installation is straightforward — for example, the electrical panel is near the garage and the wire run is short and unobstructed
- You are installing a NEMA 14-50 receptacle and simply plugging in a pre-made charging unit
Even experienced DIYers should consider having their work inspected by a licensed electrician before energizing the circuit. A second set of eyes can catch mistakes that could lead to fire or equipment damage.
When to Hire a Professional
Hiring a licensed electrician is strongly recommended (or legally required) when:
- Your electrical panel needs an upgrade or sub-panel installation
- The wire run is long, requires running through finished walls or ceilings, or involves underground conduit
- You are unfamiliar with NEC code requirements or load calculations
- Your jurisdiction requires a licensed contractor for permit issuance
- You want a warranty on the installation work (most electricians offer a 1-year labor warranty)
Cost Comparison: DIY vs. Professional
| Cost Factor | DIY Installation | Professional Installation |
|---|---|---|
| Charger unit | $300 – $700 | $300 – $700 |
| Materials (wire, conduit, breaker) | $100 – $300 | $100 – $400 |
| Labor | $0 (your time) | $500 – $1,500+ |
| Permit & inspection | $50 – $200 | $50 – $200 (often included) |
| Total estimated cost | $450 – $1,200 | $950 – $2,800+ |
Keep in mind that professional electricians bring expertise, liability insurance, and code knowledge that can prevent costly mistakes. A botched DIY installation could result in fire damage, voided warranties, or insurance claim denials that far exceed the cost of hiring a pro from the start.
Complete Cost Breakdown for Level 2 Charger Installation
Understanding the full cost picture helps you budget accurately and avoid surprises. Here is a detailed breakdown of the expenses involved in a typical Level 2 EV charger installation.
Charger Unit Cost
Level 2 home chargers range widely in price based on features, amperage, and brand:
- Budget models (16A–32A, basic features): $200 – $400
- Mid-range models (40A–48A, Wi-Fi enabled): $400 – $600
- Premium models (48A–80A, smart features, load management): $600 – $1,000+
For a detailed comparison of top models, see our best Level 2 EV charger reviews.
Electrical Materials
- Wire (per foot): $1.50 – $5.00 depending on gauge and type
- Conduit (per foot): $1.00 – $4.00 depending on type (PVC, EMT, flexible)
- Double-pole breaker: $15 – $60
- NEMA 14-50 receptacle & box: $25 – $60
- Miscellaneous fittings, connectors, labels: $20 – $50
Labor Costs (Professional Installation)
Electricians typically charge between $75 and $150 per hour for residential work. A straightforward installation in a garage with the panel nearby might take 2 to 4 hours, while a complex run through finished walls, attic spaces, or underground could take 6 to 8 hours or more.
Panel Upgrade (If Needed)
If your electrical panel lacks capacity, a panel upgrade can add significantly to the total cost:
- Upgrade from 100A to 200A service: $1,500 – $3,000
- Sub-panel installation: $500 – $1,500
- Load management device (alternative to panel upgrade): $200 – $500 plus installation
Available Incentives & Rebates
Many utility companies, state governments, and federal programs offer incentives that can offset a significant portion of your installation cost. According to the U.S. Department of Energy, common incentives include:
- Federal tax credits: The Alternative Fuel Infrastructure Tax Credit has historically offered up to $1,000 for residential EV charger installation (check current availability with your tax professional)
- Utility rebates: Many electric utilities offer rebates of $250 to $500 for purchasing and installing a qualified Level 2 charger
- State & local incentives: Some states offer additional tax credits, rebates, or reduced electricity rates for EV charging
- Time-of-use rates: While not a direct rebate, enrolling in a time-of-use plan can reduce your charging costs by 30–60% by charging during off-peak hours
Safety Tips & Best Practices
Safety should be your top priority throughout the entire installation process. Working with 240V electricity carries serious risks, including electrocution, arc flash, and fire. Follow these best practices to protect yourself, your home, and your vehicle.
Before You Start
- Always turn off the main breaker before working inside the electrical panel. Use a non-contact voltage tester to confirm that all circuits are de-energized before touching any wires.
- Wear appropriate PPE including insulated gloves, safety glasses, and non-conductive footwear.
- Work with a partner whenever possible. If an accident occurs, having someone nearby who can call for help or administer first aid is critical.
- Read the manufacturer's installation manual completely before beginning. Each charger model has specific wiring requirements, torque specifications, and clearances that must be followed to maintain the warranty and ensure safe operation.
During Installation
- Use the correct wire gauge for your circuit amperage and run length. Undersized wire can overheat and cause a fire.
- Torque all connections to manufacturer specifications. Loose connections create resistance, which generates heat and is a leading cause of electrical fires. Use a calibrated torque screwdriver — this is not a step to eyeball.
- Ensure proper grounding. The equipment grounding conductor must be properly connected at both the panel and the charger or receptacle. A missing or improper ground is one of the most dangerous installation errors.
- Protect wiring with appropriate conduit in areas where it could be subject to physical damage. NEC Article 300 outlines specific protection requirements.
- Label the circuit clearly in the electrical panel. Write "EV CHARGER" on the breaker directory so that anyone working on the panel in the future can identify the circuit.
After Installation
- Test GFCI protection (if applicable) by pressing the test button on the breaker or receptacle.
- Monitor the first several charging sessions for any unusual sounds, smells, or heat at the breaker, receptacle, or charger. Warm (not hot) components are normal; burning smells or discoloration indicate a problem.
- Keep the area around the charger clear of flammable materials and ensure adequate ventilation.
- Register your charger with the manufacturer to activate the warranty and receive firmware updates.
Troubleshooting Common Installation Issues
Even a well-planned installation can encounter issues. Here are the most common problems homeowners face and how to resolve them.
Charger Will Not Power On
Possible causes: Tripped breaker, loose wire connection, reversed hot and neutral wires, or a defective charger unit.
Solution: First, check the breaker in the electrical panel and reset it if tripped. If the breaker trips again immediately, there is likely a short circuit — do not continue resetting it. Instead, turn off the breaker and inspect all wire connections at the panel, receptacle, and charger terminal block. Verify that hot wires are connected to hot terminals, the neutral (if present) is connected properly, and the ground is secure. If all connections check out, contact the charger manufacturer for support.
Breaker Trips Repeatedly During Charging
Possible causes: Circuit overload (charger amperage exceeds breaker rating), undersized wire, loose connections, or a failing breaker.
Solution: Verify that your charger's maximum amperage does not exceed 80% of the breaker rating. For example, a 40-amp charger must be on a 50-amp breaker, not a 40-amp breaker. Check for loose connections at the breaker terminals and the charger. If the breaker is old or has been tripped many times, it may need to be replaced.
Charging Speed Is Slower Than Expected
Possible causes: Charger configured for lower amperage, voltage drop from a long wire run, vehicle's onboard charger limitation, or extreme battery temperatures.
Solution: Check the charger's app or display to confirm it is set to its maximum amperage. Some chargers ship with a lower default setting. Verify that the wire gauge is appropriate for the run length — excessive voltage drop on long runs can reduce charging speed. Also check your vehicle's maximum AC charging rate; some EVs have onboard chargers limited to 32A or 48A regardless of the charger's capacity. For more details, read our guide to EV charging speeds.
Wi-Fi Connectivity Issues
Possible causes: Weak Wi-Fi signal at the charger location, 2.4 GHz vs. 5 GHz band incompatibility, or router firewall settings.
Solution: Most smart chargers operate on 2.4 GHz Wi-Fi networks. Ensure your router's 2.4 GHz band is enabled and that the signal reaches the charger location. Consider a Wi-Fi extender or mesh node if the signal is weak. Some chargers also support Ethernet connections or cellular connectivity as alternatives.
NEMA 14-50 Receptacle Feels Hot
Possible causes: Loose wire connections behind the receptacle, a worn or low-quality receptacle, or sustained high-amperage draw.
Solution: Immediately stop charging and turn off the breaker. Remove the receptacle cover and inspect all wire connections. Tighten terminal screws to the manufacturer's torque specification. Consider upgrading to a high-quality industrial-grade NEMA 14-50 receptacle (such as those made by Hubbell or Bryant) which are designed to handle sustained high-current loads better than standard residential-grade receptacles. Many EV charger manufacturers, including those reviewed in our charger reviews section, specifically recommend industrial-grade receptacles.
Frequently Asked Questions
Do I need a permit to install a Level 2 EV charger at home?
In most jurisdictions, yes. Installing a new 240V circuit for an EV charger requires an electrical permit and a subsequent inspection. The permit ensures that your installation meets NEC and local code requirements, protecting your safety, your home's insurability, and its resale value. Permit fees typically range from $50 to $200. Some jurisdictions have streamlined the permitting process for EV charger installations, offering same-day or online permit issuance. Always check with your local building department before starting work.
Can I install a Level 2 charger myself, or do I need an electrician?
Whether you can legally perform your own electrical work depends on your local jurisdiction. Many areas allow homeowners to do their own electrical work on their primary residence, provided they obtain the required permits and pass inspections. However, some municipalities require a licensed electrician for any work involving the electrical panel. Even where DIY is permitted, working with 240V electricity carries significant risk. If you lack experience with residential wiring, hiring a licensed electrician is strongly recommended. A professional installation typically costs between $500 and $1,500 in labor and includes a workmanship warranty.
How long does a Level 2 EV charger installation take?
The physical installation typically takes between 2 and 8 hours, depending on the complexity of the wire run. A simple installation where the electrical panel is adjacent to the garage might take only 2 to 3 hours. A more complex installation involving long conduit runs, running wire through finished walls or attic spaces, or installing a sub-panel could take a full day or more. The permitting and inspection process adds additional time — expect 1 to 4 weeks from application to final approval, depending on your local building department's workload.
Will installing a Level 2 charger increase my electric bill significantly?
Charging an EV at home does increase your electricity consumption, but the cost is generally much lower than fueling a gasoline vehicle. The average American driver travels about 37 miles per day, which requires roughly 11 to 13 kWh of electricity to replenish. At the national average electricity rate of approximately $0.16 per kWh, that translates to about $1.75 to $2.10 per day, or roughly $50 to $65 per month. By comparison, the same distance in a gasoline vehicle averaging 25 mpg at $3.50 per gallon would cost about $155 per month. To minimize costs, enroll in your utility's time-of-use program and schedule charging during off-peak hours when rates can be 50% or more below the standard rate.
What size breaker do I need for a Level 2 EV charger?
The breaker size depends on your charger's maximum amperage rating and the NEC's 80% continuous load rule. The breaker must be rated at 125% of the charger's maximum draw. Here is a quick reference:
- 16-amp charger: 20-amp breaker
- 24-amp charger: 30-amp breaker
- 32-amp charger: 40-amp breaker
- 40-amp charger: 50-amp breaker
- 48-amp charger: 60-amp breaker
- 64-amp charger: 80-amp breaker
Always refer to the charger manufacturer's installation manual for the specified breaker size and wire gauge. Using an undersized breaker will result in nuisance tripping, while an oversized breaker on undersized wire creates a fire hazard.
Final Thoughts
Installing a Level 2 EV charger is one of the most rewarding upgrades you can make as an electric vehicle owner. The convenience of waking up to a fully charged car every morning, combined with the significant cost savings over gasoline, makes the investment well worth it.
The key to a successful installation is preparation. Understand your electrical system's capacity, choose the right charger for your needs, obtain the necessary permits, and follow NEC code requirements to the letter. Whether you take the DIY route or hire a licensed electrician, prioritizing safety and code compliance will ensure your charger operates reliably for years to come.
Ready to find the perfect charger for your home? Explore our top-rated Level 2 EV charger reviews and comprehensive EV guides to make an informed decision. If you are new to EV ownership, our EV charging basics guide covers everything you need to know about Level 1, Level 2, and DC fast charging.