EV Charger Installation Home Cost: The Complete Guide to Setup, Permits & Savings
Making the switch to an electric vehicle is one of the most impactful decisions you can make for your daily commute & your wallet. But once you bring that EV home, one question quickly rises to the surface: how much does it actually cost to install an EV charger at home?
The answer depends on a number of variables — your home's electrical panel capacity, the type of charger you choose, whether you hire a licensed electrician or attempt a DIY approach, and your local permitting requirements. In this comprehensive guide, we break down every cost factor so you can budget accurately & make a confident decision.
At a Glance
Difficulty Level: Moderate to Advanced (electrical work involved)
Estimated Total Cost: $300 – $2,500+ (charger + installation)
Time Required: 2 – 8 hours for professional installation
Permits Required: Yes, in most jurisdictions
Recommended Skill Level: Licensed electrician strongly advised
Understanding EV Charger Requirements for Home Installation
Before you start shopping for chargers or calling electricians, it's essential to understand what your home & your vehicle actually need. Not every home is immediately ready for a high-speed EV charging setup, & knowing your baseline will help you avoid costly surprises.
Level 1 vs. Level 2 Charging: What's the Difference?
Level 1 charging uses a standard 120-volt household outlet (NEMA 5-15). Every EV comes with a Level 1 charging cable, & it requires no special installation. However, Level 1 charging is slow — typically adding 3 to 5 miles of range per hour of charging. For a vehicle with a 250-mile battery, a full charge could take over 50 hours.
Level 2 charging operates on a 240-volt circuit, similar to what powers your electric dryer or oven. Level 2 chargers add 15 to 60+ miles of range per hour depending on the amperage, making them the practical choice for most EV owners. A full overnight charge is easily achievable with a properly installed Level 2 home charger.
If you're exploring the best options on the market, check out our reviews of the best Level 2 EV chargers to find a unit that matches your vehicle & budget.
Electrical Panel Capacity
Your home's electrical panel is the starting point for any EV charger installation. Most modern homes have a 100-amp or 200-amp service panel. A Level 2 charger typically draws between 16 & 80 amps, so your panel must have enough spare capacity to handle the additional load alongside your existing appliances.
A licensed electrician will perform a load calculation to determine whether your panel can support the charger. If your panel is at or near capacity, you may need a panel upgrade (also called a "heavy-up"), which can add $1,000 to $3,000 to your total project cost.
Circuit & Wiring Requirements
The National Electrical Code (NEC) requires that EV charging circuits be dedicated — meaning no other outlets or appliances share the same circuit breaker. The wire gauge must also match the amperage of the circuit:
- 16-amp charger: Requires a 20-amp circuit with 12 AWG wire
- 32-amp charger: Requires a 40-amp circuit with 8 AWG wire
- 48-amp charger: Requires a 60-amp circuit with 6 AWG wire
- 80-amp charger: Requires a 100-amp circuit with 3 AWG wire
The NEC also specifies that continuous loads (which includes EV charging) should not exceed 80% of a circuit breaker's rated capacity. This is why a 48-amp charger needs a 60-amp breaker, not a 48-amp one.
Step-by-Step EV Charger Installation Process
Whether you hire a professional or take the DIY route, understanding the installation process helps you plan effectively & ensure nothing gets overlooked. Here's what a typical Level 2 EV charger installation involves from start to finish.
Step 1: Choose Your Charger Location
The ideal location for your EV charger is close to where you park your vehicle — typically in a garage or on an exterior wall near your driveway. Consider these factors:
- Cable reach: Most charger cables are 18 to 25 feet long. Ensure the cable can comfortably reach your vehicle's charge port from the mounting location.
- Proximity to the electrical panel: The closer your charger is to the panel, the less wiring is needed — which reduces material & labor costs.
- Indoor vs. outdoor: If installing outdoors, choose a charger rated for outdoor use (NEMA 4 rating) & plan for weatherproof conduit & enclosures.
- Wi-Fi signal strength: Smart chargers require a stable Wi-Fi connection for scheduling, monitoring, & over-the-air updates.
Step 2: Electrical Panel Assessment & Load Calculation
A qualified electrician will inspect your panel to verify available capacity. They'll calculate your home's existing electrical load & determine whether the new circuit can be safely added. If an upgrade is needed, this step will define the scope & cost of that additional work.
Step 3: Run the Circuit & Install Wiring
This is the most labor-intensive part of the installation. Your electrician will:
- Install a new dedicated circuit breaker in your electrical panel
- Run appropriately gauged wire from the panel to the charger location through conduit
- Mount junction boxes or a subpanel if the run is long or complex
- Terminate the wiring at a NEMA outlet (for plug-in chargers) or hardwire directly to the charger unit
The complexity of this step depends heavily on your home's construction. Running wire through an unfinished basement or open attic is straightforward & inexpensive. Fishing wire through finished walls, across multiple floors, or underground to a detached garage adds significant time & cost.
Step 4: Mount the Charger & Connect
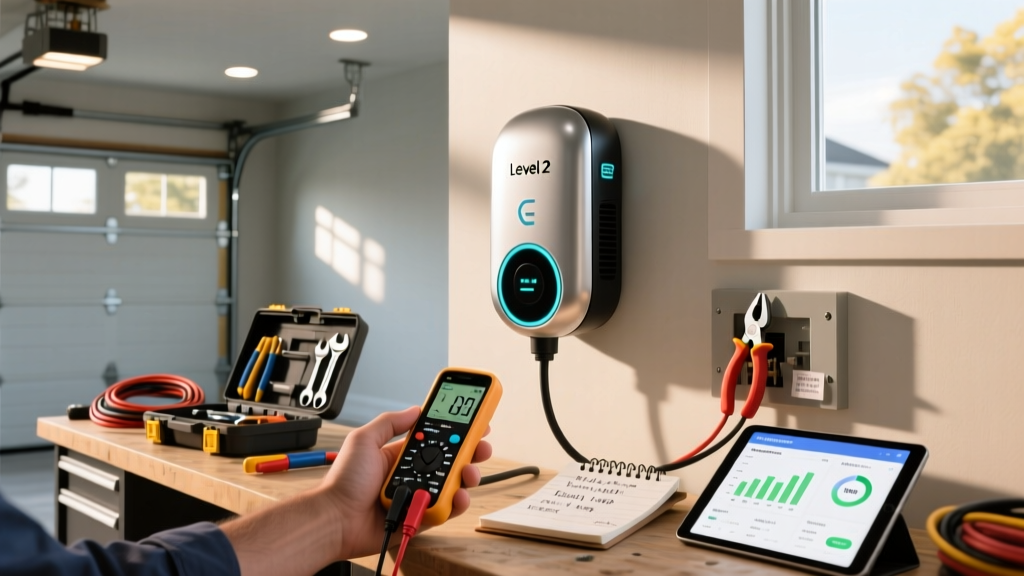
Once the wiring is in place, the charger unit is mounted to the wall using the included bracket. For hardwired units, the electrician connects the wires directly to the charger's internal terminals. For plug-in units, they install the appropriate NEMA outlet (commonly a NEMA 14-50 or NEMA 6-50).
Step 5: Testing & Configuration
After physical installation, the charger must be tested to verify proper voltage, grounding, & communication with the vehicle. Smart chargers will also need to be connected to your home Wi-Fi network & configured through the manufacturer's app. Learn more about getting the most from your setup in our complete guide to EV charging at home.
Permits, Inspections & Code Compliance
Skipping permits might save a few hundred dollars upfront, but it can create serious problems down the road — from voided warranties to insurance claim denials. Here's what you need to know about the regulatory side of EV charger installation.
When Is a Permit Required?
In most municipalities, any new electrical circuit requires a permit. This includes installing a 240-volt outlet for an EV charger or hardwiring a charging station. The permit process ensures that the work meets the National Electrical Code (NEC) standards & local amendments.
Typical permit costs range from $50 to $300, depending on your locality & the scope of work. Some jurisdictions have streamlined permit processes specifically for EV charger installations to encourage adoption.
The Inspection Process
After installation, a local electrical inspector will visit your home to verify that the work complies with code. The inspector will check:
- Proper breaker sizing & wire gauge
- Correct grounding & bonding
- Adequate conduit & wire protection
- GFCI protection where required (NEC Article 625 specifies requirements for EV charging equipment)
- Proper labeling of the circuit breaker & disconnect
If the inspection fails, the electrician must correct the issues & schedule a re-inspection — adding time & potentially cost to your project.
Why Permits Matter for Rebates & Resale
Many utility companies & government programs require proof of permitted installation before issuing rebates or tax credits. Additionally, unpermitted electrical work can become a liability during a home inspection if you decide to sell your property. Always pull the proper permits — it protects your investment & your safety.
DIY vs. Professional Installation: Which Is Right for You?
The debate between DIY & professional installation comes down to your skill level, your home's electrical setup, & your tolerance for risk. Let's break down both options honestly.
When DIY Might Work
DIY installation may be feasible if:
- You have experience with residential electrical work & understand NEC requirements
- Your electrical panel has ample spare capacity & accessible knockouts
- The wire run is short & straightforward (e.g., the panel is in the garage next to where you'll mount the charger)
- You're installing a plug-in unit using an existing, properly rated 240V outlet (such as a NEMA 14-50 already in your garage)
- Your local jurisdiction allows homeowner electrical permits
If you're simply plugging a Level 2 charger into an existing dryer outlet, the "installation" is essentially mounting the unit on the wall & plugging it in. In this scenario, costs are minimal & DIY is low-risk.
When to Hire a Professional
You should hire a licensed electrician if:
- Your panel needs an upgrade or you're unsure about available capacity
- The wire run is long, goes through finished walls, or requires trenching
- You're hardwiring the charger (no plug — direct electrical connection)
- Your jurisdiction requires a licensed professional for electrical permits
- You want the work warrantied & documented for insurance purposes
Professional installation typically costs between $500 and $2,000 for labor, depending on complexity. While this is a meaningful expense, it ensures code compliance, safety, & peace of mind. Many charger manufacturers also require professional installation to maintain the product warranty.
For a curated list of chargers that work well with both plug-in & hardwired installations, browse our EV charger comparison guide.
Complete Cost Breakdown: What You'll Actually Spend
Now let's get into the numbers. The total cost of installing an EV charger at home breaks down into several categories, each with its own range of variables.
The Charger Unit
| Charger Type | Amperage | Typical Price Range |
|---|---|---|
| Basic Level 2 (non-smart) | 16–32 amps | $200 – $400 |
| Smart Level 2 (Wi-Fi enabled) | 32–48 amps | $400 – $750 |
| Premium/High-Power Level 2 | 48–80 amps | $600 – $1,200 |
Electrical Materials
Beyond the charger itself, you'll need wiring, conduit, a circuit breaker, junction boxes, & possibly a subpanel. Material costs typically range from $100 to $500, but can go higher for long wire runs or complex routing. Copper wire prices fluctuate, so get current pricing from your electrician or supplier.
Labor Costs
Electricians typically charge between $75 and $150 per hour, though rates vary by region. A straightforward installation in a garage with the panel nearby might take 2 to 3 hours, while a complex run through finished walls or to a detached structure could take 6 to 8 hours or more.
| Installation Scenario | Estimated Labor Cost |
|---|---|
| Simple garage install (panel nearby) | $200 – $500 |
| Moderate complexity (longer run, some wall fishing) | $500 – $1,000 |
| High complexity (trenching, subpanel, finished walls) | $1,000 – $2,500+ |
Permit & Inspection Fees
As noted earlier, expect to pay $50 to $300 for permits. Inspection is typically included in the permit fee.
Panel Upgrade (If Needed)
If your electrical panel doesn't have enough capacity, a panel upgrade from 100 amps to 200 amps typically costs $1,500 to $3,000. While this is a significant added expense, it also increases your home's overall electrical capacity & can add value to your property.
Total Estimated Cost Ranges
| Scenario | Total Cost Range |
|---|---|
| Plug into existing 240V outlet (no electrical work) | $200 – $750 (charger only) |
| Standard professional install (adequate panel, short run) | $800 – $1,500 |
| Complex install with panel upgrade | $2,500 – $5,000+ |
For more details on budgeting for your EV setup, see our guide on setting up your EV home charging station.
Safety Tips & Best Practices
EV charger installation involves high-voltage electrical work that can be dangerous if done improperly. Whether you go the DIY route or hire a professional, these safety principles are non-negotiable.
Always De-Energize Before Working
Never work on an electrical panel with the main breaker on. Shut off the main breaker & verify that circuits are de-energized using a non-contact voltage tester before touching any wiring. According to the U.S. Department of Energy, improper electrical work is a leading cause of residential electrical fires.
Use Proper Wire Gauge & Breaker Sizing
Undersized wire on an oversized breaker is a fire hazard. Always follow NEC wire ampacity charts & the 80% continuous load rule. When in doubt, go one gauge larger than the minimum requirement.
Ensure Proper Grounding
Your EV charger circuit must have a reliable equipment grounding conductor. Never rely on a ground rod alone — the grounding path must return to the panel's ground bus. Improper grounding can result in electric shock or damage to your vehicle's onboard charger.
Install GFCI Protection Where Required
The NEC requires GFCI (Ground Fault Circuit Interrupter) protection for outlets in garages & outdoor locations. Some EV chargers have built-in GFCI protection; if yours does not, ensure the circuit breaker provides it. Double-GFCI setups (GFCI breaker + GFCI in the charger) can cause nuisance tripping, so consult manufacturer documentation.
Weatherproof Outdoor Installations
For outdoor chargers, use weatherproof enclosures, in-use covers for outlets, & conduit rated for wet locations. Ensure all connections are sealed against moisture intrusion. Look for chargers with a NEMA 4 or IP65 rating for outdoor durability.
Schedule Regular Maintenance Checks
Periodically inspect your charger's cable for fraying or damage, check the plug & outlet for signs of heat discoloration, & verify that the circuit breaker hasn't tripped. Many smart chargers provide diagnostic data through their companion apps — use this data to catch issues early.
Troubleshooting Common EV Charger Installation Issues
Even with a professional installation, you may encounter issues after your charger is up & running. Here are the most common problems & how to address them.
Charger Won't Power On
Possible causes: Tripped circuit breaker, loose wire connection, or a faulty charger unit.
Solution: Check the breaker in your panel & reset it if tripped. If it trips again immediately, there may be a short circuit — call your electrician. Verify that all wire connections are tight at both the breaker & the charger terminals.
Charging Speeds Are Slower Than Expected
Possible causes: The charger is sharing a circuit with other loads, the vehicle's onboard charger has a lower maximum acceptance rate, or voltage drop over a long wire run is reducing effective power.
Solution: Confirm your circuit is dedicated. Check your vehicle's maximum AC charging rate — if it accepts only 32 amps but your charger outputs 48 amps, you'll only get 32 amps of charging. For long wire runs, consult an electrician about upsizing the wire to reduce voltage drop.
Circuit Breaker Trips Repeatedly
Possible causes: Overloaded circuit, undersized breaker, GFCI sensitivity conflict, or a fault in the charger or wiring.
Solution: Verify the breaker is sized correctly for the charger's amperage (125% of continuous load). If using a GFCI breaker with a charger that has built-in GFCI, try switching to a standard breaker per the manufacturer's guidance. Persistent tripping indicates a fault that requires professional diagnosis.
Wi-Fi Connectivity Issues with Smart Chargers
Possible causes: Weak Wi-Fi signal in the garage, incompatible network settings (many smart chargers only support 2.4 GHz), or router firewall blocking the charger's communication.
Solution: Move your router closer to the garage, install a Wi-Fi extender, or switch the charger to a 2.4 GHz network. Some chargers support ethernet connections for more reliable connectivity.
Charger Gets Warm During Use
Possible causes: Some warmth is normal during high-amperage charging, but excessive heat at the plug or outlet indicates a poor connection or undersized wiring.
Solution: If the plug or outlet feels hot to the touch (not just warm), stop charging immediately & have an electrician inspect the connections. Heat damage to plugs or outlets is a serious fire risk.
Frequently Asked Questions
Is it worth installing a Level 2 charger at home?
For most EV owners, absolutely. A Level 2 charger can fully recharge your vehicle overnight, eliminating the need for frequent trips to public charging stations. The convenience of waking up to a full battery every morning is one of the biggest advantages of EV ownership. Even factoring in installation costs, home charging is significantly cheaper per mile than public DC fast charging — typically costing the equivalent of $1 to $2 per gallon of gasoline depending on your local electricity rates.
Can I use an existing dryer outlet for my EV charger?
In some cases, yes. If you have a NEMA 14-50 or NEMA 10-50 outlet already installed for a dryer, you may be able to use it for a plug-in Level 2 charger. However, there are important caveats: the outlet must be in good condition, the circuit must be properly rated, & you should not share the circuit between the dryer & the charger. If both appliances run simultaneously, you risk tripping the breaker. The safest approach is to have an electrician verify the outlet's condition & install a dedicated circuit if possible. Never use an adapter to convert a NEMA 10-30 (ungrounded) outlet for EV charging — this is a code violation & a safety hazard.
How long does EV charger installation take?
A straightforward installation — where the electrical panel is near the charger location in a garage with open walls — can be completed in 2 to 4 hours. More complex installations involving long wire runs, wall fishing, trenching, or panel upgrades can take 4 to 8 hours or more. If a panel upgrade is required, the entire project may span multiple days including the utility company's involvement.
Are there rebates or incentives for home EV charger installation?
Yes, many utility companies, state governments, & local municipalities offer rebates or tax incentives for installing home EV charging equipment. Utility rebates can range from $100 to $1,000 or more, sometimes covering a significant portion of your installation cost. The U.S. Department of Energy's Alternative Fuels Data Center maintains a searchable database of current incentives by state. Check with your local utility provider & state energy office to see what's available in your area. Some programs require pre-approval before installation, so research incentives before you begin the project.
Does installing an EV charger increase my home's value?
Studies & real estate data suggest that homes with EV charging infrastructure are increasingly attractive to buyers, particularly as EV adoption continues to grow. While the installation cost may not be fully recouped dollar-for-dollar, a properly permitted Level 2 charger installation is generally viewed as a desirable upgrade — similar to having a dedicated outlet for an electric dryer or a 240-volt workshop circuit. If you're planning to sell your home in the coming years, keeping all installation documentation, permits, & inspection records will help demonstrate the value of the upgrade to potential buyers.
Ready to find the right charger for your home? Start with our top-rated Level 2 EV charger reviews & explore our full library of EV charging guides for everything you need to know about electric vehicle ownership.