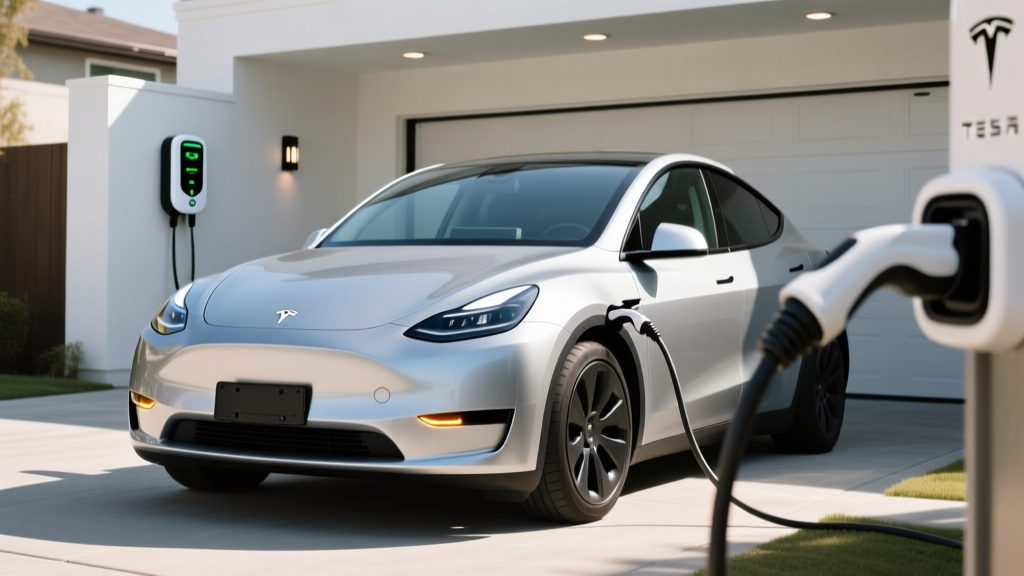
Transitioning to an electric vehicle (EV) is an exciting step toward sustainable transportation, but the ownership experience heavily relies on a reliable home charging setup. While Level 1 charging is as simple as plugging into a standard wall outlet, most EV owners quickly realize the need for a dedicated Level 2 home charging station to meet their daily driving demands. If you are currently exploring the differences, our guide on Level 1 vs Level 2 charging breaks down the charging speeds, range recovery, and daily convenience factors that make Level 2 the gold standard for home use.
Installing a Level 2 EV charger at home transforms your daily routine, allowing you to wake up to a full battery every morning without relying on public infrastructure. However, the installation process involves high-voltage electrical work, local building codes, and critical safety considerations that cannot be overlooked. Whether you are browsing our list of the best home EV chargers or preparing to upgrade your electrical panel, this comprehensive guide will walk you through everything you need to know.
Difficulty Level: Moderate to Advanced (Electrical knowledge & local code familiarity required)
Estimated Cost: $500 to $2,500+ (excluding the cost of the charger hardware)
Time Required: 2 to 8 hours, depending on panel upgrades, conduit routing, and inspection scheduling.
Pre-Installation Requirements & Electrical Panel Assessment
Before you purchase a charging unit or schedule an electrician, you must evaluate your home’s electrical infrastructure. The most critical component is your main electrical service panel. Most modern homes are equipped with a 200-amp service panel, which is generally sufficient to support a dedicated 40-amp or 50-amp circuit for an EV charger alongside standard household appliances. However, older homes with 100-amp or 150-amp panels may require a costly service upgrade before an installation can proceed.
According to the National Electrical Code (NEC), specifically Article 625 which governs Electric Vehicle Charging System Equipment, EV chargers are classified as continuous loads. This means the circuit must be rated for 125% of the charger’s maximum continuous draw. For example, if you purchase a 40-amp EV charger, it must be connected to a 50-amp breaker. If you opt for a 48-amp charger, you will need a 60-amp breaker. Failing to adhere to the continuous load rule is a major fire hazard and will result in an immediate failed inspection.
You must also decide between a hardwired connection and a plug-in setup. Hardwired chargers are permanently connected directly to the electrical panel via a junction box or conduit, offering higher amperage capabilities (up to 80 amps) and better weather resistance. Plug-in chargers utilize a NEMA 14-50 receptacle, which offers the advantage of portability. If you move, you can take the charger with you, and the outlet can double for other high-draw appliances or portable EV chargers. However, NEMA 14-50 outlets are limited to 50 amps, capping your continuous charging speed at 40 amps.
Step-by-Step EV Charger Installation Process
For those with advanced electrical experience, or for those looking to understand what a professional electrician will do, the installation process follows a strict sequence to ensure safety and code compliance. Always verify local regulations before beginning any electrical work.
Step 1: Power Down & Verify
The very first step is to shut off the main breaker to your electrical panel. Use a non-contact voltage tester or a multimeter to verify that the bus bars and existing breakers are completely de-energized. Never assume a panel is dead based solely on the switch position.
Step 2: Mounting the Charger & Backplate
Determine the optimal location for the charger. It should be close enough to your vehicle’s charging port to prevent the cable from stretching or resting on the ground, but positioned so that it does not obstruct walkways. Use a stud finder to locate the wooden or metal studs behind the drywall, or use masonry anchors if mounting to a brick or concrete block wall. Secure the mounting bracket using heavy-duty lag bolts to ensure it can support the weight of the unit and the tension of the cable.
Step 3: Running Conduit & Wiring
If you are hardwiring the unit or installing a NEMA 14-50 outlet, you will need to run wires from the main panel to the charger location. Electricians typically use PVC or flexible metal conduit to protect the wires. Inside the conduit, you will pull THHN/THWN-2 copper wire. A standard 50-amp circuit requires two hot wires (black & red), one neutral wire (white), and one ground wire (green or bare copper). Note that some modern EV chargers do not require a neutral wire, but running one is often recommended for future-proofing and meeting specific local code variations.
Step 4: Panel Connection & Torque Settings
At the main panel, install the new double-pole breaker. Connect the hot wires to the breaker terminals, the neutral to the neutral bus bar, and the ground to the grounding bus bar. This is where precision matters: the NEC now requires that all terminal connections be tightened to the manufacturer’s specified torque settings using a calibrated torque screwdriver. Loose connections create resistance, leading to heat buildup, melted insulation, and electrical fires.
Step 5: Final Connections & Testing
At the charger end, strip the wires and connect them to the unit’s terminal block or wire the NEMA 14-50 receptacle. Ensure the ground wire is securely fastened. Once all connections are made and the conduit is sealed, restore power at the main breaker. Use a multimeter to check the voltage at the outlet or charger terminals (it should read between 220V & 240V). Finally, plug in your EV or initiate a test charge via the manufacturer’s app to confirm the system is operational.
Navigating Permits & Inspections
Skipping the permitting process is one of the most common and costly mistakes homeowners make. The U.S. Department of Energy strongly advises adhering to all local building codes and securing the necessary permits for EV supply equipment (EVSE) installations. A permit ensures that a licensed city or county inspector will review the work to verify it meets the National Electrical Code and local amendments.
When you apply for an electrical permit, you will typically need to submit a load calculation worksheet. This document proves to the building department that your home’s electrical panel has enough spare capacity to handle the new continuous load without overloading the main service. The inspector will visit your home after the installation is complete to check for proper grounding, correct wire gauge, appropriate conduit fill ratios, and verified torque markings on the breaker terminals.
Failing to pull a permit can have severe repercussions. If an electrical fire occurs and the insurance company discovers the high-voltage circuit was installed without a permit or inspection, your claim will likely be denied. Furthermore, when you eventually sell your home, unpermitted electrical work can derail the real estate transaction, forcing you to tear out the walls and redo the work under the supervision of the city. Always check with your local building department or your Homeowners Association (HOA) before breaking ground.
DIY Installation vs. Hiring a Professional Electrician
The debate between DIY installation and hiring a licensed professional often comes down to cost versus liability. While watching a few tutorial videos might make the process look straightforward, working inside a 200-amp main electrical panel is incredibly dangerous. Arc flashes, severe shocks, and fatal electrocution are real risks for those who lack formal training and proper personal protective equipment (PPE).
When to Consider DIY:
Strictly speaking, DIY installation should only be considered if you are an experienced home renovator with a deep understanding of electrical systems, and only if you are installing a simple NEMA 14-50 outlet in a garage where the panel is immediately adjacent, requiring no complex conduit routing or drywall repair. Even then, you must still pull a permit and pass an inspection.
When to Hire a Professional:
You should always hire a licensed, bonded, and insured electrician if your installation requires a panel upgrade, running wires through finished walls, trenching conduit underground to a detached garage, or hardwiring a high-amperage unit. Professional electricians carry the necessary insurance to protect your home, and their work is usually backed by a warranty. Furthermore, many EV charger manufacturers will void the hardware warranty if the unit is not installed by a certified professional. When investing in a premium vehicle and a high-end charger, protecting that investment with professional labor is well worth the cost.
Comprehensive Cost Breakdown
Understanding the financial commitment is crucial before starting your project. The total cost of an EV charger installation varies wildly based on your home’s existing infrastructure and the distance between your electrical panel and the charging location.
- EV Charger Hardware: $300 to $700. Premium smart chargers with Wi-Fi connectivity, load balancing, and longer cables sit at the higher end of this spectrum.
- Standard Installation Labor: $500 to $1,200. This covers a straightforward installation where the panel has adequate space and the charger is mounted on the wall directly behind or adjacent to the electrical panel.
- Complex Routing & Conduit: $800 to $2,000+. If the electrician needs to run conduit through an attic, crawl space, or trench a line across your yard to a detached garage, labor and material costs will increase significantly.
- Electrical Panel Upgrade: $1,500 to $3,500. If your home has a 100-amp service and requires an upgrade to 200-amp service to accommodate the EV charger, this is a major utility project that requires coordination with your local power company.
- Permits & Inspections: $50 to $250. Depending on your local municipality, permit fees are generally a minor fraction of the overall budget but are absolutely mandatory.
To offset these costs, be sure to research local, state, and federal tax credits or utility company rebates. Many local power providers offer substantial rebates for installing smart Level 2 chargers that participate in off-peak demand response programs.
Essential Safety Tips & Best Practices
Safety should be the paramount concern when dealing with high-voltage continuous loads. Beyond basic code compliance, implementing the following best practices will ensure your charging station operates safely for decades.
Ground Fault Circuit Interrupter (GFCI) Protection:
The NEC requires GFCI protection for all outlets rated 50 amps or less that are installed in garages and outdoor locations. If you are installing a NEMA 14-50 receptacle, you must use a GFCI breaker. However, hardwired EV chargers often have internal GFCI protection built into the unit itself, which exempts them from the breaker-level GFCI requirement in many jurisdictions. Always verify this with your local inspector to avoid nuisance tripping, which is a common issue when double-GFCI protection occurs.
Weatherproofing & Outdoor Installations:
If you are installing the charger outside, ensure the unit is rated for outdoor use (NEMA 4 or NEMA 4X enclosure ratings). Use weatherproof conduit fittings and silicone sealant where the conduit enters the charger housing to prevent moisture ingress, which can short-circuit the internal logic boards.
Cable Management:
EV charging cables are thick, heavy, and expensive to replace. Never let the cable rest on the ground where it can be run over by a vehicle, tripped on by pedestrians, or exposed to standing water and snow-melt chemicals. Install a dedicated cable management system, such as a wall-mounted holster or a retractable reel, to keep the cord organized and protected when not in use.
Troubleshooting Common Installation Issues
Even with a flawless installation, you may encounter minor hiccups when commissioning your new EV charger. Here is how to troubleshoot the most common issues.
The Breaker Trips Immediately:
If the breaker trips the moment you turn it on, you likely have a short circuit or a ground fault. Turn the power back off and inspect all terminal connections. Ensure no stray strands of copper wire are touching the metal enclosure or the neutral bus bar. If you are using a GFCI breaker, ensure the neutral pigtail is connected correctly to the neutral bus bar.
Charger Shows a Fault Light or Error Code:
Consult the manufacturer documentation for the specific LED blink pattern or error code. A common issue is improper grounding. Use a multimeter to verify that you have a solid ground connection between the charger chassis and the main panel’s grounding rod or bus bar.
Wi-Fi Connectivity Drops:
Many modern smart chargers require a 2.4GHz Wi-Fi connection to schedule off-peak charging and track energy usage. Garages are notorious Wi-Fi dead zones due to concrete walls and metal doors. If your charger cannot connect, consider installing a Wi-Fi mesh extender in the garage or hardwiring an Ethernet connection if the charger supports it.
Charging Speeds are Slower Than Expected:
If your 48-amp charger is only pulling 32 amps, check your vehicle’s onboard charger limitations. Not all EVs can accept the maximum output of the wall unit. Additionally, check the charger’s app settings; many units have software dip-switches that allow you to manually limit the amperage output to match a smaller breaker.
Frequently Asked Questions
Can I install an EV charger on a 100-amp electrical panel?
It is possible, but highly dependent on your home’s existing electrical load. If you have a 100-amp panel and your home relies on gas appliances for heating, cooking, and water heating, you might have enough spare capacity to install a low-amperage (16-amp or 24-amp) Level 2 charger. However, if your home uses electric resistance heating, an electric oven, and an electric dryer, a 100-amp panel is likely already at maximum capacity. In this case, you will either need to upgrade to a 200-amp service or install an automated load management system that dynamically throttles the EV charger’s power draw based on the home’s real-time energy usage.
Do I need a GFCI breaker for my EV charger?
If you are installing a plug-in EV charger using a NEMA 14-50 receptacle, the National Electrical Code requires a GFCI breaker for safety, as receptacles in garages and outdoors are prone to ground faults. However, if you are hardwiring the EV charger directly to the panel, the charger’s internal computer typically handles ground-fault protection. Installing a GFCI breaker on a hardwired circuit that already has internal GFCI protection often leads to nuisance tripping, where the breaker shuts off randomly. Always consult your local building inspector regarding GFCI requirements for hardwired units in your specific municipality.
How long does a professional installation take?
A standard, straightforward installation where the electrical panel is located in the garage and the charger is mounted on the adjacent wall typically takes between 2 to 4 hours. If the installation requires running conduit through finished drywall, navigating an attic or crawlspace, or trenching a line to a detached garage, the project can take anywhere from 6 to 12 hours. If a main panel upgrade is required, the process will involve coordination with the local utility company and can take several days to complete from start to finish.
Will installing an EV charger increase my home insurance premiums?
Generally, adding a permitted, professionally installed Level 2 EV charger will not cause a significant increase in your home insurance premiums. In fact, many insurance companies view professionally installed, permitted electrical upgrades favorably. However, you must notify your insurance provider about the installation. If you attempt a DIY installation without pulling permits and an electrical fire occurs, your insurance company will likely deny the claim, leaving you personally liable for hundreds of thousands of dollars in damages. Always keep your permit sign-off and electrician’s invoice on file.
Can I use an extension cord for my EV charger?
No, you should never use a standard household extension cord for an EV charger. EV charging draws a massive, continuous electrical load for hours at a time. Standard extension cords are not rated for this continuous high-amperage draw and will overheat, melt, and potentially cause a severe electrical fire. If your charging cable does not reach your vehicle, you must either relocate the charger closer to the parking spot or purchase an EV charger model that comes with a longer, factory-sealed, heavy-duty cable (typically 18 to 25 feet). Safety and code compliance must always take precedence over convenience.