EV Charger Installation Cost at Home: Your Complete Guide to Level 2 Setup
Making the switch to an electric vehicle is an exciting step toward lower fuel costs & a smaller carbon footprint. But once your EV arrives in the driveway, one critical question remains: how much will it cost to install a home charger? Understanding the full scope of EV charger installation cost at home helps you budget accurately, avoid surprises, & ensure your setup is safe & code-compliant.
At a Glance
| Difficulty Level | Moderate to Advanced (electrical work required) |
| Estimated Total Cost | $500 – $2,500+ depending on electrical panel capacity & wiring distance |
| Time Required | 2 – 8 hours for professional installation |
| Permit Required? | Yes, in most jurisdictions |
| Recommended Skill | Licensed electrician for hardwired or panel upgrades |
In this comprehensive guide, we break down every factor that influences the price of installing a home EV charger, walk you through the step-by-step process, compare DIY versus professional installation, & share safety tips backed by the National Electrical Code (NEC) & the U.S. Department of Energy. Whether you drive a Tesla, Ford, Hyundai, or any other EV, this guide will help you make informed decisions.
Understanding Home EV Charger Requirements
Before you can estimate costs, you need to understand what a home EV charger actually requires from your electrical system. Most homeowners opt for a Level 2 charger, which operates on a 240-volt circuit — the same type of power your electric dryer or oven uses. Level 2 chargers deliver anywhere from 16 to 80 amps, providing roughly 12 to 60 miles of range per hour of charging, depending on the unit & your vehicle's onboard charger capacity.
Level 1 vs. Level 2 Charging at Home
Level 1 charging uses a standard 120-volt household outlet & typically adds only 3 to 5 miles of range per hour. While it requires zero installation cost beyond the charger itself, Level 1 is painfully slow for most modern EVs with large battery packs. A Level 2 charger is the practical standard for daily home charging & is what this guide focuses on.
Electrical Panel Capacity
Your home's electrical panel is the starting point for any EV charger installation. Most modern homes have a 100-amp or 200-amp main service panel. A Level 2 charger drawing 32 to 48 amps requires a dedicated circuit rated at 40 to 60 amps (the NEC requires circuits to be rated at 125% of the continuous load). If your panel is already near capacity — common in older homes with electric heating, air conditioning, & other large appliances — you may need a panel upgrade, which significantly affects the total cost.
To determine your available capacity, a qualified electrician will perform a load calculation as specified by NEC Article 220. This calculation considers your existing electrical loads & determines whether your panel can safely support an additional 40- to 60-amp circuit. For a deeper look at which chargers work best with different electrical setups, check out our best home EV chargers guide.
Circuit & Wiring Requirements
A Level 2 charger installation typically requires:
- A dedicated double-pole breaker (40A, 50A, or 60A depending on charger amperage)
- Appropriate gauge copper wiring (6 AWG for 50A circuits, 4 AWG for 60A circuits in most cases)
- A NEMA 14-50 or NEMA 6-50 receptacle for plug-in installations, or direct hardwiring
- A properly grounded circuit with GFCI protection as required by local code
The distance between your electrical panel & the charging location is a major cost variable. Longer wire runs require more materials, possibly larger conduit, & additional labor time.
Step-by-Step EV Charger Installation Process
Whether you hire a professional or attempt a DIY installation, the process follows a logical sequence. Here is what to expect from start to finish.
Step 1: Site Assessment & Planning
Begin by identifying the ideal location for your charger. Most installations place the unit in the garage or on an exterior wall near where you park. Consider the following:
- Proximity to the electrical panel: Shorter wire runs reduce costs significantly.
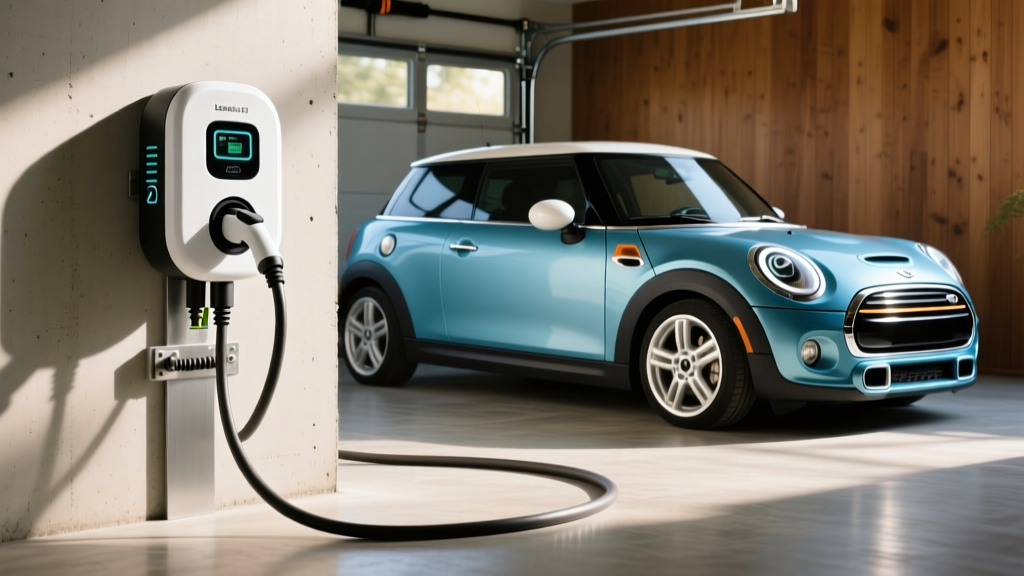
- Cord reach: Ensure the charger's cable can comfortably reach your vehicle's charge port. Most cords are 18 to 25 feet long.
- Mounting surface: The wall must support the weight of the unit, typically 15 to 30 pounds.
- Indoor vs. outdoor: If installing outdoors, choose a charger rated for outdoor use (NEMA 4 rating) & plan for weatherproof conduit & fittings.
Step 2: Electrical Load Calculation
As mentioned, a load calculation determines whether your panel can handle the new circuit. If your 200-amp panel is already serving 160 amps of calculated load, adding a 40-amp circuit (requiring 50 amps of breaker capacity) would exceed the panel's rating. In such cases, options include upgrading to a 300- or 400-amp service, installing a sub-panel, or using a load management device that dynamically reduces charger power when other appliances are running.
Step 3: Running the Circuit
The electrician will run conduit & wiring from the panel to the charger location. This may involve:
- Drilling through walls, floors, or rim joists
- Installing surface-mounted or recessed conduit (EMT, PVC, or flexible metal conduit)
- Pulling individual THHN/THWN conductors through the conduit
- Installing a junction box if the route requires directional changes
For garage installations where the panel is nearby, this step might take under an hour. For runs that go through attics, crawl spaces, or around the exterior of the house, expect several hours of labor.
Step 4: Mounting & Connecting the Charger
Once the circuit is in place, the charger is mounted to the wall using the manufacturer's bracket & hardware. For plug-in models, a NEMA 14-50 or 6-50 receptacle is installed. For hardwired models, the charger's internal wires are connected directly to the circuit conductors using wire nuts or terminal blocks inside the unit's junction compartment.
Step 5: Testing & Configuration
After physical installation, the charger must be tested for proper voltage, grounding, & GFCI functionality. Most smart chargers also require Wi-Fi configuration & app setup. If you are exploring smart charger options, our ChargePoint Home Flex review covers one of the most popular connected chargers available.
Permits, Inspections & Code Compliance
One of the most overlooked aspects of EV charger installation cost at home is the permitting process. In the vast majority of jurisdictions, adding a new 240-volt circuit requires an electrical permit & a subsequent inspection. Here is why this matters & what to expect.
Why Permits Are Required
The National Electrical Code classifies EV charging equipment under Article 625, which outlines specific requirements for installation, ventilation, disconnecting means, & cable management. Local authorities having jurisdiction (AHJs) — typically your city or county building department — enforce these codes through the permit & inspection process. Skipping a permit can result in:
- Fines or orders to remove the installation
- Voided homeowner's insurance claims related to electrical fires
- Problems during a future home sale when unpermitted work is discovered
- Safety hazards from improperly installed high-amperage circuits
Permit Costs
Electrical permit fees vary widely by location but typically range from $50 to $200. Some jurisdictions charge a flat fee for residential electrical permits, while others base the cost on the value of the work. In certain areas, permit fees may be higher if a panel upgrade is involved.
The Inspection Process
After installation, a licensed electrical inspector will visit your home to verify that the work meets code requirements. The inspector will check:
- Correct wire gauge & breaker sizing
- Proper grounding & bonding
- GFCI protection where required
- Adequate working space around the panel & charger
- Correct conduit fill & support spacing
- NEC Article 625 compliance for EV-specific requirements
Most inspections are straightforward if the work was performed by a licensed electrician familiar with local codes. If the inspector identifies deficiencies, corrections must be made before the installation receives final approval.
DIY vs. Professional Installation: Which Is Right for You?
The decision between a DIY installation & hiring a licensed electrician is one of the most significant factors affecting your total EV charger installation cost at home. Let's weigh both options honestly.
When DIY Installation Makes Sense
A DIY approach can work if all of the following conditions are true:
- Your electrical panel has ample spare capacity (at least two adjacent breaker slots & sufficient ampacity headroom)
- The charger location is close to the panel, requiring a short, straightforward wire run
- You have experience working with 240-volt circuits (such as installing a dryer or range outlet)
- You understand NEC requirements for conductor sizing, overcurrent protection, & grounding
- Your local jurisdiction allows homeowner electrical permits & self-performed work
In a best-case DIY scenario — short wire run, no panel upgrade, plug-in charger — your total cost might be as low as $200 to $500 for materials (breaker, wire, conduit, receptacle) plus the permit fee. However, this assumes you already own the necessary tools, including wire strippers, conduit benders, a multimeter, & fish tapes.
When to Hire a Professional Electrician
Professional installation is strongly recommended — & in some jurisdictions, legally required — in the following situations:
- Your panel needs an upgrade or a sub-panel must be installed
- The wire run exceeds 50 feet or passes through finished walls, attics, or crawl spaces
- You are installing a hardwired charger (many manufacturers require professional installation to maintain the warranty)
- You are unfamiliar with 240-volt electrical work
- Local code requires a licensed electrician for permits & inspections
Working with 240-volt, high-amperage circuits carries a genuine risk of arc flash, electrocution, & fire if done incorrectly. The National Fire Protection Association, which publishes the NEC, emphasizes that electrical installations should comply with all applicable codes & standards to protect life & property.
Cost Comparison
| Factor | DIY Installation | Professional Installation |
|---|---|---|
| Labor Cost | $0 | $300 – $1,500+ |
| Materials | $150 – $400 | $150 – $500 (included or itemized) |
| Permit | $50 – $200 | $50 – $200 (often handled by electrician) |
| Warranty Protection | May be voided | Fully maintained |
| Safety Assurance | Depends on your skill level | High — licensed & insured |
| Total Estimated Cost | $200 – $600 | $500 – $2,500+ |
Complete EV Charger Installation Cost Breakdown
Now let's look at the full picture of what you can expect to spend. The total EV charger installation cost at home depends on several variables, each of which we will examine in detail.
The Charger Unit Itself
Level 2 home chargers range from approximately $200 to $700 for the hardware alone. Budget-friendly options from brands like Lectron & Emporia offer reliable basic charging at the lower end, while premium smart chargers from ChargePoint, Wallbox, & Tesla sit at the higher end with features like Wi-Fi connectivity, scheduling, energy monitoring, & load sharing. Browse our EV charger reviews for detailed comparisons of the top models on the market.
Electrical Panel Upgrade
If your existing panel cannot support a new 40- to 60-amp circuit, a panel upgrade is the single largest cost factor:
- 200-amp panel upgrade: $1,500 – $3,000
- 300- to 400-amp service upgrade: $2,500 – $5,000+
- Sub-panel installation: $500 – $1,500 (a more affordable alternative if your main panel has feeder capacity)
Not every home needs a panel upgrade. Many 200-amp panels in homes with gas appliances have plenty of headroom for an EV charger circuit.
Wiring & Conduit
Material costs for wiring depend on the circuit amperage & run length:
- Short runs (under 25 feet): $100 – $200 in wire, conduit, & fittings
- Medium runs (25–75 feet): $200 – $500
- Long runs (75+ feet): $500 – $1,000+ (larger wire gauge may be needed to prevent voltage drop)
Copper wire prices fluctuate with commodity markets, so these estimates can vary. Aluminum wire is a less expensive alternative for longer runs but requires larger gauge & special connectors rated for aluminum.
Labor Costs
Electricians typically charge between $75 & $150 per hour, depending on your region & the complexity of the job. A straightforward garage installation near the panel might take 2 to 3 hours ($150 – $450 in labor), while a complex run through finished walls, across an attic, or around the exterior of a large home could take 6 to 8 hours or more ($450 – $1,200+).
Additional Cost Factors
- Trenching (for detached garages): $500 – $2,000 if underground conduit is needed
- Drywall repair & patching: $100 – $400 if walls are opened during wiring
- Smart home integration: $0 – $200 for additional hubs or adapters
- Load management device: $200 – $500 if needed to avoid a panel upgrade
Rebates, Tax Credits & Incentives
The good news is that many utilities, state governments, & local agencies offer rebates that can offset a significant portion of your installation cost. Common incentives include:
- Utility rebates: Many electric utilities offer $250 to $1,000 rebates for installing a Level 2 charger, especially if you agree to participate in time-of-use or demand-response programs
- Federal tax credit: The Alternative Fuel Infrastructure Tax Credit has historically covered up to 30% of charging equipment & installation costs (up to $1,000 for residential installations), though availability depends on current legislation & your location
- State & local incentives: Various states offer additional rebates, sales tax exemptions, or property tax exclusions for EV charging equipment
Always check with your local utility & the Department of Energy's charging infrastructure resources for the most current incentive programs available in your area.
Safety Tips & Best Practices for Home EV Charging
Installing a high-amperage, 240-volt circuit in your home demands rigorous attention to safety. Follow these best practices to protect your home, your vehicle, & your family.
Never Exceed Your Panel's Capacity
Ignoring load calculations to save money on a panel upgrade is one of the most dangerous shortcuts a homeowner can take. An overloaded panel can overheat, trip the main breaker repeatedly, or in extreme cases, cause an electrical fire. Always have a qualified electrician perform a proper NEC Article 220 load calculation before proceeding.
Use the Correct Wire Gauge & Breaker Size
Undersized wire on a high-amperage circuit creates excessive heat & is a leading cause of residential electrical fires. The NEC specifies minimum wire gauges for given breaker sizes, & these must be followed without exception. For example, a 50-amp breaker requires a minimum of 6 AWG copper wire, while a 60-amp breaker requires 4 AWG copper in most installations.
Install GFCI Protection Where Required
Recent editions of the NEC require GFCI protection for EV charging receptacles in garages & all outdoor locations. GFCI breakers or receptacles detect ground faults & interrupt the circuit within milliseconds, preventing potentially fatal shocks. While GFCI breakers add $40 to $100 to the cost, they are non-negotiable for safety & code compliance.
Ensure Proper Ventilation for Indoor Charging
While most modern EVs & chargers do not produce hazardous emissions during charging, NEC Article 625 addresses ventilation requirements for certain types of charging equipment. If your charger manufacturer specifies ventilation requirements, they must be followed. In most residential garage installations with standard Level 2 chargers, natural ventilation is sufficient.
Invest in a Quality, Certified Charger
Always purchase a charger that is UL-listed (Underwriters Laboratories) or certified by an equivalent Nationally Recognized Testing Laboratory (NRTL). Uncertified chargers, often sold at suspiciously low prices online, may lack critical safety features like overcurrent protection, thermal management, & ground fault detection. For trusted recommendations, see our guide to the best EV chargers for garage installation.
Protect Your Installation From the Elements
For outdoor installations, use weatherproof enclosures, in-use receptacle covers, & chargers rated for outdoor environments (NEMA 4 or higher). Ensure all conduit fittings are rated for wet locations & that the charger is mounted at a height that prevents water pooling around the base.
Troubleshooting Common Installation Issues
Even with a professional installation, you may encounter issues after your EV charger is up & running. Here are the most common problems & how to address them.
Charger Won't Power On
If your charger shows no signs of life, check the following:
- Verify the breaker in your electrical panel is in the ON position & has not tripped
- For plug-in chargers, ensure the plug is fully seated in the receptacle
- Use a multimeter to check for 240 volts at the receptacle or charger terminals
- Check for a tripped GFCI breaker & reset it if necessary
Charging Starts but Stops Intermittently
Intermittent charging is often caused by:
- Loose connections: A poorly seated plug or loose wire terminal can cause the charger to lose power briefly. Have all connections inspected & tightened.
- Overheating: If the charger, plug, or receptacle becomes excessively hot, the unit's thermal protection may shut it down. This can indicate undersized wiring, a worn receptacle, or inadequate ventilation.
- Voltage drop: Long wire runs with undersized conductors can cause voltage to drop below the charger's operating threshold, particularly under load. A voltage reading below 220V at the charger while charging suggests wire gauge needs to be increased.
- Wi-Fi connectivity issues: Smart chargers that rely on cloud connectivity may pause charging if the network connection drops. Move your router closer, install a Wi-Fi extender, or configure the charger for offline charging mode.
Breaker Trips Repeatedly
A breaker that trips consistently when the charger is in use indicates a serious problem that requires immediate attention:
- The breaker may be undersized for the charger's amperage draw
- A ground fault or short circuit may exist in the wiring
- The breaker itself may be defective & need replacement
- The charger's configured amperage may exceed the circuit rating — adjust the charger's output settings to match your circuit capacity
Charger Displays Error Codes
Most modern chargers display error codes or LED patterns when a fault is detected. Consult your charger's user manual for specific code meanings. Common faults include ground fault errors, overvoltage/undervoltage warnings, & communication errors with the vehicle. If error codes persist after basic troubleshooting, contact the manufacturer's support team.
Frequently Asked Questions
How much does it cost to install a Level 2 EV charger at home?
The total cost to install a Level 2 EV charger at home typically ranges from $500 to $2,500, including the charger unit, electrical materials, labor, & permits. Simple installations in a garage with the electrical panel nearby tend to fall on the lower end, while homes requiring panel upgrades, long wire runs, or trenching to a detached garage can exceed $2,500. The charger hardware itself accounts for $200 to $700 of this total.
Do I need a permit to install an EV charger at home?
Yes, in most jurisdictions, installing a new 240-volt circuit for an EV charger requires an electrical permit & inspection. This ensures the installation meets NEC Article 625 requirements & local building codes. Permit fees typically range from $50 to $200. Failing to obtain a permit can result in fines, insurance complications, & issues when selling your home. Always check with your local building department before starting work.
Can I install an EV charger myself, or do I need an electrician?
While technically skilled homeowners with 240-volt experience can install a plug-in EV charger themselves, hiring a licensed electrician is strongly recommended for most installations. Professional installation ensures code compliance, maintains your charger's warranty, provides liability protection through the electrician's insurance, & gives you peace of mind that a high-amperage circuit has been installed safely. Many jurisdictions also require a licensed electrician to pull permits for this type of work.
Does installing an EV charger require a panel upgrade?
Not necessarily. Whether you need a panel upgrade depends on your existing electrical service capacity & current load. Homes with 200-amp panels & gas appliances often have sufficient headroom for a 40- to 50-amp EV charger circuit without any upgrade. However, older homes with 100-amp service or homes with many large electric appliances may need a panel upgrade or a load management device. A licensed electrician can perform a load calculation to determine your panel's available capacity.
Are there rebates or tax credits for home EV charger installation?
Yes, many homeowners can reduce their installation costs through rebates & incentives. Common programs include utility company rebates ($250–$1,000), the federal Alternative Fuel Infrastructure Tax Credit (up to 30% of equipment & installation costs, up to $1,000 for residential), & various state & local incentive programs. Availability varies by location & current legislation, so check with your utility provider, state energy office, & the Department of Energy for programs in your area. Some utility rebates require you to use a participating electrician or install a specific approved charger model.
Final Thoughts on EV Charger Installation Costs
Installing a Level 2 EV charger at home is one of the most impactful upgrades you can make as an electric vehicle owner. The convenience of waking up to a fully charged car every morning, combined with lower electricity rates compared to public charging, makes the investment worthwhile for most EV drivers.
The key to managing your EV charger installation cost at home is planning. Start by having a licensed electrician assess your panel capacity & provide a detailed quote that includes all materials, labor, & permit fees. Research available rebates & incentives in your area before scheduling the work. Choose a quality, UL-listed charger that matches your vehicle's charging capability & your home's electrical capacity.
With proper planning & professional installation, your home EV charging setup will provide years of safe, reliable, & convenient service. Ready to find the right charger for your home? Explore our complete EV charger reviews & EV charging guides to compare the best options on the market.