EV Charger Installation in Bayside: Complete Guide for Home & Commercial Setup
Electric vehicles are rapidly becoming the standard for daily commuting, and having a reliable charging station at your home or business in Bayside is no longer a luxury — it is a necessity. Whether you own a single-family home near Bell Boulevard or manage a commercial property along Northern Boulevard, understanding the ins and outs of EV charger installation is critical for safety, performance, and long-term value.
This comprehensive guide walks you through everything you need to know about EV charger installation in Bayside for both residential and commercial properties. From electrical requirements and permitting to cost breakdowns and safety best practices, you will find actionable information to help you make informed decisions.
At a Glance
Difficulty Level: Moderate to Advanced (professional installation strongly recommended)
Estimated Time: 4–8 hours for residential; 1–3 days for commercial
Estimated Cost: $500–$2,500 (residential Level 2); $3,000–$15,000+ (commercial)
Permits Required: Yes — electrical permit from NYC Department of Buildings
Tools Needed: Voltage tester, conduit bender, wire strippers, drill, torque screwdriver, junction boxes
Before diving into the installation process, it is worth exploring which charger best fits your needs. Our guide to the best home EV chargers covers top-rated models for every budget and electrical setup.
Understanding EV Charger Types & Electrical Requirements
Before any installation begins, you must determine which level of charger your property can support and which type aligns with your charging needs.
Level 1 Charging (120V)
Level 1 chargers plug into a standard household outlet and deliver roughly 3–5 miles of range per hour of charging. While no special installation is required beyond a dedicated 15- or 20-amp circuit, Level 1 charging is extremely slow and generally only suitable for plug-in hybrids or emergency use. Most EV owners in Bayside find Level 1 insufficient for daily driving needs.
Level 2 Charging (240V)
Level 2 chargers require a 240-volt circuit — the same type of electrical supply that powers your clothes dryer or electric oven. These chargers deliver 12–80 miles of range per hour depending on amperage (typically 16A to 80A). Level 2 is the gold standard for both residential and commercial installations. According to the U.S. Department of Energy, over 80% of EV charging happens at home, making a Level 2 installation one of the most impactful upgrades you can make.
Level 3 / DC Fast Charging (480V+)
DC fast chargers are almost exclusively commercial installations due to their enormous power requirements, high cost ($20,000–$100,000+), and complex utility coordination. These units can charge an EV to 80% in 20–40 minutes and are ideal for Bayside businesses that want to attract EV-driving customers or fleet operators managing multiple vehicles.
Electrical Panel Capacity
Your home or building's electrical panel must have sufficient capacity to support an EV charger. Most modern homes in Bayside have 100-amp or 200-amp panels. A Level 2 charger typically draws between 16 and 48 amps, which means your panel must have enough spare capacity to handle the additional load. A licensed electrician will perform a load calculation to verify this before installation begins.
If your panel is maxed out, you may need a panel upgrade (from 100A to 200A, for example), which adds $1,500–$3,000 to the project. Some newer solutions, such as smart load management systems, can share capacity between your EV charger and other high-draw appliances without requiring a full panel upgrade.
Step-by-Step EV Charger Installation Process
Whether you are installing a charger in your Bayside garage or setting up a commercial charging station in a parking lot, the fundamental steps are similar. Here is a detailed breakdown of the installation process.
Step 1: Site Assessment & Planning
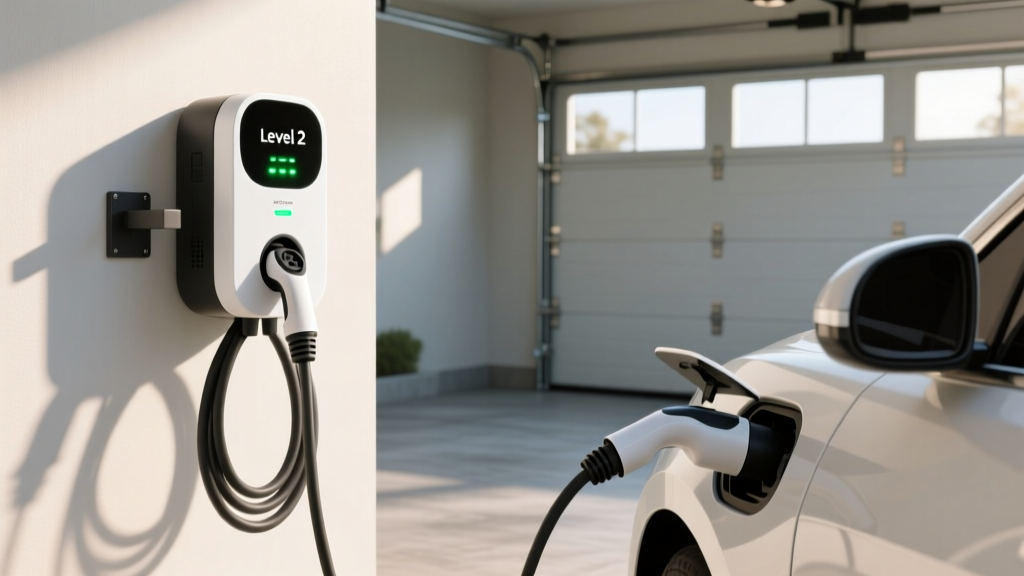
The first step involves evaluating where the charger will be installed. For residential setups, this is typically inside a garage or on an exterior wall near your driveway. For commercial installations, you will need to identify parking spaces that are accessible, visible, and close to your electrical infrastructure.
Key considerations during site assessment include:
- Proximity to the electrical panel: Shorter wire runs mean lower material costs and less voltage drop.
- Wi-Fi connectivity: Many modern smart chargers require a stable Wi-Fi connection for scheduling, monitoring, and software updates. Check out our smart EV charger comparison guide for models with the best connectivity features.
- Weather exposure: Outdoor installations require chargers rated for outdoor use (NEMA 4 or NEMA 4X enclosure rating).
- Cable management: Plan for how the charging cable will reach your vehicle's charge port without creating a tripping hazard.
- ADA compliance (commercial): Commercial installations must consider accessibility requirements under the Americans with Disabilities Act.
Step 2: Electrical Circuit Installation
Your electrician will install a dedicated circuit from your electrical panel to the charger location. For a Level 2 charger, this involves running appropriately sized copper wire (typically 6 AWG for 48-amp chargers or 8 AWG for 32-amp chargers) through conduit. The National Electrical Code (NEC) requires that EV charging circuits be rated at 125% of the charger's maximum continuous load. For example, a 48-amp charger requires a 60-amp circuit breaker.
For commercial installations, the process may involve:
- Installing a sub-panel to distribute power to multiple charging units
- Running underground conduit from the building to parking areas
- Coordinating with the local utility (Con Edison) for service upgrades if the existing transformer cannot handle the additional load
- Installing load management controllers that balance power across multiple chargers
Step 3: Mounting the Charger
Most Level 2 chargers are wall-mounted using a bracket secured to studs or masonry. The charger should be mounted at a height of approximately 48 inches from the floor (or as specified by the manufacturer) to ensure comfortable access and cable reach. For commercial pedestal-mounted chargers, a concrete pad must be poured and cured before the unit is bolted into place.
Step 4: Wiring & Connection
The electrician connects the circuit wiring to the charger's terminal block, ensuring all connections are torqued to the manufacturer's specifications. Loose connections are one of the leading causes of overheating and electrical fires, so precision at this stage is non-negotiable. For hardwired installations, the wiring goes directly into the charger's junction box. For plug-in installations, a NEMA 14-50 or NEMA 6-50 receptacle is installed, and the charger plugs into it.
Step 5: Configuration & Testing
Once the charger is physically installed and wired, it needs to be configured. This includes connecting the charger to Wi-Fi (for smart models), setting charging schedules, configuring access controls (for commercial units), and running a test charge to verify proper operation. Your electrician should use a multimeter to confirm correct voltage and polarity before the first charge session.
Permits, Inspections & Local Requirements in Bayside
Bayside is part of the New York City metropolitan area, which means EV charger installations must comply with NYC building codes and electrical regulations. Skipping permits is not only illegal — it can void your homeowner's insurance and create serious safety hazards.
Required Permits
For residential installations, you will need an electrical permit filed with the NYC Department of Buildings (DOB). The permit application must be submitted by a licensed electrician, and it typically includes:
- A description of the work being performed
- Electrical load calculations
- A single-line diagram of the circuit
- Equipment specifications (charger make, model, voltage, amperage)
Commercial installations may require additional permits depending on the scope of work. If the installation involves structural modifications (such as pouring concrete pads or trenching), a separate construction permit may be necessary. Properties with landmark status or those in historic districts face additional review requirements.
The Inspection Process
After installation is complete, an NYC electrical inspector will visit the site to verify that the work meets code requirements. The inspector will check:
- Proper wire sizing and overcurrent protection
- Correct grounding and bonding
- GFCI protection (required by NEC Article 625 for EV charging equipment)
- Adequate working clearance around the charger
- Proper labeling at the electrical panel
- Compliance with NEC Article 625, which specifically governs Electric Vehicle Charging System Equipment
Most inspections in the NYC area are scheduled within 2–4 weeks of permit filing. Once the inspector approves the work, you will receive a sign-off that becomes part of your property's official records. This documentation is valuable if you ever sell your property or need to make an insurance claim.
Utility Coordination
Con Edison, the utility serving Bayside, offers resources for EV charger installations, including information about time-of-use rates that can significantly reduce your charging costs. Some utility programs offer rebates or incentives for installing smart chargers that support managed charging. Contact Con Edison early in the planning process to understand what programs are available and whether your transformer has capacity for the additional load.
DIY vs. Professional Installation: What You Need to Know
The question of whether to install an EV charger yourself or hire a professional comes up frequently. Here is an honest comparison to help you decide.
When DIY Might Be Feasible
If you are installing a plug-in Level 2 charger and you already have a properly rated NEMA 14-50 outlet installed by a licensed electrician, the "installation" is as simple as plugging in the charger and mounting it on the wall with a few screws. Some handy homeowners with electrical experience may feel comfortable installing a new 240V outlet, but this is where the line should be drawn for most people.
Why Professional Installation Is Strongly Recommended
For the vast majority of Bayside homeowners and business owners, professional installation is the right choice. Here is why:
- Code compliance: Licensed electricians understand NEC Article 625 and local NYC amendments. Improper installations can fail inspection, create fire hazards, and result in costly rework.
- Panel expertise: A professional can accurately assess your panel capacity, perform load calculations, and recommend upgrades if needed.
- Permit handling: Electricians handle the permit application process on your behalf, saving you time and ensuring paperwork is filed correctly.
- Warranty protection: Many charger manufacturers, including popular brands featured in our EV charger reviews, require professional installation to maintain the product warranty.
- Insurance validity: Unpermitted or improperly installed electrical work can void your homeowner's or commercial property insurance.
- Safety: Working with 240V circuits carries a real risk of electrocution and arc flash. Professional electricians have the training and personal protective equipment to manage these risks.
Choosing the Right Electrician in Bayside
When selecting an electrician, look for the following qualifications:
- Valid NYC electrical license
- Experience specifically with EV charger installations
- Positive reviews and references from previous EV installation clients
- Willingness to pull permits and schedule inspections
- Clear, itemized estimates that separate labor, materials, and permit fees
Ask prospective electricians how many EV chargers they have installed and whether they are familiar with the specific model you have chosen. Installation requirements vary between brands — for instance, Tesla Wall Connectors have different wiring configurations than ChargePoint or JuiceBox units.
Cost Breakdown: Residential & Commercial EV Charger Installation
Understanding the full cost picture helps you budget effectively and avoid surprises. Below is a detailed breakdown for both residential and commercial installations in the Bayside area.
Residential Installation Costs
| Item | Estimated Cost |
|---|---|
| Level 2 Charger Unit | $350 – $800 |
| Electrical Permit | $100 – $300 |
| Labor (Licensed Electrician) | $500 – $1,500 |
| Materials (Wire, Conduit, Breaker) | $100 – $400 |
| Panel Upgrade (if needed) | $1,500 – $3,000 |
| Total (standard install) | $1,050 – $3,000 |
Factors that increase residential costs include long wire runs from the panel to the charger location, the need to run conduit through finished walls, outdoor installations requiring weatherproof enclosures, and older homes with outdated electrical systems that need upgrades.
Commercial Installation Costs
| Item | Estimated Cost (per charger) |
|---|---|
| Commercial-Grade Charger Unit | $2,000 – $7,000 |
| Electrical Infrastructure & Wiring | $2,000 – $8,000 |
| Permits & Engineering | $500 – $2,000 |
| Concrete Pad & Pedestal | $500 – $1,500 |
| Network & Software Setup | $200 – $1,000 |
| Utility Service Upgrade (if needed) | $5,000 – $30,000+ |
| Total (per charger) | $5,200 – $19,500+ |
Commercial installations benefit from economies of scale. Installing four chargers simultaneously is significantly less expensive per unit than installing them one at a time. Additionally, federal and state incentives can offset a meaningful portion of commercial installation costs. The federal Alternative Fuel Infrastructure Tax Credit provides up to 30% of installation costs (capped at $100,000 for commercial properties) as a tax credit.
Ongoing Costs to Consider
Beyond installation, factor in ongoing expenses such as electricity costs (a full charge for a typical EV costs $5–$15 at residential rates), network subscription fees for commercial smart chargers ($20–$50 per month per unit), annual maintenance and inspection, and potential repair costs after the warranty period expires.
Safety Tips & Best Practices for EV Charger Installations
Safety should be the top priority in any electrical installation. EV chargers handle significant amounts of power, and improper installation or maintenance can lead to electrical shock, fire, or equipment damage. Follow these best practices to ensure a safe installation.
Electrical Safety Fundamentals
- Always shut off power at the main breaker before working on any electrical components. Use a non-contact voltage tester to confirm the circuit is de-energized before touching any wires.
- Use a GFCI breaker or GFCI-protected circuit. NEC Article 625 requires ground-fault circuit interrupter protection for all EV charging equipment rated at 60 amps or less and 150 volts or less to ground. This protects against electrical shock in wet conditions.
- Ensure proper grounding. The charger must be connected to a reliable equipment grounding conductor. Never rely on a neutral wire as a ground.
- Torque all connections to specification. Use a calibrated torque screwdriver to tighten terminal connections to the manufacturer's recommended values. Under-torqued connections create resistance, heat, and fire risk.
- Install a dedicated circuit. Never share the EV charger circuit with other outlets or appliances. The continuous load of EV charging demands an exclusive circuit.
Environmental & Physical Safety
- Protect cables from damage. Route charging cables so they are not pinched, kinked, or run over by vehicles. Use cable management hooks or retractors to keep cords organized.
- Install at proper height. Wall-mounted chargers should be installed high enough to prevent water splash damage and low enough for comfortable access. Follow the manufacturer's mounting height recommendations.
- Use outdoor-rated equipment outdoors. If your charger will be exposed to weather, verify it carries a NEMA 4 or higher enclosure rating. Indoor-rated chargers used outdoors will fail prematurely and create safety hazards.
- Maintain clear working space. NEC Article 110.26 requires a minimum of 30 inches of clear working space in front of electrical equipment. Do not block access to the charger or the electrical panel.
- Install surge protection. A whole-panel surge protective device (SPD) helps protect your EV charger and other electronics from voltage spikes caused by lightning or utility switching events.
Commercial-Specific Safety Measures
- Install clear signage indicating EV charging spaces and any usage restrictions
- Ensure bollards or wheel stops protect chargers from vehicle impact
- Provide emergency shutoff switches that are clearly marked and easily accessible
- Implement regular inspection schedules to check for cable wear, connector damage, and enclosure integrity
- Train staff on basic troubleshooting and emergency procedures related to the charging equipment
For a deeper understanding of EV charger safety features and how different models compare, read our comprehensive EV charging safety guide.
Troubleshooting Common EV Charger Installation Issues
Even with professional installation, issues can arise. Here are the most common problems Bayside EV owners encounter and how to address them.
Charger Will Not Power On
Possible causes: Tripped circuit breaker, loose wiring connection, faulty charger unit, or blown fuse.
Solutions: Check your electrical panel for a tripped breaker and reset it. If the breaker trips again immediately, do not keep resetting it — this indicates a short circuit or overload that requires professional diagnosis. Inspect the charger's LED indicators (refer to your manufacturer's manual) for error codes. If wiring connections are accessible, verify they are tight and properly seated.
Charging Speed Is Slower Than Expected
Possible causes: Undersized circuit, voltage drop from long wire runs, charger configured for lower amperage, vehicle's onboard charger limitation, or extreme temperatures affecting battery charging rate.
Solutions: Verify that the circuit breaker amperage matches the charger's requirements. Measure voltage at the charger terminals under load — if it drops below 220V, you may need thicker wire or a shorter run. Check the charger's app or settings to confirm it is configured for its maximum rated amperage. Consult your vehicle's specifications to understand its maximum onboard charging rate.
Wi-Fi Connectivity Issues (Smart Chargers)
Possible causes: Weak Wi-Fi signal in the garage, incompatible network settings (some chargers only support 2.4 GHz networks), or router firewall blocking the charger's communication.
Solutions: Install a Wi-Fi range extender near the garage. Ensure your router is broadcasting a 2.4 GHz network (many modern routers default to 5 GHz only). Check your router's firewall settings to ensure ports required by the charger's app are open. Some chargers support ethernet connections as an alternative to Wi-Fi.
GFCI Breaker Trips Frequently
Possible causes: Moisture in the outlet or charger enclosure, ground fault in the wiring, incompatible GFCI breaker, or nuisance tripping from the charger's internal electronics.
Solutions: Inspect outdoor outlets and charger enclosures for moisture intrusion. Some EV chargers have built-in GFCI protection and may cause nuisance tripping when paired with a GFCI breaker — in these cases, the manufacturer may recommend using a standard breaker and relying on the charger's internal GFCI. Consult both the charger manufacturer's documentation and a licensed electrician to determine the correct configuration.
Charger Overheating
Possible causes: Inadequate ventilation, direct sunlight exposure, loose connections creating resistance, or undersized wiring.
Solutions: Ensure the charger has adequate clearance on all sides for airflow. If installed outdoors in direct sunlight, consider adding a shade structure. Have an electrician check all connections with a thermal imaging camera to identify hot spots. Verify that wire gauge is appropriate for the circuit amperage and run length.
Frequently Asked Questions
How long does EV charger installation take in Bayside?
A standard residential Level 2 charger installation typically takes 4–8 hours from start to finish, assuming no panel upgrades are needed and the wire run is straightforward. The permitting and inspection process adds 2–6 weeks to the overall timeline depending on NYC Department of Buildings scheduling. Commercial installations involving multiple chargers, trenching, or utility coordination can take 1–3 days of on-site work, with a planning and permitting phase that may span several weeks or months.
Do I need a permit to install an EV charger at my Bayside home?
Yes. New York City requires an electrical permit for any new 240-volt circuit installation, including EV chargers. The permit must be filed by a licensed electrician, and the completed work must pass inspection by the NYC Department of Buildings. Installing without a permit is a code violation that can result in fines, complications during property sales, and potential insurance claim denials. Always insist that your electrician pulls the required permits — it protects you and ensures the work meets safety standards.
Can I install a Level 2 charger if my home only has a 100-amp electrical panel?
It depends on your existing electrical load. A 100-amp panel can sometimes support a Level 2 charger if your home does not have many other high-draw electric appliances (such as electric heating, an electric oven, or an electric dryer). A licensed electrician will perform a NEC-standard load calculation to determine whether your panel has enough spare capacity. If it does not, you have two options: upgrade to a 200-amp panel (costing $1,500–$3,000) or install a smart load management device that dynamically reduces charger power when other appliances are running.
Are there any rebates or incentives for EV charger installation in Bayside?
Yes, several incentives may be available. At the federal level, the Alternative Fuel Infrastructure Tax Credit offers a tax credit of up to 30% of the cost of purchasing and installing EV charging equipment (up to $1,000 for residential and up to $100,000 for commercial installations). New York State and Con Edison periodically offer additional rebates for smart charger installations and managed charging programs. Incentive availability changes frequently, so check with your electrician, the Department of Energy's incentive database, and Con Edison's website for the most current offerings before starting your project.
What is the difference between a hardwired and plug-in EV charger installation?
A hardwired charger is connected directly to your home's electrical system through a junction box inside the unit. This approach eliminates the need for an external outlet, provides a cleaner look, and typically allows for higher amperage (up to 48 amps or more). A plug-in charger connects to a 240V receptacle (usually NEMA 14-50 or NEMA 6-50), which makes the charger portable — you can unplug it and take it with you if you move. Plug-in installations are limited to 40 amps of continuous charging (on a 50-amp circuit) due to NEC rules requiring plug-in devices to be rated at no more than 80% of the circuit's capacity. Hardwired installations are generally preferred for permanent, high-power setups, while plug-in installations offer flexibility and easier replacement if the charger needs servicing.
Final Thoughts on EV Charger Installation in Bayside
Installing an EV charger at your Bayside home or commercial property is one of the most practical upgrades you can make in the transition to electric mobility. It adds convenience, increases property value, and ensures you always start your day with a full charge. While the process involves multiple steps — from choosing the right charger and hiring a qualified electrician to navigating permits and passing inspections — the end result is well worth the effort.
Whether you are a homeowner looking to charge overnight in your garage or a business owner aiming to provide charging amenities for customers and employees, the key to success is careful planning and professional execution. Always prioritize safety, work with licensed professionals, and take advantage of available incentives to reduce your costs.
Ready to choose the right charger for your Bayside installation? Browse our complete EV charger reviews to compare top-rated models, or explore our EV guides section for more tips on making the most of your electric vehicle ownership experience.