EV Charger Home Installation Near Me: The Complete Guide to Setup, Costs & Safety
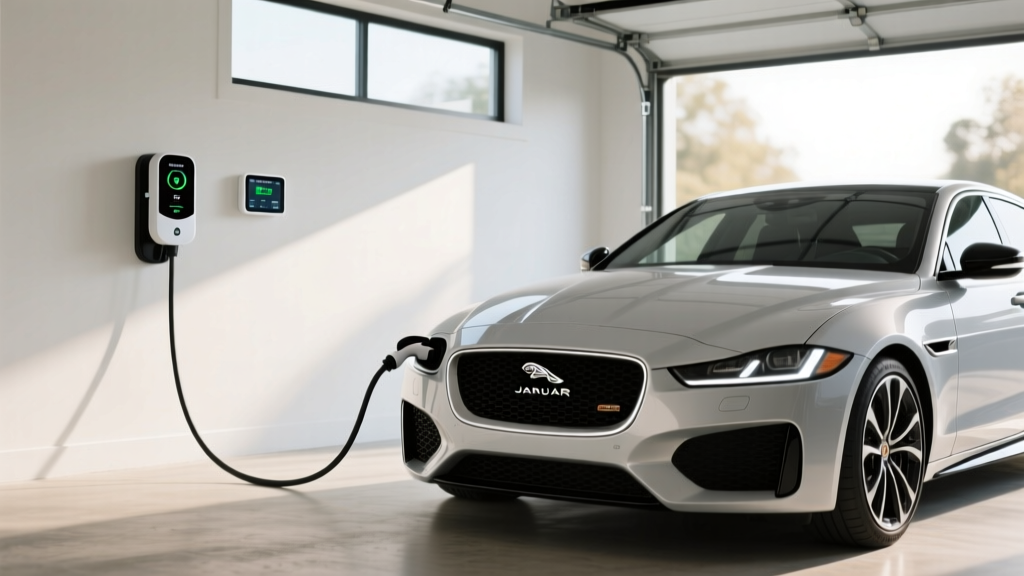
If you have recently purchased an electric vehicle or are planning to make the switch, one of the first questions on your mind is probably about home charging. Searching for "EV charger home installation near me" is the starting point for thousands of EV owners who want the convenience, speed, and reliability of a dedicated Level 2 charging station right in their garage or driveway. This comprehensive guide walks you through everything you need to know — from electrical requirements and permits to cost breakdowns and finding the right installer in your area.
- Difficulty Level: Moderate to Advanced (electrical work involved)
- Estimated Cost: $500 – $2,500+ (charger unit + professional installation)
- Time Required: 2 – 6 hours for professional installation
- Permit Required: Yes, in most jurisdictions
- Recommended: Licensed electrician with EV charger experience
Whether you drive a Tesla, Ford Mustang Mach-E, Hyundai Ioniq, Chevrolet Bolt, or any other electric vehicle, having a properly installed home charger transforms your daily routine. No more searching for public charging stations or waiting hours on a standard 120-volt outlet. Let us dive into the details so you can make an informed decision and find the best EV charger installation service near you.
Electrical Requirements for Home EV Charger Installation
Before you start calling electricians or browsing charger options, it is essential to understand what your home's electrical system can support. Most Level 2 EV chargers require a dedicated 240-volt circuit — the same type of electrical supply that powers your electric dryer, oven, or central air conditioning unit.
Understanding Your Electrical Panel Capacity
Your home's electrical panel (also called a breaker box or service panel) is the starting point for any EV charger installation. Most modern homes have a 100-amp or 200-amp main service panel. The available capacity determines what size circuit your electrician can safely install for your EV charger.
Here is what you need to know about common circuit sizes and their corresponding charger output:
- 30-amp circuit: Supports a 24-amp continuous load, delivering roughly 5.8 kW of charging power. Adds approximately 20–25 miles of range per hour of charging.
- 40-amp circuit: Supports a 32-amp continuous load, delivering roughly 7.7 kW. Adds approximately 28–32 miles of range per hour.
- 50-amp circuit: Supports a 40-amp continuous load, delivering roughly 9.6 kW. Adds approximately 35–40 miles of range per hour.
- 60-amp circuit: Supports a 48-amp continuous load, delivering roughly 11.5 kW. Adds approximately 40–48 miles of range per hour.
According to the National Electrical Code (NEC), any continuous load — which includes EV charging — must not exceed 80% of the circuit breaker's rated capacity. This is why a 40-amp breaker can only supply 32 amps continuously to your charger. This rule is critical for safety and is enforced by local building inspectors during the permitting process.
NEMA 14-50 Outlet vs. Hardwired Connection
When planning your EV charger home installation, you have two main connection options:
NEMA 14-50 Receptacle: This is a 240-volt outlet that looks similar to what your electric range or dryer uses. The advantage of a NEMA 14-50 outlet is portability — you can unplug your charger and take it with you if you move, or use the outlet for other high-power devices. Many popular chargers, including several models featured in our best Level 2 EV charger reviews, come with a NEMA 14-50 plug.
Hardwired Connection: With a hardwired setup, the charger is directly connected to your electrical panel through a junction box. Hardwired installations typically support higher amperages (48 amps and above) and eliminate the potential failure point of a plug connection. Many electricians recommend hardwiring for outdoor installations or for chargers rated above 40 amps.
Panel Upgrade Considerations
If your home has an older 100-amp service panel that is already near capacity, you may need a panel upgrade before installing an EV charger. Signs that your panel might need an upgrade include frequently tripped breakers, flickering lights when appliances turn on, or a panel that is warm to the touch. A panel upgrade to 200 amps typically costs between $1,500 and $3,000, but it adds significant value to your home and supports future electrical needs like solar panels or battery storage.
Step-by-Step EV Charger Home Installation Process
Understanding the installation process helps you prepare your home and set realistic expectations. Here is a detailed walkthrough of what happens during a professional EV charger installation.
Step 1: Site Assessment & Planning
A qualified electrician will begin by evaluating your electrical panel, determining available capacity, and identifying the best location for your charger. Key considerations include:
- Proximity to your parking spot: Most charger cables are 18 to 25 feet long, so the unit needs to be within reach of your vehicle's charging port.
- Cable routing: The electrician will plan how to run conduit and wiring from your panel to the charger location. Shorter runs mean lower material and labor costs.
- Indoor vs. outdoor placement: Garage installations are generally simpler and less expensive. Outdoor installations require weather-rated (NEMA 4) enclosures and may need additional protective measures.
- WiFi connectivity: Many smart chargers benefit from a strong WiFi signal for scheduling, monitoring, and software updates. Check out our smart EV charger setup guide for tips on optimizing connectivity.
Step 2: Obtaining Permits
In most municipalities, electrical work for an EV charger installation requires a permit. Your electrician typically handles the permit application, which involves submitting details about the planned work, including circuit size, wire gauge, and equipment specifications. Permit fees generally range from $50 to $200 depending on your local jurisdiction. Skipping the permit process can lead to fines, problems when selling your home, and potential insurance claim denials.
Step 3: Electrical Work & Installation
The physical installation process typically involves the following steps:
- Shutting off power to the main panel for safety.
- Installing a new double-pole breaker of the appropriate amperage in your electrical panel.
- Running conduit from the panel to the charger location. This may involve running wire through walls, along ceiling joists, or underground for outdoor installations.
- Pulling wire through the conduit. The wire gauge depends on the circuit amperage — for example, 6 AWG copper wire for a 50-amp circuit or 4 AWG for a 60-amp circuit.
- Mounting the charger or NEMA 14-50 receptacle at the planned location.
- Making all connections, securing wire terminations, and ensuring proper grounding.
- Restoring power and testing the circuit with a multimeter before connecting the charger.
Step 4: Charger Setup & Testing
Once the electrical work is complete, the charger is powered on and tested. This includes verifying proper voltage, checking ground fault protection, initiating a test charge with your vehicle, and configuring any smart features such as charging schedules, energy monitoring, or integration with your home energy management system. For detailed guidance on configuring specific charger models, explore our complete home EV charging guide.
Permits, Inspections & Code Compliance
Permits and inspections are not just bureaucratic hurdles — they exist to protect you, your family, and your property from electrical hazards. Understanding this process helps you ensure your installation meets all legal and safety requirements.
Why Permits Matter for EV Charger Installations
The U.S. Department of Energy recommends that all home EV charging equipment be installed in accordance with local building codes and the National Electrical Code. Article 625 of the NEC specifically addresses Electric Vehicle Charging System Equipment and outlines requirements for wiring methods, disconnecting means, ventilation, and more.
Here are the key reasons to always obtain proper permits:
- Safety assurance: The inspection process catches wiring errors, inadequate grounding, and other hazards that could cause fires or electric shock.
- Insurance compliance: Many homeowner insurance policies require that electrical modifications be permitted and inspected. Unpermitted work could void coverage for related claims.
- Home resale value: Unpermitted electrical work can cause problems during home inspections when you sell your property. Buyers and their agents routinely ask about permits for EV charger installations.
- Utility rebate eligibility: Many utility companies require proof of permitted installation before offering rebates or special EV electricity rates.
The Inspection Process
After your electrician completes the installation, a local building inspector will visit your home to verify that the work meets code requirements. The inspector typically checks:
- Correct breaker sizing and wire gauge
- Proper grounding and bonding
- Adequate conduit fill and wire protection
- GFCI (Ground Fault Circuit Interrupter) protection as required by current NEC editions
- Proper labeling of the new circuit in your electrical panel
- Correct mounting height and location per local requirements
Most inspections take 15 to 30 minutes and result in a pass or a list of corrections. If corrections are needed, your electrician will address them and schedule a re-inspection. Once you pass, you receive a final approval that becomes part of your home's permanent record.
DIY vs. Professional Installation: What You Need to Know
One of the most common questions EV owners ask is whether they can install a home charger themselves. The answer depends on your electrical knowledge, local regulations, and risk tolerance.
When DIY Installation Might Be Appropriate
If you already have a properly installed NEMA 14-50 outlet in your garage — perhaps from a previous dryer or welder — you may be able to simply plug in a compatible Level 2 charger and start charging. In this scenario, no new electrical work is required, and you can handle the setup yourself. Just make sure the existing outlet and circuit are in good condition and properly rated for your charger.
Some experienced homeowners with electrical knowledge may also feel comfortable installing a NEMA 14-50 outlet if the run from the panel is short and straightforward. However, even experienced DIYers should consider the following risks.
Why Professional Installation Is Recommended
For the vast majority of EV owners, hiring a licensed electrician is the wisest choice. Here is why:
- Code compliance: Licensed electricians are trained on current NEC requirements and local amendments. They know the specific rules for EV charger circuits, including GFCI protection requirements, conductor sizing, and disconnect rules.
- Safety: Working inside an electrical panel exposes you to lethal voltages. Even with the main breaker off, the service entrance conductors remain energized. Professional electricians have the training and equipment to work safely.
- Warranty protection: Many charger manufacturers, as documented in their installation guidelines, require professional installation to maintain the product warranty. A DIY installation that causes damage may not be covered.
- Permit handling: Professional electricians pull permits as part of their standard process, saving you time and ensuring everything is documented properly.
- Liability protection: Licensed and insured electricians carry liability coverage that protects you if something goes wrong during or after the installation.
How to Find a Qualified EV Charger Installer Near You
When searching for an EV charger home installation professional near you, look for these qualifications:
- Valid state or local electrical license
- Experience specifically with EV charger installations
- Positive reviews from other EV owners
- Willingness to pull permits and coordinate inspections
- Clear, detailed written estimates
- Proper insurance coverage (liability and workers' compensation)
Several resources can help you find qualified installers. Many charger manufacturers maintain lists of certified installers on their websites. Your local utility company may also have a preferred contractor program for EV installations. Additionally, platforms like HomeAdvisor, Angi, and PlugShare's installer directory can connect you with rated professionals in your area.
Complete Cost Breakdown for Home EV Charger Installation
Understanding the full cost picture helps you budget effectively and evaluate quotes from different installers. Here is a detailed breakdown of what you can expect to pay.
Charger Unit Costs
Level 2 home chargers range widely in price depending on features, brand, and power output:
- Basic Level 2 chargers (16–32 amps): $200 – $400
- Mid-range smart chargers (32–48 amps): $400 – $700
- Premium smart chargers (48 amps, WiFi, load management): $600 – $1,000+
For a curated selection of top-performing options at every price point, check our best Level 2 EV charger reviews where we test and compare the most popular models on the market.
Installation Labor & Material Costs
Professional installation costs vary significantly based on the complexity of the job:
- Simple garage installation (panel and charger on the same wall, short wire run): $300 – $600
- Moderate installation (wire run of 30–60 feet through walls or attic): $600 – $1,200
- Complex installation (long wire runs, outdoor mounting, trenching, or sub-panel installation): $1,200 – $2,500+
- Electrical panel upgrade (if needed): $1,500 – $3,000
Permit & Inspection Fees
Budget $50 to $200 for permit fees, depending on your local jurisdiction. Some municipalities have reduced or waived permit fees for EV charger installations to encourage adoption.
Available Rebates & Incentives
The good news is that you may be able to offset a significant portion of your installation costs through rebates and incentives:
- Federal tax credit: The Alternative Fuel Infrastructure Tax Credit may cover up to 30% of the cost of home EV charging equipment and installation, up to $1,000, depending on eligibility requirements and current tax law provisions.
- Utility rebates: Many electric utility companies offer rebates ranging from $100 to $1,000 for installing a Level 2 home charger. Some utilities also offer reduced electricity rates for EV owners who charge during off-peak hours.
- State & local incentives: Numerous states and municipalities offer additional rebates, tax credits, or grants for home EV charger installations. Check the Alternative Fuels Data Center for incentive programs available in your state.
- Manufacturer promotions: Some automakers include complimentary home charger units or installation credits with the purchase of a new EV.
When you factor in available incentives, the net cost of a professional home EV charger installation often falls between $300 and $1,000 — a worthwhile investment that adds convenience and can increase your home's resale value.
Safety Tips & Best Practices for Home EV Charging
Safety should always be your top priority when installing and using a home EV charger. Follow these essential guidelines to protect your home, your vehicle, and your family.
Installation Safety
- Never skip the permit: As discussed above, permits and inspections are your safety net. They ensure that a trained professional has verified your installation meets code requirements.
- Use the correct wire gauge: Undersized wiring is a fire hazard. Your electrician should follow NEC tables to select the proper conductor size for your circuit amperage and run length.
- Install GFCI protection: Current NEC editions require GFCI protection for EV charging outlets in garages and all outdoor locations. This protection prevents electric shock in the event of a ground fault.
- Ensure proper grounding: Your EV charger circuit must have an effective ground-fault current path. Your electrician should verify grounding with appropriate test equipment.
- Use a dedicated circuit: Your EV charger should never share a circuit with other appliances or outlets. A dedicated circuit prevents overloading and ensures consistent charging performance.
Ongoing Usage Safety
- Inspect your charging cable regularly: Look for cracks, fraying, or damage to the cable insulation. If you notice any damage, stop using the charger and contact the manufacturer.
- Keep the area clear: Maintain clear space around your charger. Do not store flammable materials near the unit, and ensure adequate ventilation in enclosed garages.
- Protect outdoor installations: If your charger is mounted outdoors, ensure it has a proper weather rating (NEMA 4 or higher) and consider installing a protective cover or enclosure.
- Use a surge protector: Consider installing a whole-home surge protector or a dedicated surge protection device for your EV charger circuit to protect against voltage spikes from lightning or grid fluctuations.
- Follow manufacturer guidelines: Always adhere to the operating instructions and maintenance recommendations provided by your charger manufacturer.
- Monitor charging sessions: Most smart chargers provide app-based monitoring. Set up notifications so you are alerted to any charging interruptions or error codes. Learn more about smart features in our smart charger setup guide.
Troubleshooting Common Home EV Charger Issues
Even with a professional installation, you may occasionally encounter issues with your home EV charger. Here are the most common problems and how to resolve them.
Charger Will Not Power On
If your charger shows no signs of life — no LED indicators, no display — check the circuit breaker in your electrical panel. If the breaker has tripped, reset it by switching it fully off and then back on. If the breaker trips again immediately, do not attempt to reset it repeatedly. This indicates a wiring fault that requires professional attention. Also verify that any disconnect switch near the charger (if installed) is in the "on" position.
Charging Starts but Stops Intermittently
Intermittent charging can be caused by several factors. First, check the connection between the charger plug and the NEMA outlet (if applicable) — a loose connection can cause intermittent power loss. Ensure the charging connector is fully seated in your vehicle's charge port. If the problem persists, check for error codes on the charger display or companion app. Thermal throttling — where the charger reduces power due to high temperatures — can also cause intermittent sessions, especially in hot garages during summer months.
Slower Than Expected Charging Speeds
If your charger is delivering less power than its rated capacity, several factors could be responsible. Your vehicle's onboard charger has a maximum acceptance rate that may be lower than the charger's output — for example, a vehicle with a 7.2 kW onboard charger will never accept more than 7.2 kW even from a 9.6 kW charger. Additionally, extreme battery temperatures (very hot or very cold) can cause the vehicle to limit charging speed to protect battery health. Check your vehicle's settings to ensure charging current is not artificially limited in the menu.
WiFi Connectivity Problems
Smart chargers rely on WiFi for features like remote monitoring, scheduling, and firmware updates. If your charger cannot connect to WiFi, try moving your router closer to the garage, installing a WiFi extender, or switching your charger to a 2.4 GHz network (which has better range than 5 GHz). Some chargers also support Ethernet connections for a more reliable wired alternative.
Ground Fault or GFCI Tripping
If your GFCI breaker or receptacle trips frequently, this could indicate a genuine ground fault, moisture intrusion in outdoor installations, or a nuisance tripping issue with certain charger and breaker combinations. Some EV chargers have built-in ground fault detection that can conflict with external GFCI protection. Consult your charger manufacturer's documentation and have your electrician evaluate the setup to determine the appropriate solution.
Frequently Asked Questions
How long does it take to install a home EV charger?
A straightforward installation in a garage where the electrical panel is close to the charger location typically takes 2 to 4 hours. More complex installations involving long wire runs, wall or ceiling penetrations, outdoor mounting, or trenching can take 4 to 8 hours or more. If your home requires an electrical panel upgrade, that adds an additional day of work. The permitting and inspection process adds time on the front and back end — expect 1 to 3 weeks from scheduling to final approval in most areas.
Can I install an EV charger myself if I have electrical experience?
While experienced DIYers with electrical knowledge may be technically capable of installing a home EV charger, it is generally not recommended. EV charger installations involve working inside your main electrical panel where lethal voltages are present, and the work must comply with NEC Article 625 and local code amendments. Mistakes can result in fire hazards, equipment damage, voided warranties, insurance complications, and code violations. If you choose the DIY route, you must still obtain a permit and pass inspection. For most homeowners, the peace of mind and liability protection that comes with hiring a licensed electrician far outweighs the potential savings.
Will installing a home EV charger increase my electric bill significantly?
Charging an EV at home does increase your electricity consumption, but the cost is typically far lower than what you would spend on gasoline. The average American driver travels about 30 to 40 miles per day, which requires roughly 10 to 15 kWh of electricity to replenish. At the national average electricity rate, this translates to approximately $1.50 to $2.50 per day — compared to $5 to $8 per day for gasoline in a comparable vehicle. Many utility companies offer time-of-use rates that provide significantly cheaper electricity during overnight hours, further reducing your charging costs. Contact your local utility to ask about EV-specific rate plans.
Do I need a smart charger, or will a basic model work fine?
A basic Level 2 charger without smart features will charge your vehicle perfectly well. However, smart chargers offer several advantages that many owners find valuable. These include scheduled charging to take advantage of off-peak electricity rates, energy usage tracking, remote monitoring and control via smartphone apps, integration with solar panels or home battery systems, and over-the-air firmware updates that add new features over time. The price difference between basic and smart chargers has narrowed considerably, making smart chargers a compelling choice for most EV owners. Browse our top-rated EV charger reviews to compare smart and non-smart options side by side.
Can I use a portable Level 2 charger instead of installing a permanent wall-mounted unit?
Yes, portable Level 2 chargers are a viable option, especially if you already have a NEMA 14-50 outlet installed or if you rent your home and cannot make permanent modifications. Portable chargers plug into a 240-volt outlet and can be stored in your vehicle's trunk for use on the road. The trade-off is that portable units typically offer lower maximum amperage (usually 32 amps or less) compared to hardwired wall-mounted units that can deliver up to 48 amps. Additionally, portable chargers require you to plug and unplug the unit each time you charge, which some owners find less convenient than a permanently mounted solution. For a comparison of portable and wall-mounted options, see our home charging guide.
Installing a home EV charger is one of the most impactful upgrades you can make as an electric vehicle owner. It provides the freedom to wake up every morning with a full battery, eliminates trips to public charging stations, and delivers the lowest per-mile fueling cost available. By understanding the electrical requirements, permitting process, installation steps, and safety considerations outlined in this guide, you are well-prepared to find a qualified installer near you and enjoy the full benefits of home EV charging for years to come.