240V EV Charger Installation Cost: Complete Guide to Level 2 Home Charging Setup
Upgrading to a 240V Level 2 EV charger at home is one of the most impactful improvements any electric vehicle owner can make. While a standard 120V outlet delivers roughly 3 to 5 miles of range per hour, a properly installed 240V Level 2 charger can add 25 to 40 miles of range per hour — transforming overnight charging from a compromise into a convenience. But before you plug in, you need to understand the full picture: electrical requirements, installation complexity, permitting, and of course, cost.
Difficulty Level: Moderate to Advanced (electrical work required)
Estimated Total Cost: $500 – $2,500+ (charger + installation)
Time Required: 2 – 8 hours (professional installation)
Permit Required: Yes, in most jurisdictions
In this comprehensive guide, we break down every factor that influences the cost of installing a 240V EV charger at home, walk you through the process step by step, and help you decide whether to hire a licensed electrician or tackle portions of the project yourself. Whether you drive a Tesla, Ford Mustang Mach-E, Hyundai Ioniq 5, or any other electric vehicle, this guide will prepare you for a safe, code-compliant installation.
Electrical Requirements for a 240V EV Charger
Before calculating costs, it is essential to understand what a 240V Level 2 charger actually demands from your home's electrical system. Most residential Level 2 chargers operate on a 240-volt circuit and draw between 16 amps and 48 amps, depending on the unit. The most common configurations are:
- 16-amp charger: Requires a 20-amp circuit; delivers approximately 3.8 kW of power
- 24-amp charger: Requires a 30-amp circuit; delivers approximately 5.8 kW of power
- 32-amp charger: Requires a 40-amp circuit; delivers approximately 7.7 kW of power
- 40-amp charger: Requires a 50-amp circuit; delivers approximately 9.6 kW of power
- 48-amp charger: Requires a 60-amp circuit; delivers approximately 11.5 kW of power
The National Electrical Code (NEC) requires that continuous loads — defined as loads operating for three hours or more — must not exceed 80% of a circuit's rated capacity. Since EV charging sessions routinely exceed three hours, this 80% rule is critical. A 40-amp charger, for example, must be installed on a circuit rated for at least 50 amps.
Your Electrical Panel Capacity
The single biggest variable in installation cost is whether your existing electrical panel can support the additional load. Most modern homes have a 200-amp main service panel, which is typically sufficient for adding a 40-amp or 50-amp EV charging circuit. However, older homes with 100-amp or 150-amp service may require a panel upgrade, which can add $1,500 to $3,000 or more to the total project cost.
A licensed electrician will perform a load calculation to determine whether your panel has enough spare capacity. This calculation considers all existing circuits, major appliances (HVAC, electric range, water heater, dryer), and the proposed EV charger load. According to the U.S. Department of Energy, a professional assessment is the safest way to confirm your home is ready for Level 2 charging.
Wiring and Conduit Requirements
The type and gauge of wiring required depends on the circuit amperage and the distance from your electrical panel to the charger location:
- 20-amp circuit: 12 AWG copper wire
- 30-amp circuit: 10 AWG copper wire
- 40-amp circuit: 8 AWG copper wire
- 50-amp circuit: 6 AWG copper wire
- 60-amp circuit: 4 AWG copper wire (or 6 AWG THHN in conduit)
Longer wire runs increase material costs significantly. If your panel is in the basement and you want the charger in a detached garage 100 feet away, the cost of copper wire alone can add $200 to $500 to the project. Conduit is required for any exposed wiring and may be mandated by local code even inside walls in some jurisdictions.
NEMA Outlet vs. Hardwired Connection
You have two options for connecting your Level 2 charger to the circuit:
- NEMA outlet (plug-in): A NEMA 14-50 or NEMA 6-50 receptacle is installed, and the charger plugs in. This offers portability — you can take the charger with you if you move — and provides a convenient disconnect point.
- Hardwired: The charger is directly wired into the circuit with no plug. Hardwired installations are often required for chargers rated above 40 amps and may be preferred for outdoor installations. Some jurisdictions require a hardwired connection with a dedicated disconnect switch.
Many popular chargers, including models featured in our best Level 2 EV chargers roundup, offer both plug-in and hardwired configurations. Check your charger's specifications and local code before deciding.
Step-by-Step 240V EV Charger Installation Process
Whether you are overseeing a professional installation or managing portions of the project yourself, understanding the step-by-step process helps you plan accurately and avoid surprises.
Step 1: Choose the Charger Location
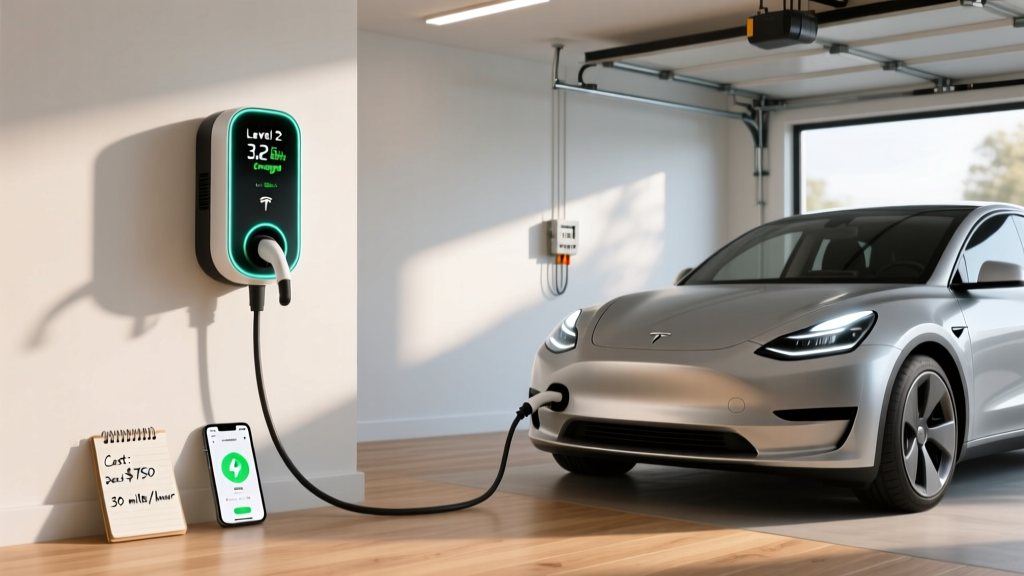
Select a location that is close to your vehicle's charging port, protected from direct weather exposure (if the charger is not rated for outdoor use), and within a practical distance from your electrical panel. Most EV owners install their charger in the garage, near where the vehicle is parked overnight. Consider cable management — the charging cable should reach your vehicle's port without stretching across walkways or driveways.
Step 2: Electrical Panel Assessment and Load Calculation
A qualified electrician will inspect your main service panel, verify available amperage, and perform a formal load calculation per NEC Article 220. If your panel lacks capacity, options include:
- Upgrading to a higher-amperage main panel (e.g., 100A to 200A)
- Installing a sub-panel dedicated to the EV charger
- Using a smart load management device that automatically reduces charger amperage when other high-draw appliances are running
Smart load management devices, such as the Eve Charge Controller or similar products, can eliminate the need for a costly panel upgrade by dynamically sharing available capacity. This is an increasingly popular solution that many home charging setups now incorporate.
Step 3: Pull the Permit
Most municipalities require an electrical permit for any new 240V circuit. Your electrician typically handles this, but if you are managing the project yourself, you will need to apply at your local building department. Permit fees vary widely but generally range from $50 to $200 depending on your locality and the scope of work.
Step 4: Run the Circuit
The electrician will install a new double-pole breaker in your main panel at the appropriate amperage, then run wiring from the panel to the charger location. This may involve:
- Drilling through framing members and fire-blocking
- Installing conduit (EMT, PVC, or flexible) for wire protection
- Pulling wire through conduit or running Romex (NM-B cable) through stud cavities
- Mounting junction boxes as needed
The complexity of this step is the primary driver of labor costs. A panel adjacent to the garage with easy access through an unfinished ceiling is a best-case scenario. Running wire through finished walls, across an attic, or underground to a detached garage dramatically increases labor time and cost.
Step 5: Install the Outlet or Hardwire the Charger
For plug-in installations, the electrician mounts a NEMA receptacle (typically 14-50 or 6-50) in an appropriate electrical box and terminates the wiring. For hardwired installations, the charger's internal wiring is connected directly to the circuit conductors using wire nuts or terminal blocks inside the charger's junction compartment.
Step 6: Mount the Charger
The charging unit is mounted to the wall using the manufacturer's bracket, typically at a height of 48 to 54 inches from the floor to the center of the unit. Ensure the mounting surface can support the charger's weight and that the cable has a clear path to your vehicle.
Step 7: Test and Commission
Once everything is connected, the electrician will energize the circuit, verify proper voltage and grounding with a multimeter, and perform a test charge with your vehicle. Many smart chargers require Wi-Fi setup and app configuration during commissioning — explore our smart EV charger setup guide for detailed instructions on connecting Wi-Fi-enabled units.
Permits, Inspections, and Code Compliance
Electrical permits and inspections are not optional — they are legal requirements designed to protect you, your home, and your neighbors. Skipping the permit process can result in fines, voided insurance claims, and serious safety hazards.
Why Permits Matter
When you pull an electrical permit, your local building department reviews the proposed work for compliance with the National Electrical Code (NEC) and any local amendments. After the installation is complete, an inspector visits your home to verify that the work was performed correctly and safely. This independent verification provides peace of mind and creates a documented record of the installation.
Common Code Requirements for EV Charger Installations
The NEC includes several provisions specific to EV charging equipment under Article 625:
- GFCI protection: NEC Article 625.54 requires ground-fault circuit interrupter protection for all EV charging outlets rated 150 volts to ground or less and 50 amps or less. This means your 240V NEMA outlet will likely need a GFCI breaker.
- Disconnecting means: A readily accessible disconnect switch is required for hardwired chargers. Some breakers satisfy this requirement if the panel is within sight of the charger.
- Ventilation: While most modern EV chargers and vehicles do not produce hazardous gases, NEC Article 625.52 addresses ventilation requirements for certain indoor charging installations.
- Cable management: Charging cables must not create a tripping hazard and should be managed with retractors, holsters, or hooks.
Inspection Process
After installation, your electrician (or you, if self-managing) will request a final inspection. The inspector will typically check:
- Correct breaker size and wire gauge
- Proper grounding and bonding
- GFCI protection where required
- Conduit fill and wire insulation ratings
- Physical mounting and strain relief
- Labeling and signage
If the inspector identifies any deficiencies, you will need to correct them and schedule a re-inspection. Working with an experienced, licensed electrician virtually eliminates the risk of failed inspections.
Utility Rebates and Incentives
Many utility companies and state or local governments offer rebates, tax credits, or reduced electricity rates for EV charger installations. Some utility rebates can cover $250 to $1,000 or more of the installation cost. Check with your local utility provider and the Department of Energy's alternative fuels station locator for incentive programs in your area. Be aware that many rebate programs require proof of a permitted and inspected installation — another reason not to skip the permit.
DIY vs. Professional Installation: What You Need to Know
The question of whether to install a 240V EV charger yourself or hire a professional is one of the most debated topics in the EV community. Here is an honest breakdown of both paths.
When DIY Might Make Sense
A DIY installation may be reasonable if:
- You have prior experience with residential electrical work, including running circuits, terminating wiring, and working inside breaker panels
- Your electrical panel has obvious spare capacity and accessible knockouts
- The charger location is close to the panel with an unfinished path (exposed studs, open attic, or surface-mounted conduit)
- You are comfortable navigating the permit process and coordinating inspections yourself
- You understand and can comply with all applicable NEC requirements
Even experienced DIYers should consider having their work inspected by a licensed electrician before energizing the circuit. Some jurisdictions allow homeowners to perform electrical work on their own primary residence under a homeowner's permit, but this varies significantly by location.
When You Should Hire a Professional
Professional installation is strongly recommended — and in many cases legally required — when:
- Your panel needs an upgrade or sub-panel installation
- The wire run is long, complex, or requires underground conduit
- You are unfamiliar with NEC code requirements or load calculations
- Your jurisdiction does not allow homeowner electrical permits
- You want to qualify for utility rebates that require licensed electrician certification
- The installation involves a detached structure, requiring a four-wire feeder and grounding electrode system
Cost Comparison: DIY vs. Professional
| Factor | DIY Installation | Professional Installation |
|---|---|---|
| Materials (wire, breaker, conduit, outlet) | $100 – $400 | $150 – $500 (included in quote) |
| Labor | $0 (your time) | $300 – $1,500 |
| Permit fees | $50 – $200 | $50 – $200 (often included) |
| Panel upgrade (if needed) | $1,500 – $3,000 (pro required) | $1,500 – $3,000 |
| Total (simple install) | $150 – $600 | $500 – $1,800 |
| Warranty on workmanship | None | 1 – 5 years typical |
For most EV owners, the professional route offers the best balance of safety, compliance, and long-term value. The labor premium pays for expertise, code knowledge, warranty protection, and the assurance that the installation will pass inspection on the first attempt. If you are exploring different charger options before committing to installation, our EV charger reviews cover the top-rated Level 2 units available today.
Complete 240V EV Charger Installation Cost Breakdown
Now let us examine the full cost picture in detail. The total cost of a 240V EV charger installation depends on several variables, which we will address individually.
The Charger Unit
Level 2 EV chargers range from approximately $200 to $700 for the hardware itself:
- Budget chargers (16-32A): $200 – $350
- Mid-range smart chargers (32-40A): $350 – $550
- Premium chargers (48A, Wi-Fi, load management): $500 – $700
Smart chargers with Wi-Fi connectivity, scheduling features, and energy monitoring cost more upfront but can reduce your electricity bills by enabling off-peak charging and providing detailed usage data. Read our detailed comparison of smart vs. standard EV chargers to decide which features matter most for your situation.
Electrical Labor
Electricians typically charge $75 to $150 per hour for residential work, though rates vary by region. A straightforward installation with a short, accessible wire run may take 2 to 3 hours, while a complex installation involving long conduit runs, wall fishing, or sub-panel installation can take 6 to 8 hours or more.
- Simple install (panel adjacent to garage): $300 – $600 in labor
- Moderate install (25-50 ft run, some wall/ceiling work): $500 – $1,000 in labor
- Complex install (long run, finished walls, detached garage): $1,000 – $2,000+ in labor
Materials Beyond the Charger
- Double-pole breaker: $10 – $50
- Wire (per foot): $1 – $6 depending on gauge and type
- Conduit and fittings: $50 – $200 depending on length and type
- NEMA receptacle and box: $20 – $60
- Miscellaneous (connectors, straps, labels): $20 – $50
Panel Upgrade (If Required)
If your home's electrical service needs an upgrade to accommodate the EV charger, this is the most significant cost factor:
- 100A to 200A upgrade: $1,500 – $3,000
- Sub-panel installation: $500 – $1,500
- Smart load management device: $200 – $500 (may eliminate the need for a panel upgrade)
Total Cost Scenarios
| Scenario | Charger | Installation | Total |
|---|---|---|---|
| Best case: 32A charger, short run, 200A panel | $350 | $400 – $600 | $750 – $950 |
| Typical: 40A smart charger, moderate run | $500 | $600 – $1,200 | $1,100 – $1,700 |
| Complex: 48A charger, long run, conduit | $650 | $1,200 – $2,000 | $1,850 – $2,650 |
| Panel upgrade required | $500 | $2,500 – $4,000 | $3,000 – $4,500 |
Remember to factor in any available rebates or tax credits, which can reduce your out-of-pocket cost by hundreds or even thousands of dollars.
Safety Tips for 240V EV Charger Installations
A 240V circuit carries enough current to be lethal. Safety must be the top priority at every stage of the installation. Follow these essential safety guidelines:
Before Installation
- Turn off the main breaker before opening the electrical panel. Verify that power is off using a non-contact voltage tester and a multimeter.
- Wear appropriate PPE including insulated gloves and safety glasses when working near live components.
- Use a lockout/tagout procedure to ensure no one accidentally re-energizes the panel while you are working.
- Read the charger manufacturer's installation manual completely before beginning work. Manufacturers such as ChargePoint, Emporia, and Wallbox provide detailed wiring diagrams and torque specifications.
During Installation
- Never exceed the rated capacity of wire, breakers, or receptacles. Oversizing the breaker relative to wire gauge creates a fire hazard.
- Torque all connections to manufacturer specifications. Loose connections generate heat and are a leading cause of electrical fires. Use a calibrated torque screwdriver or wrench.
- Ensure proper grounding. The equipment grounding conductor must be correctly sized per NEC Table 250.122 and securely terminated at both the panel and the outlet or charger.
- Maintain proper wire bending radius and conduit fill limits. Overcrowded conduits cause overheating.
- Label the new breaker clearly in the panel directory as "EV Charger" with the amperage rating.
After Installation
- Test GFCI functionality by pressing the test button on the breaker or receptacle before connecting the charger.
- Verify voltage at the outlet with a multimeter: you should read approximately 240V between the two hot legs and approximately 120V from each hot leg to ground.
- Monitor the first several charging sessions for any unusual warmth at the outlet, breaker, or wiring connections. Some warmth is normal; excessive heat is not.
- Schedule annual inspections of the outlet and wiring connections, especially for high-use installations. NEMA 14-50 receptacles in particular have been associated with loosening connections over time in EV charging applications.
For more on maintaining a safe charging environment, see our guide on EV charging safety best practices.
Troubleshooting Common 240V EV Charger Installation Issues
Even professionally installed systems can encounter issues. Here are the most common problems and their solutions:
Charger Will Not Power On
- Verify the breaker is fully in the ON position. Some breakers trip to a middle position that looks like ON.
- Check for voltage at the outlet or charger terminals with a multimeter.
- Inspect the charger's internal fuse or GFCI reset button.
- Confirm the charger is properly seated in the mounting bracket — some units have a safety interlock switch.
Breaker Trips Repeatedly
- Confirm the breaker is sized correctly for the charger's amperage per the 80% rule.
- Check for a ground fault — moisture ingress in outdoor installations is a common cause.
- Inspect wiring for damaged insulation, pinched conductors, or loose connections.
- If using a GFCI breaker, ensure compatibility with your charger. Some chargers have internal GFCI protection that can conflict with breaker-level GFCI, causing nuisance trips.
Charging Speed Is Slower Than Expected
- Verify the charger is configured for its maximum amperage in the app or dip switch settings.
- Check whether your vehicle is limiting charge rate due to battery temperature (extreme cold or heat).
- Confirm voltage at the charger under load — significant voltage drop indicates undersized wiring for the run length.
- Ensure no smart load management device is throttling the charger due to competing household loads.
Wi-Fi or Smart Features Not Working
- Ensure the charger is within range of your Wi-Fi router. Garage installations often have weak signal — consider a Wi-Fi extender or mesh node.
- Check that your router's firewall is not blocking the charger's communication.
- Update the charger's firmware through the manufacturer's app.
- Some smart features require a 2.4 GHz Wi-Fi network — confirm you are not trying to connect to a 5 GHz-only network.
Outlet Feels Warm During Charging
- Some warmth is normal during extended high-amperage charging sessions. However, if the outlet is hot to the touch, stop charging immediately.
- Turn off the breaker and inspect the outlet for loose wire connections, signs of arcing, or discoloration.
- Consider upgrading to a higher-quality industrial-grade NEMA receptacle rated for continuous duty.
- If problems persist, consult a licensed electrician to evaluate the circuit and consider switching to a hardwired installation.
Frequently Asked Questions
How much does it cost to install a 240V outlet for an EV charger?
The total cost to install a 240V outlet for an EV charger typically ranges from $500 to $2,000 when hiring a licensed electrician. This includes the outlet, breaker, wiring, conduit, and labor. The final price depends on the distance from your electrical panel to the charger location, the amperage of the circuit, whether conduit is required, and the condition of your existing electrical panel. A simple installation with the panel near the garage may cost as little as $400 to $600, while complex runs through finished walls or to detached garages can exceed $2,000.
Do I need a permit to install a Level 2 EV charger at home?
Yes, in most jurisdictions, any new 240V electrical circuit requires a permit and inspection. The permit ensures that the installation complies with the National Electrical Code and local amendments. Permit fees typically range from $50 to $200. Skipping the permit can result in fines, complications when selling your home, and potential issues with insurance claims related to electrical fires. Additionally, many utility rebates and tax incentives require proof of a permitted installation.
Can I install a 240V EV charger myself?
Technically, yes — if your local jurisdiction allows homeowner electrical work under a homeowner's permit. However, installing a 240V circuit involves working inside your main electrical panel, which carries serious shock and arc flash hazards. Mistakes in wire sizing, breaker selection, or grounding can cause fires or equipment damage. For most EV owners, hiring a licensed electrician is the safer and more practical choice, especially given that professional labor for a straightforward installation typically costs $400 to $800.
Will installing an EV charger require upgrading my electrical panel?
Not necessarily. Most homes with a 200-amp electrical service panel have sufficient capacity to add a 40-amp or 50-amp EV charging circuit without an upgrade. However, homes with 100-amp or 150-amp service, or homes that already have many high-draw electric appliances (electric heat, electric range, electric dryer, hot tub), may require a panel upgrade or a smart load management system. A licensed electrician can perform a load calculation to determine your home's available capacity. If an upgrade is needed, expect to add $1,500 to $3,000 to the total project cost.
What is the difference between a NEMA 14-50 and a NEMA 6-50 outlet for EV charging?
Both NEMA 14-50 and NEMA 6-50 outlets provide 240 volts at up to 50 amps, but they differ in configuration. A NEMA 14-50 has four prongs (two hot wires, one neutral, one ground) and is commonly used for electric ranges and RV hookups. A NEMA 6-50 has three prongs (two hot wires, one ground) and does not include a neutral conductor. For EV charging, a neutral wire is generally not required, so both outlet types work. However, the NEMA 14-50 is more widely supported by EV charger manufacturers and is the more common recommendation. Your electrician can advise on the best option based on your charger's plug configuration and local code requirements. Browse our EV charger plug types guide for a full overview of connector standards.
Installing a 240V Level 2 EV charger is one of the smartest investments you can make as an electric vehicle owner. With proper planning, a clear understanding of the costs involved, and attention to safety and code compliance, you will enjoy years of fast, convenient home charging. Whether you choose a budget-friendly 32A unit or a premium 48A smart charger, the upgrade from Level 1 to Level 2 charging transforms the daily EV ownership experience.